7
ENGLISH
5. To remove a bit pull back the tool holder locking sleeve/collar
13
and
pull the bit out of the tool holder
12
.
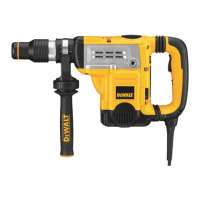
Selecting the Operating Mode (Fig. A)
Hammerdrilling:
D25501, D25601, D25602, D25603
for concrete, brick, stone and masonry drillingoperations.
Hammering only:
D25501, D25601, D25602, D25603, D25820, D25831
for chiselling and demolitionapplications. In this mode the tool
can also be used as a lever to free a jammed drillbit.
1. To select the operating mode, rotate the mode selector switch
6
until
it points to the symbol of the requiredmode.
It may be neccessary to twist the tool holder
12
slightly to allow the
mode selector switch
6
to pass the position.
2. Check that the mode selector switch
6
is locked inplace.
Indexing the Chisel Position (Fig. E)
D25501, D25601, D25602, D25603, D25820,
D25831
The chisel can be indexed and locked into 18 differentpositions.
1. Rotate the mode selector switch
6
until it points towards the
position.
2. Rotate the chisel in the desiredposition.
3. Set the mode selector switch
6
to the “hammering only”position.
4. Twist the chisel until it locks inposition.
Setting the Electronic Speed and Impact Control Dial
(Fig. A, C)
D25601, D25602, D25603, D25831
Turn the dial
7
to the desiredlevel. Turn the dial upwards for higher
speed and downwards for lowerspeed. The required setting is a matter of
experience, e.g.
• when chiselling or drilling in soft, brittle materials or when minimum
break-out is required, set the dial to a low setting;
• when breaking or drilling in harder materials, set the dial to a
highsetting.
Setting the Two Stage Mechanical Clutch (Fig. C)
D25602, D25603
NOTICE: Always turn the tool off before changing torque control
settings or damage to the tool mayresult.
Move the torque control lever
21
to setting 40Nm or 80Nm as needed
forapplication.
• Clutch Setting 40Nm
19
is designed for most drilling applications and
is designed to easily clutch out when the drill bit encounters re-bar or
other foreignsubstances.
• Clutch Setting 80Nm
20
is designed for higher torque applications
such as core-bits and deep hole drilling and is designed to clutch out at
a higher torquethreshold.
NOTE: If it is not possible to select position 80Nm, run the unit under load
and tryagain.
Each time the tool is plugged in, it will automatically default to clutch
setting 1 into clutch setting 40Nm
19
, the most sensitivesetting.
Depth Rod
(Additional Accessory)
1. Push in and hold the depth rod release button on the sidehandle.
2. Move the depth rod so the distance between the end of the rod and
the end of the bit equals the desired drillingdepth.
3. Release the button to lock rod intoposition. When drilling with the
depth rod, stop when end of rod reaches surface ofmaterial.
OPERATION
Instructions for Use
WARNING: Always observe the safety instructions and
applicableregulations.
WARNING: To reduce the risk of serious personal injury,
turn tool off and disconnect tool from power source before
making any adjustments or removing/installing attachments
oraccessories. Be sure the trigger switch is in the OFFposition. An
accidental start-up can causeinjury.
WARNING: Tool bits may be hot and gloves should be worn when
changing or removing them to avoid personalinjury.
WARNING:
• Be aware of the location of pipework andwiring.
• Apply only a gentle pressure to the tool (approximately 20 kg).
Excessive force does not speed up drilling but decreases tool
performance and may shorten toollife.
• Always hold the tool firmly with both hands and ensure a
securestance. Always operate the tool with the side handle
properlyassembled.
NOTE: Operating temperature is -7˚ to +40˚C (19˚ to 104˚ F). Using the
tool outside of this temperature range will decrease the life of thetool.
Proper Hand Position (Fig. F)
WARNING: To reduce the risk of serious personal injury, ALWAYS use
proper hand position asshown.
WARNING: To reduce the risk of serious personal injury, ALWAYS hold
securely in anticipation of a suddenreaction.
Proper hand position requires one hand on the side handle
3
, with the
other hand on the main handle
4
.
Switching On and Off (Fig. A)
D25501, D25601, D25602, D25603
To turn the tool on, depress the trigger switch
1
.
To stop the tool, release the triggerswitch.
D25601, D25602, D25603
The lock-on slider
2
allows the trigger switch
1
to be locked on in
chiselling modeonly. If the lock-on button is activated in drilling mode, as a
feature the tool will switch offautomatically.
To turn the tool on, press the trigger switch
1
.
To stop the tool, release theswitch.
For continuous operation, press and hold down the switch
1
, slide the
lock-on button
2
upwards and release theswitch.
To stop the tool in continuous operation, press the switch briefly
and releaseit. Always switch off the tool when work is finished and
beforeunplugging.
D25820, D25831
To turn the tool on, press the on/off rocker switch
1
at the lower part of
thetrigger.
To stop the tool, press the on/off rocker switch at the upper part of
thetrigger.
Hammerdrilling
To turn the tool on, press the on/off switch
1
.
To stop the tool, release theswitch.
Drilling with a Solid Bit (Fig. A)
D25501, D25601, D25602, D25603
1. Insert the appropriate drillbit.
2. Set the mode selector switch
6
to the hammerdrillingposition.
 Loading...