13
English
•
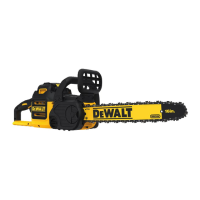
Flip up locking lever and rotate the bar adjust locking knob (G)
counterclockwise as shown into remove sprocket cover (F).
• Wearingprotectivegloves, graspthe sawchain(E) andwrapit
around the guide bar (D), ensuring the teeth are facing the correct
direction (see )
•
Ensure the chain is properly set in the slot around the entire guide bar.
• Place the saw chain around the sprocket (7A). While lining up the
slot on the guide bar
with chain tensioning pin
(7B) and the bolt (7C) on
the base of the tool as
shown in .
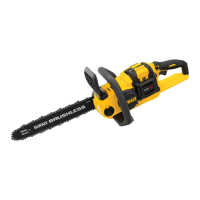
•
Once in place, hold
the bar still, replace
sprocket cover (F).
Make sure tool-free
tension assembly bolt
hole on the cover lines
up with the bolt (7B)
in the main housing.
Flip up locking lever
and r
otate the bar
adjust locking knob (G)
clockwise until it clicks,
then loosen knob one
f
ull turn, so that the
saw chain can be
properly tensioned.
• Rotate the chain
tensioning knob (H)
clockwise to increase
tension as shown in
. Make sure the saw chain (E) is snug around the guide
bar (D). Tighten the bar adjust locking knob until it clicks. The bar is
secure after three audible clicks are heard. Further tightening is not
required.
the level of charge left. When the level of
5A
FIG. 5
charge in the battery is below the
usable limit, the fuel gauge will not
illuminate and the battery will need to
be recharged.
NOTE: The fuel gauge is only an
indication of the charge left on the
battery pack. It does not indicate tool
functionality and is subject to variation
based on product components, temperature and end-user application.
For more information regarding fuel gauge battery packs, please call
1-800-4-D
eWALT (1-800-433-9258) or visit our website www.dewalt.com.
CAUTION:
The chain is sharp and can cut
you when it is not running.
WARNING:
Failure to do
this could result in serious
personal injury.
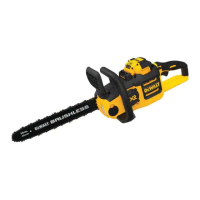
The saw chain (E) and
guide bar (D) are packed
separately in the carton.
The chain has to be
attached to the bar, and
both must be attached to
the body of the tool.
• Placethesawonaflat,
firm surface.
FIG. 6
FIG. 8
FIG. 7
7A
7C
7B