EasyManua.ls Logo

DeWalt DCD708C2 User Manual

DeWalt DCD708C2
44 pages
To Next Page IconTo Next Page
Page #1 background imageLoading...
Page #1 background image
If you have questions or comments, contact us.
Pour toute question ou tout commentaire, nous contacter.
Si tiene dudas o comentarios, contáctenos.
1-800-4-
DeWALT
DCD708
20V Max* 1/2" (13 mm) Brushless Drill Driver
Perceuse-visseuse sans balais 13 mm (1/2 po) 20Vmax*
Rotomartillo sin escobillas de 13 mm (1/2") 20 V Máx*
Instruction Manual
Guide D’utilisation
Manual de instrucciones
DeWALT
Question and Answer IconNeed help?

Do you have a question about the DeWalt DCD708C2 and is the answer not in the manual?

DeWalt DCD708C2 Specifications

General IconGeneral
BrandDeWalt
ModelDCD708C2
CategoryDrill
LanguageEnglish

Summary

Components Overview

Battery Pack

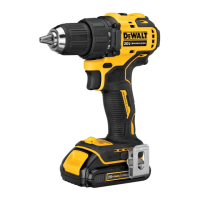
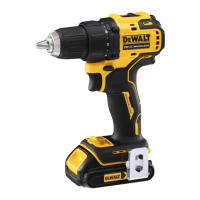
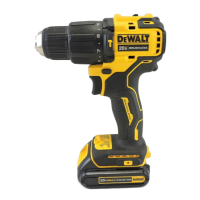
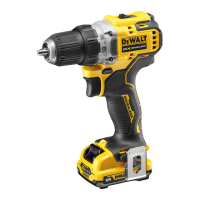
Details of the battery pack.

Battery Pack Release Button

Function of the release button.

Main Handle

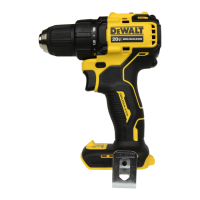
The main grip of the tool.

Variable Speed Trigger Switch

Controls tool speed.

Forward/Reverse Control Button

Controls tool direction and lock-off.

Mode Selection Collar

Selects operating modes.

Speed Selector

Adjusts tool speed settings.

Worklight

Illuminates the work area.

Chuck Sleeve

Part of the keyless chuck.

Keyless Chuck

Holds drill bits and accessories.

General Power Tool Safety Warnings

Work Area Safety

Maintaining a safe and clean work environment.

Electrical Safety

Precautions related to electrical hazards.

Personal Safety

Measures to protect the operator's safety.

Power Tool Use and Care

Proper usage and maintenance of the tool.

Additional Safety Rules for Drills

Hearing Protection

Protect hearing from loud drill noise.

Auxiliary Handle Usage

Use of auxiliary handles for stability.

Grip Surfaces for Wiring Safety

Avoid shock from hidden wiring.

Firm Two-Handed Grip

Proper grip for control and safety.

Workpiece Securing

Secure workpieces for safe operation.

Eye Protection

Protect eyes from flying debris.

Limit Prolonged Use

Limit prolonged use due to vibration.

Hot Components Awareness

Be aware of hot components.

Additional Safety Information

Always Wear Safety Glasses

Always wear eye protection.

Hazardous Dust and Chemicals Awareness

Awareness of hazardous dust and chemicals.

Important Safety Instructions for All Battery Packs

Read All Safety Instructions

Read all safety information before use.

Avoid Hazardous Atmospheres

Avoid charging in hazardous atmospheres.

Prevent Battery Short Circuits

Prevent short circuits of battery terminals.

Do Not Force Battery into Charger

Do not force battery into charger.

Keep Battery Packs Away from Liquids

Keep battery packs away from liquids.

Avoid High Temperature Storage/Use

Avoid high temperatures for battery storage/use.

Avoid Storing with Locked Trigger

Avoid storing tool with trigger locked.

Do Not Dispose Batteries in Fire

Do not dispose of batteries in fire.

Handle Battery Leaks Carefully

Handle battery leaks carefully.

Flammable Battery Liquid Warning

Battery liquid is flammable.

Do Not Tamper with Battery Packs

Do not open or tamper with battery packs.

Storage Recommendations

Optimal Storage Conditions

Store in a cool, dry place.

Long-Term Storage

Store fully charged battery in a cool, dry place.

Battery Pack Cleaning Instructions

Cleaning Method

Clean battery exterior with a cloth or brush.

Fuel Gauge Battery Packs

Fuel Gauge Operation

Battery packs have a fuel gauge with LED lights.

Transportation Safety

Prevent Short Circuits During Transport

Prevent short circuits during transport.

Li-ion Batteries in Baggage

Do not put Li-ion batteries in checked baggage.

Important Safety Instructions for All Battery Chargers

Read Charger Safety Instructions

Read all safety information for chargers.

Use DEWALT Chargers Only

Use only DEWALT chargers for DEWALT batteries.

Protect Charger Cord

Protect the charger cord from damage.

Extension Cord Usage Caution

Use extension cords with caution.

Outdoor Charger Cord Use

Use outdoor-rated cords for outdoor charging.

Correct Extension Cord Gauge

Use correct gauge extension cords.

Ensure Charger Ventilation

Ensure proper ventilation for the charger.

Charger Condition and Service

Do not use or disassemble damaged chargers.

Disconnect Before Cleaning

Disconnect charger before cleaning.

Do Not Connect Multiple Chargers

Do not connect multiple chargers.

Charger Voltage Specification

Use only specified voltage for chargers.

Prevent Charger Shock Hazard

Keep chargers dry to prevent shock.

Prevent Battery Liquid Contact

Keep battery packs away from liquids.

Charge DEWALT Batteries Only

Use only DEWALT batteries for charging.

Charging a Battery

Charge Battery Fully Before First Use

Charge battery fully before first use.

Charging Procedure Steps

Plug in charger, connect battery, check indicator.

Hot/Cold Pack Delay Feature

Temperature-Based Charging Delay

Charger delays charging for temperature extremes.

Electronic Protection System

Battery Protection Function

Tool protects battery from overload/overheating.

Automatic Tool Shut-off

Tool shuts off when protection engages.

Important Charging Notes

Ideal Charging Temperature

Ideal charging temperature range.

Normal Charging Warmth

Charger and battery may get warm.

Battery Charging Troubleshooting

Troubleshooting battery charging issues.

Recharge When Power is Low

Recharge when power is low.

Keep Charger Slots Clear

Keep conductive materials away from charger slots.

Do Not Immerse Charger

Do not immerse charger in water.

Charger Cleaning Instructions

Disconnect Charger Before Cleaning

Disconnect charger before cleaning.

Wall Mounting Information

Tool Components and Intended Use

Never Modify the Tool

Do not modify the tool or its parts.

Intended Use Description

Tool designed for drilling and screwdriving.

Avoid Wet or Flammable Conditions

Avoid use in wet or flammable conditions.

Keep Children Away

Keep children away from the tool.

Assembly and Adjustments Safety

Turn Off Tool Before Adjustments

Turn off tool and remove battery before adjustments.

Belt Hook and Bit Clip Installation

Proper Belt Hook Usage

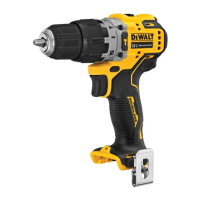
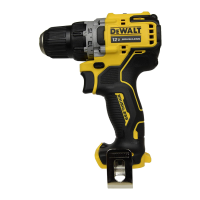
Use belt hook only for hanging on belt.

Use Provided Screw for Attachment

Use provided screw for belt hook/bit clip.

Belt Hook/Bit Clip Attachment Options

Belt hook/bit clip attachment options.

Installing a Bit or Accessory into a Keyless Chuck

Do Not Use Tool to Tighten Bits

Do not use tool to tighten bits.

Ensure Bit Security Before Use

Ensure bit is secure before use.

Speed Selection and Operation

Two Speed Settings Available

Tool has two speed settings.

Do Not Change Speed While Running

Do not change speed while tool is running.

Mode Selection and Operation

Mode Selection Collar Function

Collar selects operating mode.

Drilling Mode Symbol

'E' symbol for drilling mode.

Screwdriving Mode Settings

Numbers for screwdriving torque selection.

Battery Pack Installation and Removal

Ensure Battery is Fully Charged

Ensure battery is fully charged for best results.

Install Battery Pack

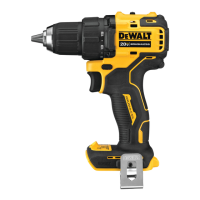
Install battery by aligning rails and sliding.

Remove Battery Pack

Remove battery by pressing release button.

Proper Hand Position

Always Use Correct Hand Position

Always use correct hand position.

Hold Securely for Reaction

Hold tool securely for sudden reactions.

Trigger and Control Button Operations

Trigger Controls On/Off and Speed

Trigger controls ON/OFF and speed.

Direction and Lock-off Button

Button controls direction and lock-off.

Select Forward Rotation

Select forward rotation.

Select Reverse Rotation

Select reverse rotation.

Center Position Locks Tool Off

Center position locks tool off.

Avoid Continuous Variable Speed Use

Avoid continuous variable speed use.

LED Work Light Operation

Avoid Staring Into Worklight

Avoid staring into the worklight.

Worklight Activation and Auto-off

Worklight activates with trigger, auto-off after 20s.

Worklight Purpose

Worklight is for immediate surface lighting.

Performing an Application

Always Anchor or Clamp Workpiece

Always anchor or clamp workpiece.

Wait for Motor to Stop

Wait for motor to stop before changing direction.

Pre-Work Preparation Steps

Set speed selector, install bit/accessory.

Avoid Flammable Fluid Use

Do not use tool with flammable fluids.

Screwdriving Operations

Adjustable Torque Clutch

Tool has adjustable torque clutch.

Torque Range Selection

Numbers set torque range for screwdriving.

Set Mode Collar for Screwdriving

Set mode selection collar.

Drive Fastener Using Trigger

Drive fastener using trigger.

Recommendations for Screwdriving

Start Low, Increase Torque

Start low and increase torque settings.

Practice Mode Setting

Practice to find correct mode setting.

Drilling Operations

Use Masonry Bits for Masonry

Use masonry bits for masonry materials.

Set Mode Collar to Drill Symbol

Set mode collar to drill symbol.

Position Drill Bit on Workpiece

Position drill bit on workpiece.

Use Sharp Drill Bits Only

Use only sharp drill bits.

Drill to Desired Depth

Drill to desired depth.

Expect Drill Stall Warning

Expect drill stall and sudden twists.

Remove Bit While Motor Runs

Keep motor running when removing bit.

Drilling Pressure Advice

Apply straight pressure, avoid stalling.

Drill Stall Procedures

Immediate action for drill stall.

Do Not Trigger Stalled Drill Repeatedly

Do not repeatedly trigger a stalled drill.

Drilling Tips for Final Hole Section

Reduce pressure for final part of hole.

Pilot Holes for Large Holes

Use pilot holes for large holes in steel.

Backup Block for Thin Materials

Use backup block for thin materials.

Maintenance and Cleaning

Turn Off Tool Before Maintenance

Turn off tool and remove battery before maintenance.

Clean Air Vents Weekly

Clean air vents weekly with compressed air.

Avoid Solvents on Tool Parts

Do not use solvents on tool parts.

Accessory Usage

Use DEWALT Recommended Accessories Only

Use only DEWALT recommended accessories.

Accessory Availability

DEWALT accessories are available for purchase.

Repairs and Service

Non-Serviceable Parts

Charger and battery pack are not serviceable.

Service by Authorized Centers Only

Service by authorized centers only.

Product Registration Benefits

Register for Warranty and Safety Notification

Register for warranty, ownership, safety notification.

Warranty Information

Three Year Limited Warranty Coverage

Three year warranty on tools, two on batteries.

Warranty Exclusions

Warranty excludes normal wear and abuse.

Warranty Service Contact

Contact DEWALT for warranty details.

Free Service Programs

1 Year Free Service, 2 Years Free Service..., 3 Years Free Service...

Warranty Conditions and Guarantees

Tampering voids, 90-Day Guarantee.

Related product manuals