43
ENGLISH
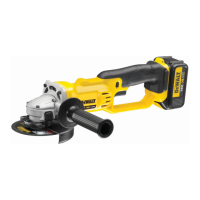
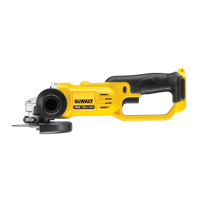
Tool Connect™ Chip (Fig. Q)
WARNING: To reduce the risk of serious personal
injury, turn unit off and remove the battery pack
before making any adjustments or removing/
installing attachments or accessories. An
accidental start-up can causeinjury.
Your tool is Tool Connect™ Chip ready and has a location for
installation of a Tool Connect™ Chip.
Tool Connect™ Chip is an optional application for your smart
device (such as a smart phone or tablet) that connects
the device to utilize the mobile application for inventory
management functions.
Refer to Tool Connect™ Chip Instruction Sheet for
moreinformation.
Accessories
WARNING: Since accessories, other than those offered
by
, have not been tested with this product, use
of such accessories with this tool could be hazardous.
To reduce the risk of injury, only
recommended
accessories should be used with thisproduct.
Recommended accessories for use with your tool are
available at extra cost from your local dealer or authorized
servicecenter.
Cleaning
WARNING: Blow dirt and dust out of all air vents with
clean, dry air at least once a week. To minimize the
risk of eye injury, always wear approved eye protection
when performingthisprocedure.
WARNING: Never use solvents or other harsh
chemicals for cleaning the non-metallic parts of the
tool. These chemicals may weaken the plastic materials
used in these parts. Use a cloth dampened only with
water and mild soap. Never let any liquid get inside the
tool; never immerse any part of the tool into aliquid.
MAINTENANCE
WARNING: To reduce the risk of serious personal
injury, turn unit off and remove the battery pack
before making any adjustments or removing/
installing attachments or accessories. An
accidental start-up can causeinjury.
Your D
WALT power tool has been designed to operate
over a long period of time with a minimum of maintenance.
Continuous satisfactory operation depends upon proper tool
care and regularcleaning.
3. Position yourself so that the open‑underside of the wheel
is facing away fromyou.
4. Once a cut is begun and a notch is established in the
workpiece, do not change the angle of the cut. Changing
the angle will cause the wheel to bend and may cause
wheel breakage. Edge grinding wheels are not designed
to withstand side pressures caused bybending.
5. Remove the tool from the work surface before turning
the tool off. Allow the tool to stop rotating before laying
itdown.
Edge Grinding and Cutting (Fig.P)
WARNING: Do not use edge grinding/cutting wheels
for surface grinding applications because these wheels
are not designed for side pressures encountered
with surface grinding. Wheel breakage and injury
mayresult.
CAUTION: Wheels used for edge grinding and
cutting may break or kick back if they bend or twist
while the tool is being used. In all edge grinding/
cutting operations, the open side of the guard must be
positioned away from theoperator.
NOTICE: Edge grinding/cutting with a Type27wheel
must be limited to shallow cutting and notching—less
than 1/2" (13mm) in depth when the wheel is new.
Reduce the depth of cutting/notching equal to the
reduction of the wheel radius as it wears down. Refer
to the Accessories Chart for more information. Edge
grinding/cutting with a Type 41wheel requires usage
of a Type 1guard.
1. Allow the tool to reach full speed before touching the
tool to the worksurface.
2. Apply minimum pressure to the work surface, allowing
the tool to operate at high speed. Grinding/cutting rate is
greatest when the tool operates at highspeed.
2. A dust mask or respirator should be worn by all persons
entering the work area. The filter should be replaced daily
or whenever the wearer has difficultybreathing.
NOTE: Only those dust masks suitable for working with
lead paint dust and fumes should be used. Ordinary
painting masks do not offer this protection. See your local
hardware dealer for the proper N.I.O.S.H. approvedmask.
3. NO EATING, DRINKING or SMOKING should be done in
the work area to prevent ingesting contaminated paint
particles. Workers should wash and clean up BEFORE
eating, drinking or smoking. Articles of food, drink, or
smoking should not be left in the work area where dust
would settle onthem.
Environmental Safety
1. Paint should be removed in such a manner as to
minimize the amount of dustgenerated.
2. Areas where paint removal is occurring should be sealed
with plastic sheeting of 4milsthickness.
3. Sanding should be done in a manner to reduce tracking
of paint dust outside the workarea.
Cleaning and Disposal
1. All surfaces in the work area should be vacuumed and
thoroughly cleaned daily for the duration of the sanding
project. Vacuum filter bags should be changedfrequently.
2. Plastic drop cloths should be gathered up and disposed
of along with any dust chips or other removal debris.
They should be placed in sealed refuse receptacles and
disposed of through regular trash pick‑upprocedures.
During clean up, children and pregnant women should
be kept away from the immediate workarea.
3. All toys, washable furniture and utensils used by children
should be washed thoroughly before being usedagain.
 Loading...