7
ENGLISH
unless they are supervised by a person responsible for their
safety. Children should never be left alone with thisproduct.
ASSEMBLY AND ADJUSTMENTS
WARNING: To reduce the risk of serious personal
injury, turn tool off and disconnect battery pack
before making any adjustments or removing/
installing attachments or accessories. An accidental
start-up can causeinjury.
WARNING: Use only DeWALT battery packs andchargers.
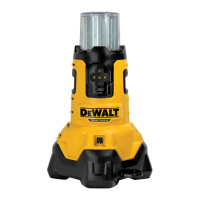
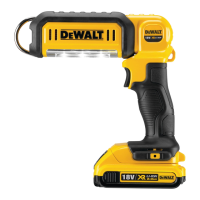
Inserting and Removing the Battery Pack
from the Tool (Fig. A)
NOTE: Make sure your battery pack
10
is fullycharged.
To Install the Battery Pack into the Light
• Align the battery pack with the rails inside the tripod light's
battery port
9
and slide it in until the battery pack is firmly
seated. Ensure that it does notdisengage.
To Remove the Battery Pack from the Light
• To remove the battery pack from the tripod light, press and
hold the release button
11
on the battery pack and firmly
pull the battery pack out.
Fuel Gauge Battery Packs (Fig. A)
Some DeWALT battery packs include a fuel gauge which
consists of three green LED lights that indicate the level of
charge remaining in the batterypack.
To actuate the fuel gauge, press and hold the fuel gauge button.
A combination of the three green LED lights will illuminate
designating the level of charge left. When the level of charge
in the battery is below the usable limit, the fuel gauge will not
illuminate and the battery will need to berecharged.
NOTE: The fuel gauge is only an indication of the charge left on
the battery pack. It does not indicate tool functionality and is
subject to variation based on product components, temperature
and end-userapplication.
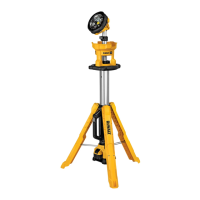
Tripod Light Setup (Fig. A)
To set up your tripod light from its collapsed carrying position,
hold the handle/rest
5
with one hand then use your other
hand to hold the carrying handle
8
. While pressing the leg
release button
6
, slide the carrying handle
8
down until the
legs extend and lock intoplace.
Be sure the legs are fully extended and locked into position
before extending the light headpole.
Extending the LED Light Head (Fig.A,C,D)
The height of your tripod light can be adjusted by extending or
collapsing the extension poles
2
.
1. Extend the legs
7
then secure/lock them into position (refer
to Tripod Light SetUp).
2. Unfasten the top latch and raise the head out of the
housing. Extend the pole to the desiredheight.
3. Fully close the top extension latch and make sure the
extension pole is locked intoplace.
4. For more height, unfasten the bottom latch and extend the
head further to the requiredheight.
5. Fully fasten the bottom latch and make sure the extension
pole is locked intoplace.
6. Pivot the head to the desiredangle.
NOTE: Over time, the latches may loosen. If this happens, open
the latches
3
and hand-tighten the screws
13
(Fig.C). Do not
over-tighten, as that could damage thelatches.
NOTE: Over time, the light head may also loosen. If this
happens, hand tighten the two light head screws
14
(Fig.D)
located on the back of the lighthead.
Collapsing and Carrying the Tripod Light
(Fig.A)
CAUTION: Keep hands and fingers clear when collapsing
the light head back into the housing to avoid pinching of
fingers andhands.
To collapse your tripod light into the carrying position, first
collapse the extension poles
2
so the light head rests in the
lowest position and is inside the housing. Lock the latches
3
.
Press the leg release button
6
and slide the carrying handle
8
up until the legs fold in completely.
CAUTION: Keep hands clear of the legs as they collapse to
avoid pinching of fingers andhands.
Storing the Tripod Light
Store your tripod light either in its closed carrying position
(refer to Collapsing and Carrying the Tripod Light) lying on its
side on the handle/rest
5
, or standing vertically with the legs
extended and the light head fully collapsed into thebase.
CAUTION: Do not store the light vertically when in the
closed position as it could tip over causing injury or
damage to thelight.
OPERATION
Instructions for Use
WARNING: Always observe the safety instructions and
applicableregulations.
WARNING: To reduce the risk of serious personal
injury, turn tool off and disconnect battery pack
before making any adjustments or removing/
installing attachments or accessories. An accidental
start-up can causeinjury.
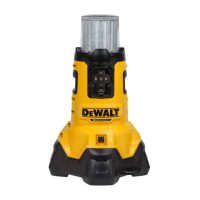
Usage (Fig. A)
WARNING: Burn hazard. The lens and heatsink get very
hot during use. To reduce the risk of burns and fire, do not
touch and keep away from combustible materials while
inoperation.
1. Place the tripod light on a stable, level surface resting on its
three extendedlegs.
2. To turn the light on, press the power button
4
. The light
will turn on at the brightest setting. Pressing the power
button a second time will change the light to middle
brightness, and pressing it a third time will change the light