ENGLISH
12
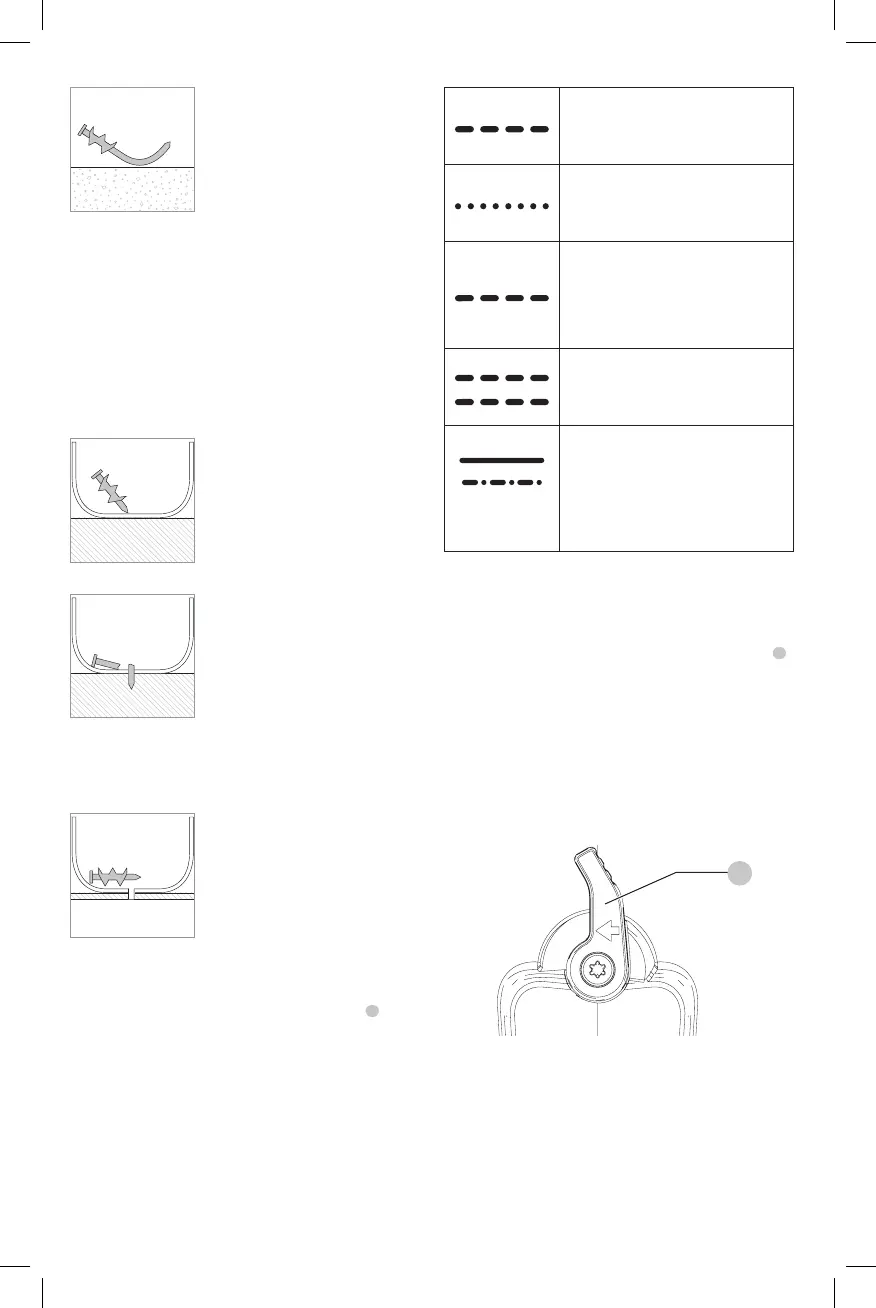
Pin bends.
Cause:
- Pin hit large aggregate
onentry.
- Too hard/high
strengthconcrete.
- Pin hit rebar just
undersurface.
Action:
- Use shorter pin.
- Make sure nailer is
perpendicular to the
worksurface.
- Move 3" (8 cm) and
tryagain.
STEEL
Pin does not penetrate the surface.
Cause:
- Power setting too low.
- Material to hard for
pintype.
Action:
- Increase tool power setting.
Pin breaks or bends.
Cause:
- Pin too long.
- Power setting too low.
- Material to hard for
pintype.
Action:
- Use shorter pin.
- Switch to higher
powersetting.
Pin does not hold in the steel.
Cause:
- Steel base material too thin.
Action:
- Use thicker base material.
Headlights/LED Indicator (Fig. A)
There are low battery and jam/stall indicator lights
9
located on the front of the tool on each side of
themagazine.
LOW BATTERY
Replace battery with a charged pack.
HOT PACK
Let the battery cool or replace it with
a cool pack.
JAM/STALL CONDITION
Rotate the stall release lever
torelease.
Refer to Stall Release or Clearing a
Jammed Pin.
HOT TOOL (Both LEDs Flashing)
Let the tool cool down before
continuing use.
or any other
combination.
ERROR
Reset tool by removing and
reinserting battery pack or cycling
trigger lock off. If error code persist,
take tool to an authorized
service center.
Stall Release (Fig. J)
If the nailer is used in harder material where all available
energy in the motor is used to drive a fastener, the tool may
stall. The driver will not complete the drive cycle and the
jam/stall indicator will flash. Rotate the stall release lever
8
on the tool and the mechanism will release.
NOTE: The tool will disable itself and not reset until the
battery pack has been removed and reinserted. If the
driver does not automatically return to the home position,
proceed to Clearing a Jammed Pin. If the unit continues
to stall please review the material and fastener length to
be sure that it is not too rigorous an application. The nailer
could also be overheated and needs time to cool before
further use.
Fig. J
8
Clearing a Jammed Pin (Fig. A, K)
WARNING: To reduce the risk of serious personal
injury, disconnect battery pack from tool before
making any adjustments, changing accessories,
servicing, or moving the tool. Such preventative
safety measures reduce the risk of starting the
toolaccidentally.
CAUTION: When removing a jammed pin, DO
NOT orient the nailer with the nose up or with