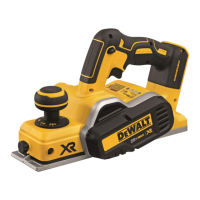
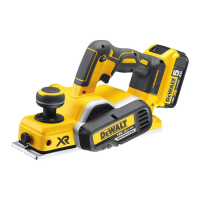
ENGLISH
12
Register Online
Thank you for your purchase. Register your product nowfor:
• WARRANTY SERVICE: Registering your product will
help you obtain more efficient warranty service in case
there is a problem with yourproduct.
• CONFIRMATION OF OWNERSHIP: In case of
an insurance loss, such as fire, flood or theft, your
registration of ownership will serve as your proof
ofpurchase.
• FOR YOUR SAFETY: Registering your product will
allow us to contact you in the unlikely event a safety
Repairs
The charger and battery pack are notserviceable. There are
no serviceable parts inside the charger or batterypack.
WARNING: To assure product SAFETY and RELIABILITY,
repairs, maintenance and adjustment (including brush
inspection and replacement, when applicable) should
be performed by a DeWALT factory service center or a
DeWALT authorized service center. Always use identical
replacementparts.
Accessories
WARNING: Since accessories, other than those offered
by DeWALT, have not been tested with this product, use
of such accessories with this tool could be hazardous.
To reduce the risk of injury, only DeWALT recommended
accessories should be used with thisproduct.
Recommended accessories for use with your tool are available
at extra cost from your local dealer or authorized service
center. If you need assistance in locating any accessory, please
contact DeWALT. Call 1-800-4-DeWALT (1-800-433-9258)
or visit our website: www.dewalt.com.
Chip Discharge Chute
CleaningInstructions (Fig. A)
If the unit is clogged with dust or chips, use a non-metallic
stick to push the obstruction out of the chip discharge
chute
11
. Never stick your finger into thechute.
Cleaning
WARNING: Blow dirt and dust out of all air vents with
clean, dry air at least once a week. To minimize the risk
of eye injury, always wear ANSI Z87.1approved eye
protection when performingthisprocedure.
WARNING: Never use solvents or other harsh
chemicals for cleaning the non‑metallic parts of the
tool. These chemicals may weaken the plastic materials
used in these parts. Use a cloth dampened only with
water and mild soap. Never let any liquid get inside the
tool; never immerse any part of the tool into aliquid.
MAINTENANCE
WARNING: To reduce the risk of serious personal
injury, turn unit off and remove the battery pack
before making any adjustments or removing/
installing attachments or accessories. An
accidental start‑up can causeinjury.
Sharpening High‑Speed Steel Blades
(Fig.L)
CAUTION: Planer blades are extremely sharp. Handle
with greatcare.
NOTE: Carbide blades cannot besharpened.
1. Fasten the blades to the sharpening holder
28
. Make
sure both blade edges
21
are facing the samedirection.
2. Place the blade edges so they rest flat on the grinding
stone (notincluded).
3. Firmly grip the sharpening holder and move it back and
forward to sharpen the blade edges
21
.
Kickstand (Fig.M)
Your planer is equipped with a kickstand
29
located behind
the rear shoe
4
that automatically lowers when the tool is
lifted from the work surface allowing the planer to set on the
work surface without the blade touching it. When planing,
the kickstand raises as the tool is pushed forward through
the material. If the kickstand obstructs special planing work,
it can be stored and locked out of theway.
CAUTION: Be sure that the kickstand is correctly
extended when setting the planer on a worksurface.
Edge Chamfering (Fig.N)
Your planer has a precision machined chamfering groove
30
in the front shoe for planing along a corner of the wood. The
width of the groove is 4.5 to 8mm. It’s a good idea to try a
piece of scrap wood before doing finishwork.
Dust Extraction (Fig.A,O)
Your planer has a built-in dust extraction port
12
which
allows either a dust bag or a shop vacuum to be connected.
The built-in outlet utilizes the DeWALT AirLock connection
system making it compatible with the DeWALT dustextractor.
To Attach the Dust Bag
While holding the planer, slide the dust bag collar onto the
dust extraction port
12
as shown in FigureO.
To Empty The Dust Bag
1. While holding the planer, remove the dust bag by sliding
it off the dust extraction port
12
.
2. Gently shake or tap the dust bag toempty.
3. Reattach the dust bag back onto theoutlet.
You may notice that all the dust will not come free from
the bag. This will not affect planing performance but will
reduce the planer’s dust collection efficiency. To restore your
planer’s dust collection efficiency, depress the spring inside
the dust bag when you are emptying it and tap it on the side
of the trash can or dustreceptacle.
NOTE: A DeWALT AirLock Adapter (DWV9000) can be
purchased separately to connect a shop vacuum or DeWALT
dust extractor to yourplaner.
CAUTION: Never operate these tools unless the
dust collector is in place. Planing dust exhaust may
create a breathinghazard.