Do you have a question about the DeWalt DCS374P2 and is the answer not in the manual?
Prevent accidents by keeping the workspace clear and illuminated.
Do not operate tools in areas with flammable liquids, gases, or dust.
Ensure children and bystanders are kept away during operation.
Ensure plugs match outlets and avoid adapter plugs for safety.
Prevent contact with earthed surfaces like pipes and radiators.
Keep tools dry to reduce the risk of electric shock.
Avoid cord abuse and keep it away from heat, oil, and sharp edges.
Use appropriate cords for outdoor operations to reduce shock risk.
Use GFCI protection where damp locations are unavoidable.
Stay alert, avoid operating while tired or under influence.
Always wear eye protection and other appropriate safety gear.
Ensure the switch is off before connecting power or battery.
Ensure no keys or wrenches are attached to the tool.
Keep good footing and balance for better control.
Avoid loose clothing, jewelry, or long hair near moving parts.
Properly connect and use dust extraction facilities.
Do not force the tool; use the tool designed for the application.
Do not use tools with faulty switches; they must be repaired.
Disconnect power before making adjustments or changing accessories.
Store idle tools away from children and untrained users.
Check for misalignment, binding, or damage; have repaired if needed.
Sharp, clean tools are easier to control and less likely to bind.
Use tools, accessories, and bits in accordance with instructions.
Use only the manufacturer-specified charger for safety.
Use only specifically designated battery packs for tools.
Prevent shorting battery terminals by keeping them away from metal.
Avoid contact with battery liquid; flush with water if contact occurs.
Have tools serviced by qualified persons using identical replacement parts.
Hold tool by insulated surfaces to avoid shock from hidden wiring.
Keep hands clear of the cutting area and the blade.
Always keep hands out of the line of the band saw blade.
Always wait until the motor reaches full speed before starting a cut.
Keep handles dry, clean, and free of oil and grease.
Hold the tool firmly when in use for better control.
Remain alert, especially during repetitive operations.
Do not remove the work stop feature from the tool.
Be aware of end pieces that may fall after cutting.
Avoid covering air vents, as they cover moving parts.
Always wear ANSI-approved eye, hearing, and respiratory protection.
Use specially designed dust masks for microscopic particles.
Wear protective clothing and wash skin after exposure to dust.
Use NIOSH/OSHA approved respiratory protection for dust exposure.
Always wear hearing protection conforming to ANSI S12.6.
Place tool on its side on a stable surface to prevent tripping.
Avoid charging battery packs in areas with flammable liquids, gases, or dust.
Do not force or modify battery packs to fit incompatible chargers.
Charge battery packs only in DEWALT designated chargers.
Avoid splashing or immersing battery packs or tools in water.
Store battery packs in cool, dry locations, avoiding high temperatures.
Never store battery packs in a tool with the trigger switch locked on.
Never attempt to open battery packs, even if damaged.
Return damaged battery packs to a service center for recycling.
Protect battery terminals from contact with conductive materials.
Do not incinerate battery packs, even if severely damaged.
If battery contents contact skin, wash immediately with soap and water.
Provide fresh air if battery cell contents cause respiratory irritation.
Read all instructions and cautionary markings on the charger and battery.
Keep liquids away from the charger to prevent electric shock.
Charge only DEWALT rechargeable battery packs to avoid overheating.
Keep charger cavities free of conductive foreign materials.
Use only chargers specified in the manual for battery packs.
Chargers are intended only for DEWALT batteries; other uses are hazardous.
Do not expose chargers to rain or snow.
Pull by the plug, not the cord, to disconnect the charger.
Ensure the cord is positioned to avoid damage or stress.
Use extension cords only when necessary and ensure proper gauge.
Provide a dry location and use suitable cords for outdoor charger use.
Use adequate wire size (AWG) for extension cords to prevent issues.
Do not block ventilation slots; place away from heat sources.
Do not operate the charger with a damaged cord or plug.
Take damaged chargers to an authorized service center.
Do not disassemble chargers; service by authorized centers only.
Disconnect the charger from the AC outlet before cleaning.
Never attempt to connect two chargers together.
Use chargers designed for standard 120V household power.
Plug the charger into an appropriate outlet before inserting the battery.
Insert the battery pack fully seated into the charger.
Completion is indicated by the red light remaining ON continuously.
Red light flashing indicates a problem; re-insert or try a different pack.
Charger delays charging if battery is too hot or too cold.
Charging resumes automatically when the battery reaches optimum temperature.
Charger may refuse to light or display 'problem pack or charger'.
Mount securely using appropriate screws at the correct depth.
Charge batteries between 65°F and 75°F (18°-24°C) for best results.
It is normal for the charger and pack to become warm during charging.
Cold battery packs charge at a slower rate.
Check receptacle and surrounding air temperature for charging problems.
Check receptacle, light switch, and air temperature for charging issues.
Best storage is cool and dry, away from direct sunlight and heat.
For long storage, store a fully charged pack for optimal results.
This band saw is designed for professional metal cutting.
Avoid use in wet conditions or presence of flammable liquids or gases.
Do not let children come into contact with the tool; supervision is required.
Lock the trigger switch when carrying or storing the tool.
Press lock-off button then pull trigger to turn motor ON.
Do not lock the switch in the ON position by any means.
Trigger depression controls speed; further depression increases speed.
Slow speed is recommended only for beginning a cut.
Worklight activates when the trigger switch is depressed.
Worklight automatically turns off 20 seconds after trigger release.
Use .020" thick, 1/2" wide, 44-7/8" long blades; do not use .025" thick.
Use only DEWALT recommended blades and accessories; others may be hazardous.
Consider work material, shape, and desired cut for blade selection.
Coarser teeth provide faster cuts; use appropriately.
At least two teeth should contact the work surface for proper cutting.
Soft materials usually require coarse tooth blades.
Hard materials require fine tooth blades for a smoother finish.
Never cut resin materials that may melt from heat generated.
Determine material and dimensions to select the most appropriate blade.
Loosen the adjustment locking nut using a 1/2" wrench.
Turn the adjustment screw 1/4 turn clockwise or counterclockwise.
Adjust so the back edge of the blade lightly touches the rollers.
Securely tighten the adjustment locking nut after adjustment.
Observe tracking and repeat steps as necessary for proper alignment.
Ensure battery is removed if further tracking adjustment is needed.
Always turn tool off and remove battery before making adjustments.
For best results, ensure the battery pack is fully charged before installation.
Align the battery pack with the rails and slide until firmly seated.
Press the release button and pull firmly to remove the battery pack.
Turn tool off and remove battery before removing or installing blades.
Rotate the blade tension lever clockwise to release tension.
Saw blades are sharp; handle them with care during removal and installation.
Position the blade with teeth on the bottom and angled toward the work stop.
Slip the blade into the guide rollers as shown.
Place the blade around pulleys and through the work stop.
Make sure the blade is fully inserted and positioned squarely against tires.
Rotate the blade tension lever counterclockwise until it stops.
Turn the saw on and off a few times to ensure the blade is seated.
Assemble the bail handle in one of the multi-positions (forward, angled, up).
Ensure the bail handle knob is tightened and the handle is secure.
Loosen the two screws using the provided hex wrench.
Move the work stop to the desired position.
Securely tighten the screws after adjusting the work stop.
Turn the saw over and place it on a workbench with the handle to the right.
Slide the brush into the slot as seen in the figure.
Place the brush cap over the top and screw it securely into place.
Turn tool off and remove battery before making adjustments or accessories.
Thoroughly remove oil or grease from workpiece before cutting.
Always securely clamp the workpiece and bring the tool to it.
Bring the tool to the workpiece gently; do not apply excess pressure.
Ensure no sudden impact at the beginning of cutting for blade life.
Keep blade aligned with motor housing for straight cutting.
Release switch immediately if saw becomes locked or jammed.
Tool's weight provides efficient downward cutting pressure.
Support heavy end pieces that may cause injury when dropped.
Whenever possible, hold the saw firmly in both hands.
Do not make any speed changes unless the tool has been turned off.
Use the recommended cutting positions as a guide for results.
Turn tool off and remove battery before performing maintenance.
Tool uses self-lubricating bearings; periodic relubrication is not required.
Blow dirt and dust from air vents with dry air at least once a week.
Always wear approved eye protection when cleaning to minimize injury risk.
Never use solvents or harsh chemicals for cleaning; use water and mild soap.
Never let liquid get inside the tool or immerse any part in liquid.
Disconnect the charger from the AC outlet before cleaning.
Use a cloth or soft non-metallic brush; do not use water or cleaning solutions.
Use only DEWALT recommended accessories; others may be hazardous.
Repairs, maintenance, and adjustments should be done by DEWALT service centers.
Registering helps obtain more efficient warranty service.
Registration serves as proof of ownership for insurance loss.
Registration allows contact for safety notifications if required.
Warranty covers defects due to faulty materials or workmanship for three years.
Warranty does not cover part failure from normal wear or tool abuse.
Warranty does not apply if repairs have been made or attempted by others.
Product warranty is void if the battery pack is tampered with in any way.
Return product within 90 days with receipt for a full refund.
This document outlines the safety guidelines, operational procedures, and maintenance instructions for a DEWALT portable band saw. It emphasizes safe handling, proper use, and care to ensure optimal performance and user safety.
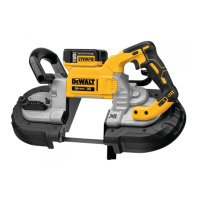
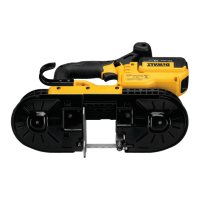
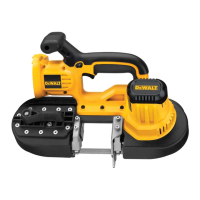
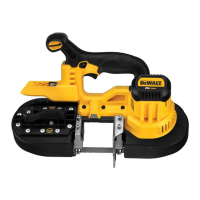
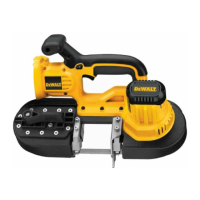
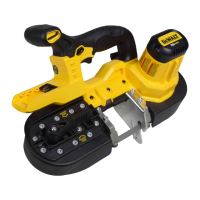
The DEWALT portable band saw is a heavy-duty power tool designed for professional metal cutting applications. It is equipped with a variable speed trigger switch, allowing for versatile cutting speeds depending on the material and desired cut. The tool is designed to cut various types of material up to 4-3/4" (120.7 mm) diameter or 5" (127 mm) x 4-3/4" (120.7 mm) rectangular shape at 90°. A worklight is integrated to illuminate the immediate work surface, and a multi-position bail handle provides flexibility for carrying and use as an additional handle. The tool is powered by DEWALT battery packs, some of which include a fuel gauge to indicate the remaining charge level.
Before operating the band saw, users are instructed to read all safety warnings and instructions to prevent electric shock, fire, and serious injury. Personal safety is paramount, requiring users to stay alert, use common sense, and avoid operating the tool while tired or under the influence of drugs, alcohol, or medication. Personal protective equipment, including eye protection, dust masks, non-skid safety shoes, hard hats, and hearing protection, must always be worn.
The tool features a lock-off button to prevent unintentional starting. Users must ensure the switch is in the off position before connecting to the power source or battery pack, or when picking up or carrying the tool. Any adjusting key or wrench must be removed before turning the power tool on. Proper footing and balance should be maintained at all times, and loose clothing, jewelry, or long hair should be kept away from moving parts. If dust extraction and collection facilities are provided, they should be connected and properly used to reduce dust-related hazards.
For optimal performance, the correct power tool should be used for the specific application. The variable speed trigger switch allows users to select the desired speed (Speed 1 being the slowest, Speed 5 the fastest). Higher speeds are recommended for cutting copper, brass, bronze, aluminum, cast iron, angle iron, and mild steel, while lower speeds are suitable for plastic pipe, tougher steels, chrome steel, tungsten steel, stainless steel, and other problem materials. Users are cautioned that prolonged use at very slow speeds may damage the saw.
The band saw is equipped with an adjustable blade tracking mechanism to ensure proper blade alignment. The back edge of a properly aligned blade should lightly touch one or both of the back-up rollers in the blade guides. Adjustments to blade tracking involve loosening an adjustment locking nut, turning an adjustment screw, and then securely tightening the locking nut. The battery pack must be removed before making any adjustments.
To install or remove the battery pack, the bail handle should be positioned fully forward, and the battery pack aligned with the rails inside the tool's handle before sliding it in until it is firmly seated. To remove, the release button is pressed, and the battery pack is pulled out.
Blade installation involves positioning the blade with teeth on the bottom and angled toward the work stop, slipping it into the guide rollers, and placing it around both pulleys and through the work stop. The blade must be fully inserted into the guide rollers and positioned squarely against the rubber tires. The blade tension lever is then rotated counterclockwise until it stops, and the saw is gently turned over to ensure the pulleys rest on a workbench or table. The saw should be turned on and off a few times to ensure the blade is properly seated.
For cutting operations, the material must be mounted solidly in a vise or other clamping device. The work stop is brought into contact with the workpiece, keeping the blade off the material. The saw is then turned on, and once it reaches the desired rotation speed, the main body of the tool is slowly and gently tilted to bring the blade into contact with the workpiece. Additional pressure beyond the tool's own weight should be avoided, as it can slow the blade and reduce blade life. End pieces that may fall after cutting should be supported, and safety shoes are recommended. The saw should be held firmly with both hands whenever possible. Speed changes should only be made when the tool is turned off.
Regular maintenance is crucial for the safety and longevity of the band saw. Users are advised to keep the work area clean and well lit. Power tool plugs must match the outlet, and no adapter plugs should be used with earthed (grounded) power tools. Body contact with earthed or grounded surfaces should be avoided. Power tools should not be exposed to rain or wet conditions. The cord should not be abused or used for carrying, pulling, or unplugging the tool, and it should be kept away from heat, oil, sharp edges, or moving parts. When operating outdoors, an extension cord suitable for outdoor use should be used. If operating in a damp location, a ground fault circuit interrupter (GFCI) protected supply is recommended.
Power tools should be maintained by checking for misalignment or binding of moving parts, breakage, and any other conditions that may affect operation. Damaged tools should be repaired before use. Cutting tools should be kept sharp and clean. The power tool, accessories, and tool bits should be used in accordance with instructions and working conditions.
Battery packs should only be recharged with the charger specified by the manufacturer. They should be stored away from other metal objects to prevent shorting of terminals. In case of contact with battery liquid, the affected area should be immediately washed with soap and water, and medical help sought if liquid contacts the eyes. The battery pack should not be incinerated, even if severely damaged or worn out.
Chargers should be kept clean and dry. Foreign materials of a conductive nature should be kept away from charger cavities. The charger should not be operated if it has received a sharp blow, been dropped, or otherwise damaged. Disassembly of the charger is not recommended; service or repair should be performed by an authorized service center. The charger is designed for standard 120V household electrical power and should not be used with other voltages.
For the band saw itself, the guide rollers should be inspected, and any large chips removed to prevent flat spots. The rubber tires on the pulleys should be inspected for looseness or damage, and any chips wiped away to extend tire life and prevent slipping. If looseness or damage occurs, the tool should be taken to an authorized DEWALT service center.
Self-lubricating bearings are used in the tool, so periodic relubrication is not required. All air vents should be blown clear of dirt and dust with clean, dry air at least once a week, while wearing ANSI Z87.1 approved eye protection. Solvents or harsh chemicals should not be used to clean non-metallic parts of the tool, as they may weaken the plastic materials. A cloth dampened with water and mild soap is recommended.
The charger's exterior can be cleaned using a cloth or soft non-metallic brush after disconnecting it from the AC outlet. Water or cleaning solutions should not be used on the charger.
Users are encouraged to register their product online for warranty service, confirmation of ownership, and safety notifications. Repairs, maintenance, and adjustments should be performed by a DEWALT factory service center or authorized service center, using identical replacement parts.
| Quantity per pack | 1 pc(s) |
|---|