38
ENGLISH
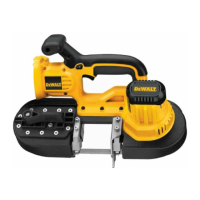
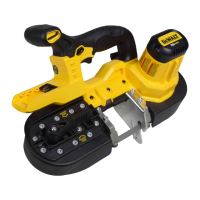
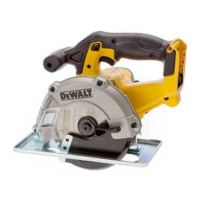
Inserting and Removing the Battery Pack
from the Tool (Fig. B)
NOTE: Make sure your battery pack
14
is fullycharged.
To Install the Battery Pack into the Tool Handle
1. Align the battery pack with the rails inside the tool’s
handle(Fig. B).
2. Slide it into the handle until the battery pack is firmly seated
in the tool and ensure that you hear the lock snap intoplace.
To Remove the Battery Pack from the Tool
1. Press the battery release button
15
and firmly pull the
battery pack out of the toolhandle.
2. Insert battery pack into the charger as described in the
charger section of thismanual.
Fuel Gauge Battery Packs (Fig.B)
Some DeWALT battery packs include a fuel gauge, which
consists of three green LED lights that indicate the level of
charge remaining in the batterypack.
To actuate the fuel gauge, press and hold the fuel gauge
button
26
. A combination of the three green LED lights will
illuminate, designating the level of charge left. When the level
of charge in the battery is below the usable limit, the fuel gauge
will not illuminate and the battery will need to berecharged.
NOTE: The fuel gauge is only an indication of the charge left on
the battery pack. It does not indicate tool functionality and is
subject to variation based on product components, temperature
and end‑userapplication.
OPERATION
Instructions for Use
WARNING: Always observe the safety instructions and
applicableregulations.
WARNING: To reduce the risk of serious personal
injury, turn tool off and disconnect battery pack
before making any adjustments or removing/
installing attachments or accessories. An accidental
start-up can causeinjury.
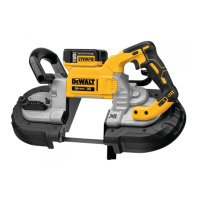
LED Worklight (Fig. A)
CAUTION: Do not stare into worklight. Serious eye
injury couldresult.
There is a worklight
16
located above the blade. The worklight
is activated when the trigger switch is depressed, and will
automatically turn off 20seconds after the trigger switch is
released. If the trigger switch remains depressed, the worklight
will remainon.
NOTE: The worklight is for lighting the immediate work surface
and is not intended to be used as aflashlight.
Cutting (Fig. A, I)
Refer to Recommended Cutting Positions for recommended
cutting positions for variousmaterials.
NOTE: Select and use a band saw blade that is most
appropriate for the material being cut. See Bi‑Metal Band Saw
BladeDescription.
This portable band saw may be hung using the hang hook
(
10
, Fig.A). Hang tool on a pipe vise or other suitable,
stablestructure.
WARNING: When using the hang hook make sure it is
secure and stable before releasing it. The saw may fall
resulting in serious injury to you orothers.
WARNING: Do not use the hang hook as a lanyard
attachmentpoint.
WARNING: To reduce the risk of injury, only use hang
hook to support the weight of the tool. Never rely on the
hang hook for your own support or to help you maintain
yourbalance.
WARNING: Never attempt to use this tool by resting it
upside down on a work surface and bringing the material
to the tool. Always securely clamp the workpiece and
bring the tool to the workpiece, securely holding the tool
as shown in FigureI.
1. Material to be cut must be rigidly secure where it is or
clamped in a vise or other clampingdevice.
2. Bring the work stop
6
into contact with the workpiece
while keeping the blade off of the workpiece. Turn the
sawon.
3. When saw reaches desired rotation speed, slowly and gently
tilt the main body of the tool to bring the band saw blade
into contact with the workpiece. Do not apply additional
pressure in excess of the weight of the main body of the
tool. Carefully avoid bringing the band saw blade suddenly
and heavily into contact with the upper surface of the
workpiece. This will cause serious damage to the band saw
blade. To obtain maximum service life of the band saw
blade, ensure there is no sudden impact at the beginning of
the cuttingoperation.
4. Straight cutting can be accomplished by keeping the
band saw blade aligned perpendicular to the material. Any
twisting or cocking of the blade will cause the cut to go
offline and decrease the life of theblade.
NOTICE: During cutting, if the band saw becomes locked
or jammed in the workpiece material, release the switch
immediately to avoid damage to the band saw blade
andmotor.
5. The tool’s own weight provides the most efficient
downward cutting pressure. Added operator pressure slows
the blade and reduces bladelife.
6. End pieces, which would be heavy enough to cause injury
when they drop, after cut‑off, should be supported. Safety
shoes are strongly recommended. End pieces may be hot
andsharp.
Hold the saw firmly with one hand on the main handle
4
and
one hand on the auxiliary handle
17
.
Proper Hand Position (Fig. I)
WARNING: To reduce the risk of serious personal injury,
ALWAYS use proper hand position as shown.
WARNING: To reduce the risk of serious personal injury,
ALWAYS hold securely in anticipation of a suddenreaction.
 Loading...