50
ENGLISH
See Technical Data for chargingtime.
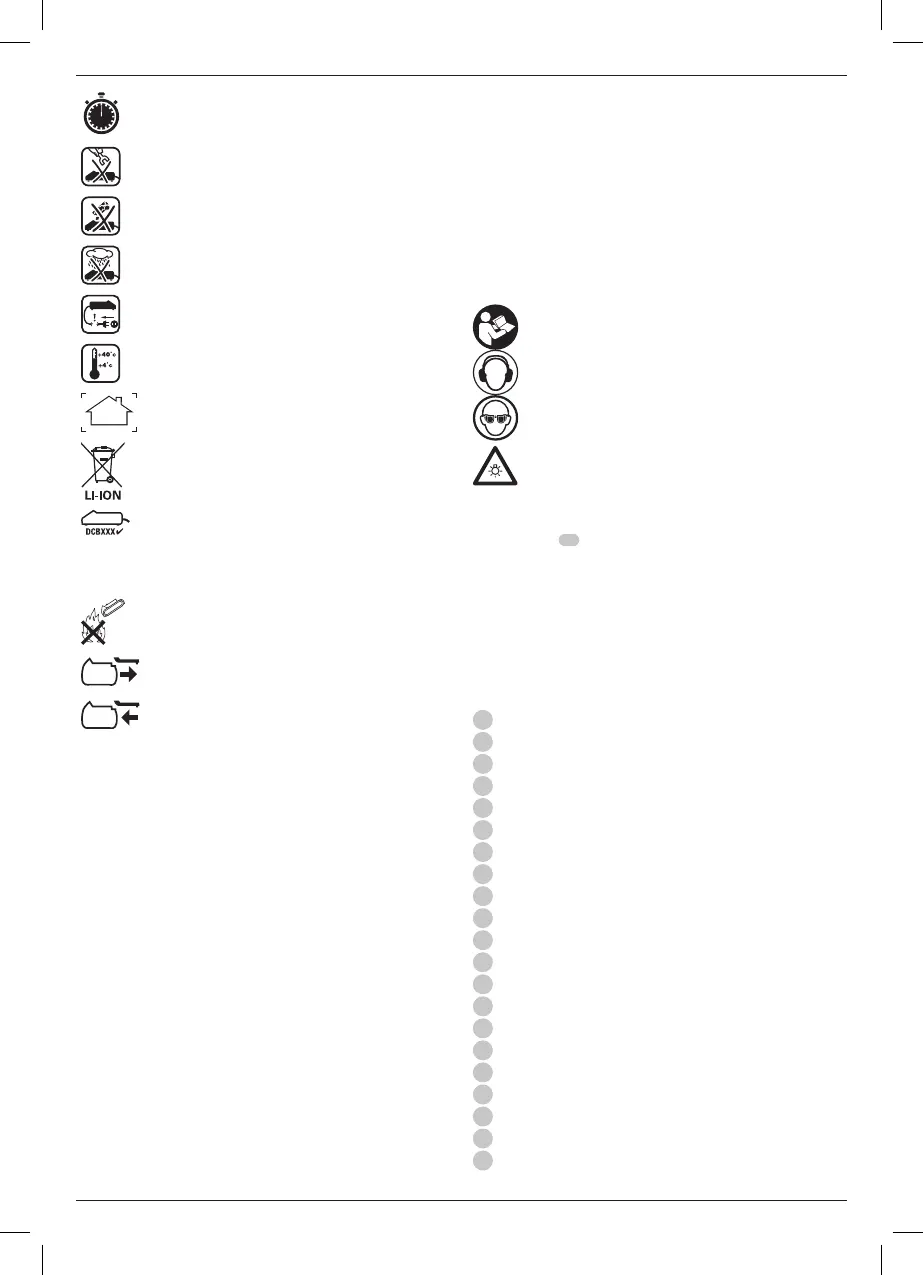
Do not probe with conductiveobjects.
Do not charge damaged batterypacks.
Do not expose to water.
Have defective cords replacedimmediately.
Charge only between 4 ˚C and 40 ˚C.
Only for indooruse.
Discard the battery pack with due care for
theenvironment.
Charge
battery packs only with designated
chargers. Charging battery packs other than
the designated
batteries with a
charger may make them burst or lead to other
dangeroussituations.
Do not incinerate the batterypack.
USE (without transport cap). Example: Wh rating
indicates 108 Wh (1 battery with 108 Wh).
TRANSPORT (with built-in transport cap). Example:
Wh rating indicates 3 x 36 Wh (3batteries of 36 Wh).
Battery Type
The DCS575 and DCS576 operate on a 54 volt battery pack.
These battery packs may be used: DCB546, DCB547, DCB548.
Refer to Technical Data for moreinformation.
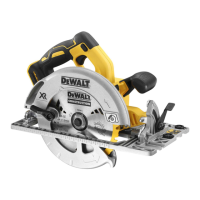
Package Contents
The package contains:
1 Circular saw
1 Circular saw blade
1 Blade wrench
1 Parallel fence
1 Dust extraction port
1 Charger (T models only)
1 Li-Ion battery pack (T1 model)
2 Li-Ion battery packs (T2 model)
3 Li-Ion battery packs (T3 model)
1 Instruction manual
NOTE: Battery packs, chargers and kitboxes are not included
with N models. Battery packs and chargers are not included with
NT models. Bmodels include Bluetooth® batterypacks.
NOTE: The Bluetooth® word mark and logos are registered
trademarks owned by the Bluetooth®, SIG, Inc. and any use of
such marks by
is under license. Other trademarks and
trade names are those of their respectiveowners.
• Check for damage to the tool, parts or accessories which may
have occurred duringtransport.
• Take the time to thoroughly read and understand this manual
prior tooperation.
Markings on Tool
The following pictograms are shown on the tool:
Read instruction manual beforeuse.
Wear earprotection.
Wear eyeprotection.
Visible radiation. Do not stare intolight.
Date Code Position (Fig. H)
The date code
18
, which also includes the year of manufacture,
is printed into thehousing.
Example:
2019 XX XX
Year of Manufacture
Description (Fig.A, H)
WARNING: Never modify the power tool or any part of it.
Damage or personal injury couldresult.
1
Trigger switch
2
Trigger switch lock-off button
3
Main handle
4
Rafter hook (Included with some models)
5
Blade lock
6
End cap
7
Auxiliary handle
8
Bevel adjustment lever
9
Bevel angle adjustment mechanism
10
LED worklight
11
Base plate
12
Lower blade guard
13
Blade clamping screw
14
Lower guard lever
15
Upper blade guard
16
Battery pack
17
Battery release button
18
Date code (Fig. H)
19
Rail adjuster (0° cutting)
20
Rail adjuster (1–45° bevel cutting)
21
Fuel gauge button (on battery pack)
 Loading...