ENGLISH
8
with the retracting handle and make sure it moves freely and
does not touch the blade or any other part, in all angles and
depths ofcut.
b ) Check the operation of the lower guard spring. If the
guard and the spring are not operating properly, they
must be serviced before use. Lower guard may operate
sluggishly due to damaged parts, gummy deposits, or a build-
up ofdebris.
c ) Lower guard should be retracted manually only
for special cuts such as “plunge cuts” and “compound
cuts.” Raise lower guard by retracting handle and as
soon as blade enters the material, the lower guard must
be released. For all other sawing, the lower guard should
operateautomatically.
d ) Always observe that the lower guard is covering
the blade before placing saw down on bench or floor.
An unprotected, coasting blade will cause the saw to walk
backwards, cutting whatever is in its path. Be aware of the
time it takes for the blade to stop after switch isreleased.
Additional Safety Information
WARNING: Never modify the power tool or any part of it.
Damage or personal injury couldresult.
WARNING: ALWAYS use safety glasses. Everyday
eyeglasses are NOT safety glasses. Also use face or dust
mask if cutting operation is dusty. ALWAYS WEAR CERTIFIED
SAFETYEQUIPMENT:
• ANSI Z87.1 eye protection (CAN/CSA Z94.3),
• ANSI S12.6 (S3.19) hearing protection,
• NIOSH/OSHA/MSHA respiratoryprotection.
WARNING: Some dust created by power sanding, sawing,
grinding, drilling, and other construction activities contains
chemicals known to the State of California to cause cancer,
birth defects or other reproductive harm. Some examples of
these chemicalsare:
• lead from lead-based paints,
• crystalline silica from bricks and cement and other masonry
products, and
• arsenic and chromium from chemically-treatedlumber.
Your risk from these exposures varies, depending on how
often you do this type of work. To reduce your exposure to
these chemicals: work in a well ventilated area, and work with
approved safety equipment, such as those dust masks that are
specially designed to filter out microscopicparticles.
• Avoid prolonged contact with dust from power
sanding, sawing, grinding, drilling, and other
construction activities. Wear protective clothing and
wash exposed areas with soap and water. Allowing dust
to get into your mouth, eyes, or lay on the skin may promote
absorption of harmfulchemicals.
WARNING: Use of this tool can generate and/or disperse
dust, which may cause serious and permanent respiratory or
other injury. Always use NIOSH/OSHA approved respiratory
protection appropriate for the dust exposure. Direct particles
away from face andbody.
WARNING: Always wear proper personal hearing
protection that conforms to ANSI S12.6 (S3.19) during
use. Under some conditions and duration of use, noise from
this product may contribute to hearingloss.
CAUTION: When not in use, place tool on its side
on a stable surface where it will not cause a tripping
or falling hazard. Some tools with large battery packs
will stand upright on the battery pack but may be easily
knockedover.
• Air vents often cover moving parts and should be
avoided. Loose clothes, jewelry or long hair can be caught in
movingparts.
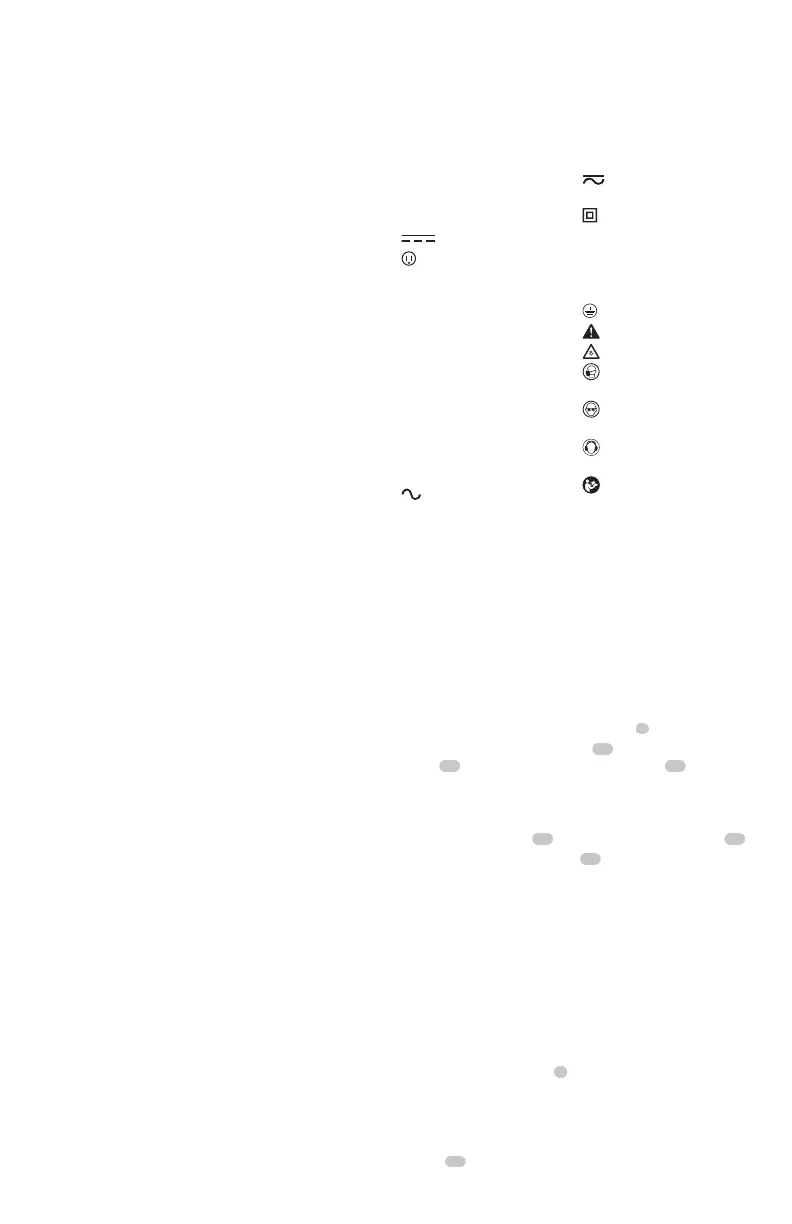
The label on your tool may include the following symbols. The
symbols and their definitions are asfollows:
V ......................... volts
Hz .......................hertz
min ..................... minutes
or DC ......direct current
...................... Class I Construction
(grounded)
…/min ..............per minute
BPM .................... beats per minute
IPM ..................... impacts per minute
RPM .................... revolutions per
minute
sfpm ................... surface feet per
minute
SPM .................... strokes per minute
A ......................... amperes
W ........................watts
or AC ...........alternating current
or AC/DC .... alternating or
direct current
...................... Class II
Construction
(double insulated)
n
o
.......................no load speed
n .........................rated speed
......................earthing terminal
.....................safety alert symbol
.....................visible radiation
..................... wear respiratory
protection
..................... wear eye
protection
..................... wear hearing
protection
..................... read all
documentation
ASSEMBLY AND ADJUSTMENTS
WARNING: To reduce the risk of serious personal
injury, turn unit off and remove the battery pack
before making any adjustments or removing/installing
attachments or accessories. An accidental start-up can
causeinjury.
WARNING: To reduce the risk of serious personal injury,
always wear ANSI compliant eyeprotection.
Assembling the Dust Port (Fig. B, C)
(Optional Accessory)
1. Fully loosen depth adjustment lever (
4
, Fig. B).
2. Align the dust port–back half
19
over upper blade
guard
20
as shown. Be sure to insert the tab
21
into the
casting notch on the tool as shown in FigureC. When
installed correctly, it will snap fully over the original depth
of cutpointer.
3. Align the dust port
22
with the dust port–back half
19
.
4. Insert two dust port screws
23
as shown and
tightensecurely.
OPERATION
WARNING: To reduce the risk of serious personal
injury, turn unit off and remove the battery pack
before making any adjustments or removing/installing
attachments or accessories. An accidental start-up can
causeinjury.
Installing and Removing the Battery Pack (Fig. D)
NOTE: For best results, make sure your battery pack is
fullycharged.
To install the battery pack
3
into the tool handle, align the
battery pack with the rails inside the tool’s handle and slide
it into the handle until the battery pack is firmly seated in
the tool and ensure that it does notdisengage.
To remove the battery pack from the tool, press the release
button
13
and firmly pull the battery pack out of the tool
handle. Insert it into the charger.