16
DEUTSCH
Deutsch (übersetzt von den originalanweisungen)
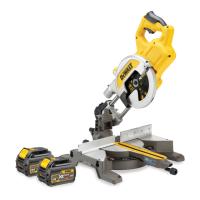
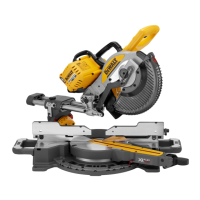
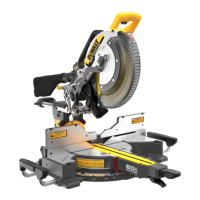
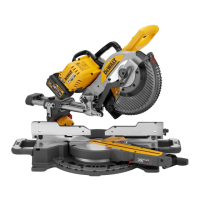
KABELLOSE, KOMPAKTE GEHRUNGSSÄGE
DCS777
Herzlichen Glückwunsch!
Sie haben sich für ein Gerät von
entschieden. Langjährige
Erfahrung, sorgfältige Produktentwicklung und Innovation machen
zu einem zuverlässigen Partner für professionelle Anwender
vonElektrowerkzeugen.
Technische Daten
DCS777
Spannung V 54
Typ 1
XPS Ja
Abgabeleistung W 1750
Sägeblattdurchmesser mm 216
Sägeblattbohrung mm 30
Max. Messerdrehzahl U/min 6300
Gehre (max. Positionen) links und rechts 50°
Gehrung (max. Positionen) links 48°
Doppelgehrungsschnitte Neigung 45°
Gehrung 45°
Leistungsfähigkeit
Querschnitt 90° mm 60 x 270
Gehrung 45° mm 60 x 190
Gehrung 48° mm 60 x 180
Neigung 45° mm 48 x 270
Neigung 48° mm 45 x 270
Gesamtabmessungen mm 460 x 560 x 430
Gewicht kg 15,0
Lärmwerte und Vibrationswerte (Triax-Vektorsumme) gemäß EN61029:
L
PA
(Schalldruckpegel) dB(A) 91
L
WA
(Schallleistung) dB(A) 102
K (Schallleistung Unsicherheit) dB(A) 3,2
Vibrationsemissionswert a
h
= m/s² 2,1
Messungenauigkeit K = m/s² 1,5
Der in diesem Informationsblatt angegebene Geräuschemissionswert
wurde gemäß einem standardisierten Test laut EN61029 gemessen und
kann für einen Vergleich zwischen zwei Geräten verwendet werden. Er kann
zu einer vorläufigen Einschätzung der Exposition verwendet werden.
WARNUNG: Der angegebene Geräuschemissionswert bezieht
sich auf die Hauptanwendung des Gerätes. Wenn das Gerät jedoch
für andere Anwendungen, mit anderem Zubehör oder schlecht
gewartet eingesetzt wird, kann die Geräuschemission verschieden
sein. Dies kann den Expositionsgrad über die Gesamtbetriebszeit
erheblicherhöhen.
Eine Schätzung der Vibrationsstärke sollte auch berücksichtigen, wie
oft das Gerät ausgeschaltet wird oder über welche Zeit es zwar läuft,
aber nicht wirklich in Betrieb ist.
Dies kann die Exposition über die Gesamtbetriebszeit erheblich
mindern. Identifizieren Sie zusätzliche Sicherheitsmaßnahmen, um
den Bediener vor den Vibrationsauswirkungen zu schützen, wie: Erhalt
des Werkzeugs und Zubehörs, Hände warm halten, Organisation
vonArbeitsmustern.
Akku DCB546
Akkutyp Li-Ion
Spannung V
GS
18/54
Leistung Ah 6,0/2,0
Gewicht kg 1,05
Ladegerät DCB118
Netzspannung V
WS
230
Akkutyp 18/54 Li-Ion
Ungefähre Ladedauer
der Akkus
min 22 (1,3 Ah) 22 (1,5 Ah) 30 (2,0 Ah)
45 (3,0 Ah) 60 (4,0 Ah) 75 (5,0 Ah)
60 (6,0 Ah)
Gewicht kg 0,66
Das DCB118-Ladegerät kann mit 18V Li-Ion XR und XRFLEXVOLT
TM
-
Akkupacks verwendet werden (DCB181, DCB182, DCB183, DCB183B,
DCB184, DCB184B, DCB185 und DCB546).
Sicherungen:
Europa 230V Werkzeuge 10 A Stromversorgung
EG-Konformitätserklärung
Maschinenrichylinie
Kabellose, kompakte Gehrungssäge
DCS777
erklärt hiermit, dass diese unter Technische Daten beschriebenen
Produkte die folgenden Vorschriften erfüllen:
2006/42/EG, EN61029-1:2009+A11:2010, EN61029-2-9:2012 + A11:2013.
Diese Produkte erfüllen auch die Anforderungen von Richtlinie, 2014/30/
EU und 2011/65/EU. Für weitere Informationen wenden Sie sich bitte an
unter der folgenden Adresse oder schauen Sie auf der Rückseite
dieser Betriebsanleitungnach.
Der Unterzeichnete ist verantwortlich für die Zusammenstellung des
technischen Dossiers und gibt diese Erklärung im Namen von
ab.
Markus Rompel
Technischer Direktor
, Richard-Klinger-Straße 11
D-65510 Idstein, Deutschland
20.07.2016
WARNUNG: Zur Reduzierung der Verletzungsgefahr bitte
die Bedienungsanleitunglesen.
Sicherheitsanweisungen
WARNUNG: Lesen Sie alle Sicherheitswarnhinweise und
alle Anweisungen. Das Nichtbeachten von Warnhinweisen und
Anweisungen kann zu elektrischem Schlag, Brand und/oder schweren
Verletzungenführen.
BEWAHREN SIE ALLE WARNHINWEISE UND
ANWEISUNGEN ZUM SPÄTEREN
NACHSCHLAGEN AUF
 Loading...