15
DANSK
VEDLIGEHOLDELSE
Dit
el-værktøj er konstrueret til at fungere i lang tid med minimal
vedligeholdelse. Vedvarende tilfredsstillende funktion er afhængig af, om
værktøjet plejes korrekt og rengøresregelmæssigt.
ADVARSEL: For at mindske risikoen for alvorlige personskader,
skal maskinen slukkes og batteriet tages ud, inden der
foretages justeringer eller tilbehør eller udstyr af- eller
påmonteres. En utilsigtet start kan forårsagekvæstelser.
ADVARSEL: Hvis savklingen er slidt, skal denudskiftes.
Smøring
Dit el-værktøj skal ikke smøresyderligere.
Rengørin
Kontrollér omhyggeligt savklingens øverste beskyttelsesskærm, den
bevægelige nedre beskyttelsesskærm såvel som støvopsamlingsrøret for at
være sikker på, at de fungerer korrekt. Sørg for at spåner, støv eller partikler
fra arbejdsemnet ikke kan føre til blokering af en affunktionerne.
I tilfælde af at fragmenter fra arbejdsemnet sidder fast mellem savklingen
og beskyttelsesskærme, skal maskinen frakobles strømforsyningen og de
instruktioner, der findes i afsnittet Montering af savklingen følges. Fjern de
fastklemte dele og genmontérsavklingen.
ADVARSEL: Blæs støv og snavs ud af hovedhuset med tør luft,
lige så snart der samler sig snavs i og omkring luftaftrækket. Bær
godkendte beskyttelsesbriller og godkendt støvmaske ved udførelse af
denneprocedure.
ADVARSEL: Brug aldrig opløsningsmidler eller andre kraftige
kemikalier til at rengøre værktøjets ikkemetalliske dele. Disse kemikalier
kan svække de materialer, der anvendes i disse dele. Brug en klud, der
kun er fugtet med vand og mild sæbe. Lad aldrig væske trænge ind i
værktøjet, og nedsænk aldrig dele af værktøjet i envæske.
ADVARSEL: For at reducere risikoen for kvæstelser skal
bordpladen rengøresregelmæssigt.
ADVARSEL: For at reducere risikoen for kvæstelser skal
støvopsamlingssystemet rengøresregelmæssigt.
Valgfrit tilbehør
ADVARSEL: Eftersom andet tilbehør, end det, der tilbydes af
, ikke er afprøvet med dette produkt, kan det være farligt at
bruge sådant tilbehør med dette værktøj. For at reducere risikoen
for kvæstelser, må dette produkt kun anvendes med tilbehør, som
anbefales af
.
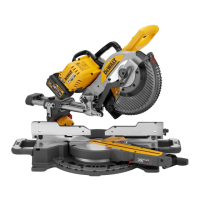
Type savklinger til rådighed (anbefalede klinger)
Klingetype Klingedimensioner
(diameter x boring x antal
tænder)
Brug
Serie DT4310 40 216x30x24 Normal brug, afkortning og lige skæring i
træ og plastik
Serie DT4286 40 216x30x80 TCG til aluminum
Serie DT4320 60 216x30x48 ATB til finskæring af kunstigt træ
og naturtræ
Serie DT4350 60 216x30x60 TCG til ekstra finskæring af kunstigt træ
og naturtræ
DT99568-QZ 216x30x24 24T Flexvolt klinge til generelle formål,
snitning og tværsnitning
DT99569-QZ 216x30x36 36T Flexvolt klinge til finsnitning
DT99570-QZ 216x30x60 60T Flexvolt klinge til ultrafin snitning
Ret henvendelse til din forhandler vedr. yderligere oplysninger mhp. det
passendetilbehør.
Miljøbeskyttelse
Separate Sammlung. Produkte und Batterien, die mit diesem
Symbol gekennzeichnet sind, dürfen nicht im normalen Hausmüll
entsorgtwerden.
Produkte und Batterien enthalten Materialien, die
zurückgewonnen oder recycelt werden können, um den Bedarf an
Rohstoffen zu reduzieren. Bitte recyceln Sie elektrische Produkte und
Batterien gemäß den lokalen Bestimmungen. Weitere Informationen
erhalten Sie unter www.2helpU.com.
Genopladelig batteripakke
Dette batteri har en lang levetid, men skal udskiftes, når det ikke afgiver
tilstrækkelig effekt ved opgaver, der før var lette at udføre. Ved afslutningen
af batteriets rimelige levetid bortskaffes det på en miljøsikker måde:
• Sørg for, at batteripakken er helt afladet og tag den derpå ud
afværktøjet.
• Litium-ion-celler er genanvendelige. Tag dem med til din forhandler
eller til den lokale genbrugsplads. De indsamlede batteripakker vil blive
genanvendt eller korrektbortskaffet.
 Loading...