7
English
L
FIG. 2
I
M
E
J
F
G
D
H
C
A
B
K
N
ASSEMBLY (FIG. 3 - 5)
Assembling the Pole
1. To assemble the pole, line up the upper trimmer pole (F) and the
lower trimmer pole (G) as shown in figure 3. Press down the
latching button (O) and slide the upper pole into the lower pole.
Ensure the latching button engages the latch hole (P).
2. Secure the poles by tightening the middle bolt (Q) with the supplied
wrench (R) as shown in figure 4.
WARNING: Burn hazard. Do not submerge the battery
pack in any liquid or allow any liquid to enter the battery pack. Never
attempt to open the battery pack for any reason. If the plastic housing of
the battery pack breaks or cracks, return to a service center for recycling.
Storage Recommendations
1. The best storage place is one that is cool and dry, away from direct
sunlight and excess heat or cold.
2. For long storage, it is recommended to store a fully charged battery
pack in a cool dry place out of the charger for optimal results.
NOTE: Battery packs should not be stored completely depleted of
charge. The battery pack will need to be recharged before use.
SAVE THESE INSTRUCTIONS
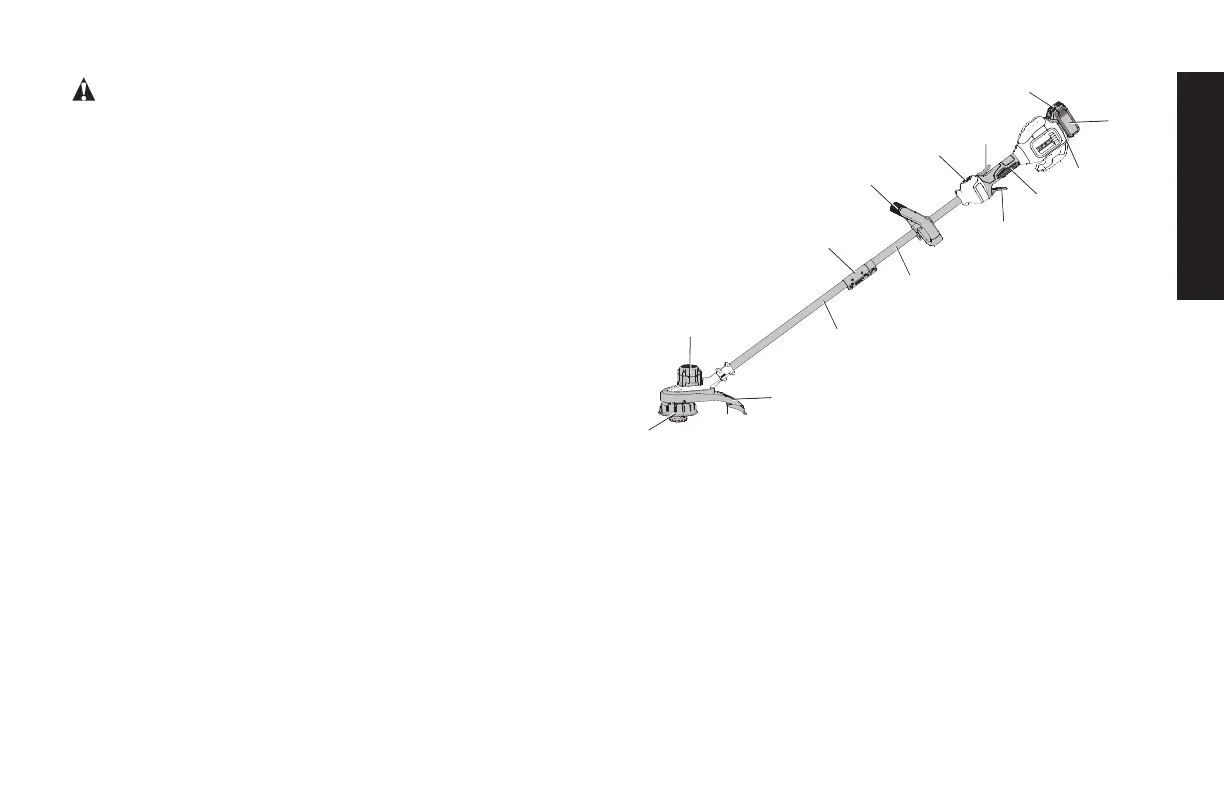
COMPONENTS (Fig. 2)
INTENDED USE
This string trimmers is designed for professional trimming applications
DO NOT use under wet conditions or in presence of flammable
liquids or gases.
This string trimmer is a professional appliance. DO NOT let children
come into contact with the tool. Supervision is required when
inexperienced operators use this appliance.
A. Variable speed trigger H. Pole bracket
B. Lock-off lever I. Guard
C. Speed control switch J. Spool housing
D. Auxiliary handle K. Battery housing
E. Motor housing L. Battery pack (may not be
included)
F. Upper trimmer pole M. Battery release button
G. Lower trimmer pole N. Handle