4
English
• The label on your tool may include the following symbols. The
symbols and their definitions are as follows:
V ............ volts A ............amperes
Hz .......... hertz W ........... watts
min ......... minutes
..........alternating current
....... direct current
n
o ...........no load speed
........... Class I Construction ...........earthing terminal
............... (grounded)
............ Class II Construction ...........safety alert symbol
............... (double insulated)
BPM....... beats per minute …/min .... revolutions or
sfpm ...... surface feet
............... reciprocation
.............. per minute (sfpm) ..............per minute
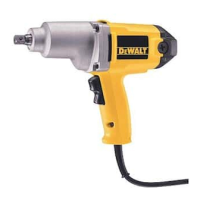
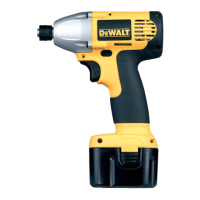
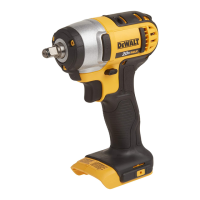
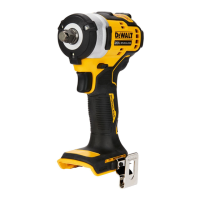
DESCRIPTION (FIG. 1)
DW292
DW294
DW293
A
A
B
B
FIG. 1
WARNING: Never modify the tool
power or any part of it. Damage or
personal injury could result.
A. Switch
B. Anvil
OPERATION
WARNING: Always observe the
safety instructions and applicable
regulations.
WARNING: To reduce the risk of
injury, turn unit off and disconnect
tool from power source before
installing and removing accessories,
before making any adjustments or
removing/installing attachments or
accessories.
Motor
Your DEWALT tool is powered by a DEWALT built motor. Be sure
your power supply agrees with the nameplate marking.
Volts 50/60 Hz or “AC only” means your tool must be operated on
alternating current and never with direct current.
Voltage decrease of more than 10% will cause loss of power and
overheating. D
EWALT tools are factory tested; if this tool does not
operate, check power supply.
Motor Brushes
This DEWALT tool uses an advanced brush system which auto-
matically stops the tool when the brushes wear out. This prevents
seri ous damage to the motor.
Switch
Pressing the BOTTOM part of the switch (A) runs the tool in forward
(right-hand thread) direction. Pressing the TOP of the switch
reverses motor direction. This allows "rocking" fasteners to break
them loose.
Anvil with Detent Pin
To install a socket on the anvil (B), align the hole in the side of the
socket with the detent pin on the anvil. Press the socket on until the
detent pin engages in the hole. To remove a socket, depress the
detent pin through the hole, using a small, pointed object, and pull
the socket off.
Impact Time
Many variables exist that will cause the torque available on any
fastener to vary considerably.