Do you have a question about the DeWalt DWE402N and is the answer not in the manual?
General warning to read and save all instructions for future reference to prevent injury.
Maintain a clean and well-lit work area to prevent accidents.
Avoid operating in explosive atmospheres due to sparks igniting flammable substances.
Ensure children and bystanders remain at a safe distance during operation.
Use matching plugs and outlets to reduce the risk of electric shock.
Prevent contact with grounded surfaces to reduce the risk of electric shock.
Keep tools dry to prevent increased risk of electric shock from water ingress.
Avoid using cords for carrying or pulling; keep them away from heat and sharp edges.
Use appropriate extension cords for outdoor use to reduce electric shock risk.
Utilize GFCI protection in damp locations to reduce the risk of electric shock.
Emphasizes staying alert, avoiding fatigue, and using common sense for safe tool operation.
Advises wearing appropriate protective gear like eye protection, gloves, and dust masks for injury prevention.
Instructions to ensure the switch is off before connecting power or handling the tool to prevent accidental starts.
Reminder to remove any tools left in the tool before operation to prevent injury.
Advises maintaining good footing and balance for better control and to handle unexpected situations.
Guidance on wearing appropriate clothing and avoiding loose items that could get caught in moving parts.
Instruction to properly connect and use dust extraction systems to reduce hazards.
Advises using the right tool for the job to ensure safety and efficiency.
Instructs to ensure the power tool's switch functions correctly before use, or it must be repaired.
Emphasizes disconnecting the tool from power before making adjustments or changing accessories to prevent accidental starts.
Guidance on storing tools out of reach of children and away from untrained users.
Advises regular checks for damage or misalignment and repairs before use.
Recommends keeping cutting tools sharp and clean for better control and reduced binding.
Instruction to use accessories according to manual guidelines and working conditions.
Recommends having tool serviced by qualified personnel using identical replacement parts for safety.
Covers basic safety for grinder, sander, wire brush, polisher, or cut-off tool operations.
Advises using only manufacturer-designed and recommended accessories for safe operation.
Ensures accessory speed rating meets or exceeds the tool's maximum speed to prevent breakage.
Stresses using accessories within the tool's capacity rating for proper guarding and control.
Ensures accessory mounting hardware matches the tool's spindle thread for balance and control.
Advises inspecting accessories for damage and testing them at no-load speed before use.
Details necessary PPE like face shields, goggles, dust masks, gloves, and aprons for various operations.
Instructs to keep bystanders away from the work area and ensure they wear PPE.
Advises holding the tool only by insulated surfaces to prevent shock from live wires.
Explains kickback as a reaction to pinched/snagged accessories causing sudden tool movement.
Advise a firm grip and body positioning to resist kickback forces, using auxiliary handles.
Keep hands away from the accessory's path to prevent it from kicking back over your hand.
Advise staying out of the tool's potential kickback path to avoid being struck.
Exercise caution on corners/edges to avoid snagging and kickback.
Prohibits using saw chain or toothed saw blades due to kickback risk.
Keep cords away from spinning accessories to prevent cutting or snagging.
Do not put the tool down until the accessory has completely stopped to prevent loss of control.
Avoid carrying the tool with a spinning accessory to prevent accidental snagging.
Regular cleaning of air vents prevents dust buildup and potential electrical hazards.
Do not operate the tool near flammable materials as sparks can ignite them.
Avoid using liquid coolants to prevent electrocution or shock.
Warns against using Type 11 (flaring cup) wheels as it can result in injury.
Emphasizes using and securely tightening the side handle for maximum tool control.
Advise testing new wheels for minute to detect cracks and prevent accidents.
Discourages using accessories not specified in the manual as it may be hazardous.
Recommend securing the workpiece with clamps for stability and control.
Advise against bouncing the wheel or rough handling, and to inspect for cracks if it occurs.
Instruction to handle and store abrasive wheels carefully to prevent damage.
Suggests limiting use time and using gloves to mitigate vibration-induced injuries.
Keep hands, clothing, and hair away from air vents to prevent them from being caught in moving parts.
Emphasizes using only recommended wheel types and specific guards for safety.
Ensures grinding surface of wheels is below guard lip for adequate protection.
Guard must be securely attached and positioned for maximum operator protection.
Use wheels only for their intended applications, e.g., not grinding with the side of a cut-off wheel.
Use undamaged, correctly sized flanges to support wheels and prevent breakage.
Warns against using wheels from larger tools as they may not suit the smaller tool's speed and could burst.
Avoid jamming the wheel or applying excessive pressure to prevent binding and breakage.
Avoid positioning body in the wheel's path to prevent injury from kickback.
If the wheel binds, stop the tool and hold it motionless until the wheel stops rotating.
Do not restart a cut while the wheel is binding; re-enter the cut after reaching full speed.
Support large workpieces to minimize pinching and kickback risk due to sagging.
Exercise extra caution for pocket cuts into blind areas to avoid hitting hidden utilities.
Do not use oversized sanding discs to avoid laceration hazards and snagging.
Ensure polishing bonnet strings are tucked away or trimmed to prevent entanglement.
Be aware that wire bristles can be thrown during operation; do not overstress the brush.
If a guard is recommended, ensure it does not interfere with the wire wheel or brush.
Mandates wearing face shields and safety goggles for wire brushing operations.
Emphasizes wearing safety glasses and appropriate face/dust masks as necessary.
Lists required certified safety equipment including eye, hearing, and respiratory protection.
Warns about hazardous chemicals in dust from sanding/grinding, known to cause cancer or birth defects.
Explains various symbols found on the tool label and their meanings.
Provides guidelines on selecting the correct wire size for extension cords based on length and amperage.
Recommends working in ventilated areas and using proper safety equipment to reduce chemical exposure.
Advises washing exposed skin and wearing protective clothing to minimize dust contact.
Recommends NIOSH/OSHA approved respiratory protection for dust exposure.
Advises wearing hearing protection conforming to ANSI S12.6 during use.
Reiteration to always wear eye protection conforming to ANSI Z87.1.
Instructs to place the grinder on a stable surface when not in use to prevent hazards.
Warns that accessories may loosen during coast-down, potentially causing injury.
Advise caution when working near corners or edges due to potential sudden tool movement.
Details guard requirements for various accessories like grinding wheels, cutting wheels, and wire brushes.
Provides step-by-step instructions for attaching, adjusting, and removing the keyless guard.
Verify power supply matches tool's nameplate marking for optimal performance.
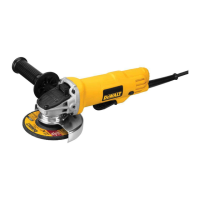
Specifies the tool's design for professional grinding, sanding, wire brush, and cut-off applications.
Warns against operating the tool in wet conditions or near flammable liquids/gases.
Highlights that these are professional tools and not for unsupervised children.
Emphasizes turning off and disconnecting the tool before making any adjustments or removing accessories.
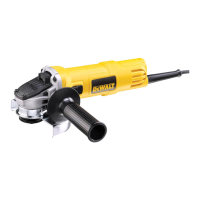
Instructions on how to attach the side handle to the gear case.
Steps to rotate the gear case 90° for improved user comfort during cutting operations.
Details the tool's capacity for grinding/cutting wheels and the importance of correct guards, pads, and flanges.
Stresses that accessories must be rated for tool speed and meet hub/arbor hole specifications.
Advises careful handling and storage of abrasive wheels to prevent damage.
Step-by-step guide for installing the keyless ONE TOUCH™ guard.
Instructions for rotating the guard for optimal positioning and removing it.
Details installing and positioning the Type 1 guard for operator protection.
Explains how to adjust and ensure the guard is securely fitted using the release lever.
Turn off and disconnect tool before making adjustments or removing accessories to prevent injury.
Stresses choosing correct guards and flanges for grinder accessories.
Mentions edge grinding/cutting with Type 27 wheels for specific purposes.
Instructions on operating the paddle switch and lock-off lever for starting and stopping the tool.
Details how to use the slider switch for starting and stopping the tool.
Advises switching tool on/off without load and allowing it to reach full speed before touching work.
Explains how the lock-on button provides comfort for extended use applications.
Describes the function of the spindle lock button for installing/removing wheels when the tool is off.
Provides instructions for mounting Type 27 and Type 42 wheels using included flanges.
Instructions on tool speed, pressure, angle, and movement for effective surface grinding.
Warns about potential wheel breakage or kickback when bending/twisting during edge grinding/cutting.
Details reaching full speed, minimum pressure, positioning, and cut angle for edge grinding.
Guide on choosing sanding disc grits for different material removal rates and finish quality.
Instructions for applying minimum pressure and maintaining an angle for sanding flap discs.
Step-by-step guide for mounting backing pads and sanding discs onto the spindle.
Discourages sanding lead-based paint due to high risk of lead poisoning.
Recommends precautions for sanding any paint, including personal safety and environmental considerations.
Advises on protective measures like dust masks, washing, and avoiding eating/drinking in the work area.
Guidelines for minimizing dust generation and tracking during paint removal.
Instructions for screwing wire brushes/wheels onto the spindle and tightening them.
Guidance on using wire brushes/wheels for rust, scale, paint removal and smoothing surfaces.
Advise continuous movement to avoid burning or swirling marks on the workpiece.
Mandates using the Type 1 guard for cutting wheels, available at extra cost.
Warns that failure to use proper flange and guard with cutting wheels can result in injury.
Provides steps for mounting and removing the Type 1 ONE TOUCH guard.
Instructions for installing the closed Type 1 guard for cutting wheels.
How to rotate and position the guard for maximum operator protection.
Ensuring the guard release lever snaps into alignment holes for security.
Step-by-step instructions for mounting Type 1 and Type 41 cutting wheels using correct flanges.
Warns against using edge grinding/cutting wheels for surface grinding due to potential breakage.
Guidelines for reaching full speed, applying minimum pressure, and maintaining cut angle for cutting wheels.
Advises blowing dirt and dust from air vents weekly, wearing eye protection.
Recommends using mild soap and water for cleaning non-metallic parts, avoiding solvents.
Advises using only DEWALT recommended accessories as others may be hazardous.
Recommends repairs, maintenance, and adjustments be performed by DEWALT service centers.
Encourages product registration for efficient warranty service.
Registration serves as proof of ownership for insurance purposes.
Registration allows contact in case of safety notifications.
Covers defects in materials/workmanship for three years, excluding normal wear or abuse.
Tool maintenance and worn part replacement for free during the first year.
Full refund within 90 days if not completely satisfied with the product.
Offers free replacement labels if they become illegible or missing.
| Quantity per pack | 1 pc(s) |
|---|