
B
Benjamin JonesAug 13, 2025
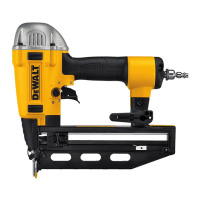
Why is my DeWalt DWFP71917 Nail Gun lacking power or cycling slowly?
- SSamuel SmithAug 13, 2025
If your DeWalt Nail Gun is experiencing a lack of power or is slow to cycle, several factors could be at play. It might be due to a broken cylinder cap spring, in which case you should replace the cap spring. Alternatively, cut or cracked rings/seals could be the issue, requiring their replacement. A blocked exhaust, often related to the bumper or head valve spring, should be checked. Other potential causes include a worn or leaky trigger assembly (replace the trigger assembly), dirt/tar buildup on the driver (disassemble the nose/driver to clean), or a cylinder sleeve not seated correctly on the bottom bumper (disassemble to correct). Also, ensure that the air pressure isn't too low by checking the air supply equipment, and that the air filter isn't clogged (clean or replace it).