8
ENGLISH
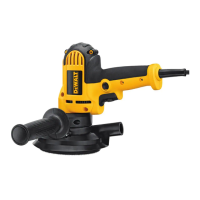
Tracking the Abrasive Belt (fi g. 2)
WARNING: Severe laceration hazard.
Properly adjust the tracking of the belt
to avoid it overhanging the housing. A
running belt overhanging the housing
can cause severe lacerations.
CAUTION: To reduce the risk of injury,
always be sure the switch is off before
connecting the tool to power source.
To prevent excessive wear on both the sander
and belt, NEVER allow the abrasive belt to rub on
the sander frame. To make sure that the belt is
tracking correctly, do the following:
1. Turn the tool over. Hold the rear handle with
the left hand so that the ring finger and the
little finger rest on trigger.
2. Squeeze the trigger to start the motor.
3. Turn the belt aligning knob (k) in either
direction until the edge of the belt is even with
the outer edge of the rear rubber-covered
pulley. The edge of the belt will extend beyond
the edge of the front pulley.
4. Release the trigger to stop the motor. Allow
the tool to come to a COMPLETE STOP
before turning it over and putting it down.
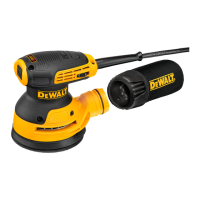
Dust Collection (fi g. 1, 3, 4)
WARNING: To reduce the risk
of injury, turn unit off and
disconnect it from power source
before installing and removing
accessories, before adjusting or
when making repairs. An accidental
start-up can cause injury.
WARNING: Empty dust collection
system frequently, especially when
sanding resin-coated surfaces such
as polyurethane, varnish, shellac,
etc. Dispose of coated dust particles
according to the finish manufacturer’s
guidelines, or place in a metal can with
a tight fitting metal lid. Remove coated
dust particles from the premises daily.
The accumulation of fine sanding dust
particles may self ignite and cause fire.
WARNING: Shock hazard. The use of
a vacuum hose and vacuum adapter
with the belt sander may generate
static electricity that could result in
startling static discharge.
Installing a New Belt (fi g. 1)
1. Place the sander on its left side.
2. Pull the lever (h) out toward the front of the
machine as shown. This will retract the idler
pulley (i) and release the tension on the
abrasive belt.
3. Remove the old belt.
4. Install the new belt with the arrow (printed on
the inside of the belt) on the top and pointing
TOWARD the idler pulley.
NOTE: Some sanding belts are bi-directional.
These belts will not have arrows printed on them.
They can be installed to run in either direction.
5. Engage the front pulley by pushing the lever
(h) back to its original position.
To Start and Stop the Belt Sander
(fi g.1)
WARNING: To reduce the risk of
injury, make sure the sander is not
resting on the workpiece when the
switch is turned on.
WARNING: To reduce the risk of
injury, check to see that the belt guard
is in place, secured, and working
correctly.
1. Be certain that the the switch is off and the
power circuit voltage is the same as the
voltage shown on the specification plate.
Connect the machine to the power circuit.
2. Squeeze the trigger (f) to start the motor.
Release the trigger to stop the motor.
3. To allow the motor to run without constantly
holding the trigger, press the trigger switch
(f), push and hold the lock button (e) while
releasing the trigger switch.
4. To release the lock button, squeeze the trigger
and release.
Variable Speed (fi g. 1)
The operating speed is adjustable between
270 m/min [meters per minute] and 440 m/min for
the 230V DWP352VS. For the 115V DWP352VS
the operating speed is adjustable between
235m/min and 380 m/min.
The speed is adjusted by turning the variable
speed dial (g). The first position provides the
slowest operating speed (270/235 m/min) while
position 6 is the fastest (440/380 m/min). The
speed can be changed either when the motor is
running or is stopped.