9
ENGLISH
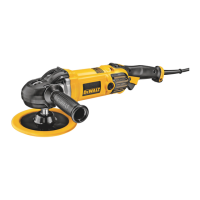
Proper hand position requires one hand on the
front handle (d), with the other hand on the main
handle (c).
To Operate
WARNING: To reduce the risk of
serious personal injury, do not use this
tool in a stand that would invert it for
use as a stationary belt sander. This
tool is not made for that application.
CAUTION: To reduce the risk of injury,
secure the work and maintain a firm
grip on the sander. Friction between
the sanding belt and the work will tend
to move the work backward and the
sander forward.
CAUTION: To reduce the risk of injury,
always be sure the switch is off before
connecting the tool to power source.
1. Hold the sander off the work before starting
the motor.
2. Lower the sander to the work, touching the
rear part of the belt first. Level the machine
when moving it forward.
3. Guide the machine over the work in
overlapping strokes. Allow the sander to do
the work.
4. Avoid applying excessive pressure. The weight
of the machine is usually sufficient for a fast
smooth finish. A slight increase in pressure
may speed removal of material, but too much
pressure will slow the motor and decrease
removal.
5. Work back and forth over a fairly wide area to
obtain an even surface.
6. Do not let the tool tilt. The edge of the belt
can make a deep cuts into the surface.
7. Do not pause in any one spot during the
sanding operation. The belt will eat into the
work and make the surface uneven.
8. Lift the tool from the work before turning the
motor off.
9. Always be sure that the motor has completely
stopped before putting the tool down.
MAINTENANCE
Your DEWALT power tool has been designed to
operate over a long period of time with a minimum
of maintenance. Continuous satisfactory operation
depends upon proper tool care and regular cleaning.
WARNING: Fire hazard. Do not use a
dust collection device when sanding
metal. Doing so creates a fire hazard,
which may cause serious personal
injury and/or damage to the tool.
CAUTION: To reduce the risk of injury,
do not operate the tool without a dust
bag.
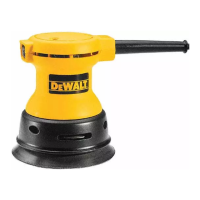
Before installing the dust chute, place the Oring
(n) onto the dust spout (b) between the two ribs
(Fig.3).
To install the dust chute (l), place the end with the
threaded knob (m) over the dust spout (b) and
rotate to preferred position. Tighten knob (m) to
secure dust chute to dust spout (Fig. 3).
To use with the dust bag (a), push dust bag onto
dust chute (l) until secure. Then position bag
so that the internal wire is on top. For the most
efficient operation, empty the dust bag when it is
approximately half full. Pull the dust bag off of the
dust chute, unzip the rear of the bag, and shake
out the dust. Every so often, turn the bag inside
out and brush the accumulated dust from the
inside.
The dust chute utilizes the D
EWALT AirLock
connection making it compatible with the DEWALT
dust extractor and AirLock accessory DWV9000
(Fig. 4).
OPERATION
Instructions for Use
WARNING: Always observe the safety
instructions and applicable regulations.
WARNING: To reduce the risk of
injury, turn unit off and disconnect
machine from power source before
installing and removing accessories,
before adjusting or changing
set-ups or when making repairs.
Be sure the trigger switch is in the OFF
position. An accidental start-up can
cause injury.
Proper Hand Position (fi g. 1)
WARNING: To reduce the risk of
serious personal injury, ALWAYS use
proper hand position as shown.
WARNING: To reduce the risk of
serious personal injury, ALWAYS hold
securely in anticipation of a sudden
reaction.