6
ENGLISH
Pairing the Dust Extractor with a Tool using
Wireless Tool Control™ Mode (Fig.A, G)
CAUTION: When the dust extractor is being controlled
with the remote or paired power tool it may start or stop
withoutwarning.
WARNING: Do not attach the remote strap to
movingparts.
To Pair with a DeWALT Remote or Wireless Tool
Control™ Tool
1. Turn the on/off tool control switch
14
to the position.
2. Press and hold the Wireless Tool Control™ pairing button
17
on
the extractor and pull the trigger on the Wireless Tool Control™-
Hose Diameter Adjustment (Fig.E)
Adjust the hose diameter control
15
to the correct hose (or
tube) inside diameter size (32mm or 20mm) or accessory
diameter referring to the largest section. The chosen diameter
of the adjustment control must be equal or bigger as the largest
diameter of the used hose/tube/ accessories. The hose supplied
is 32mm inside diameter. An acoustic alarm will sound if the
flow rate falls below 20m/s. The system has a time delay to
reduce unintendedalarms.
NOTE: Set the hose diameter regulator only to the yellow
marked diameter ranges of the connected suctionhose.
If the alarm sounds when there is no apparent blockage:
1. Ensure that the adjustment control is set to the correctdiameter.
2. If the flow rate adjustment is set below the maximum,
increase this level until sufficient flow through the hose
causes the alarm tostop.
3. If the alarm still continues to sound, remove hose and check
that it is clear. Remove and replace dust bag if full or blocked
and check filter condition and replace wherenecessary.
If the alarm continues to sound contact your local DeWALT
serviceagent.
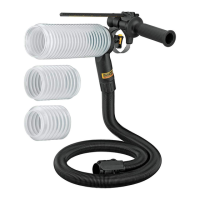
Connecting to Power Tools (Fig.C,D)
Your DeWALT construction dust extractor is fitted with the
DeWALT AirLock connection system. The AirLock allows for
a fast, secure connection between the suction hose
7
and
power tool. The AirLock connector
25
connects directly to
DeWALT compatible tools or through the use of an AirLock
adapter (available from your local DeWALT supplier). Refer to the
Accessories section for detail on available adapters.
NOTE: If using an adapter ensure it is firmly attached to the tool
outlet before following the steps below.
1. Ensure the collar on the AirLock connector is in the unlock
position. Align notches
26
on collar and AirLock connector
as shown for unlock and lock positions.
2. Push the AirLock connector onto the adapter connector point.
3. Rotate the collar to the locked position.
NOTE: The ball bearings inside collar lock into slot and secure
the connection. The power tool is now securely connected to
the dust extractor.
OPERATION
Dry Vacuum Operation (Fig.E)
WARNING: Always observe the safety instructions and
applicableregulations.
WARNING: To reduce the risk of injury, turn
appliance off and disconnect appliance from power
source before installing and removing accessories,
before adjusting or changing set-ups or when
making repairs. An accidental start‑up can causeinjury.
1. Plug the power cord into an appropriateoutlet.
2. Set the hose diameter adjuster
15
to the diameter of the
connectedhose.
3. Turn the on/off tool control switch
14
to the ON position
).
4. Set the variable suction dial
13
to the desired position.
This feature allows the user to control the vacuum's power,
suction andnoise.
NOTE: This setting also controls the level of suction. This
is very useful in applications where the vacuum creates
unacceptable levels of drag to the workpiece.
5. Follow the direction under Connecting to Power Tools to
connect to the power tool to beused.
NOTE: Refer to Pairing the Dust Extractor with a Tool using
Wireless Tool Control™ Mode to use the dust extractor with a
Wireless Tool Control™ equipped tool or remote.
Filter Care
Class H filters must not be cleaned manually. If the filter is
clogged, it must be disposedof.
The filters included with this vacuum are long life filters. To be
effective in minimizing dust recirculation, the filters MUST be
installed correctly and in goodcondition.
WARNING: Appropriate personal protective equipment
like dust mask and gloves should be used while handling
thefilters.
WARNING: Dispose of the used filter in accordance with
the legalregulations.
Remove / Change Used Dust Collection Bag
WARNING: Appropriate personal protective equipment
like dust mask and gloves should be used while handling
used dustbags.
1. Turn off vacuum and unplug cord fromoutlet.
2. To remove the suction hose, close the twist-lock hose
inlet
10
with the inlet plug
20
.
3. Unlatch canister latches
4
and remove vacuum head
3
4. Pull the collection bag carefully frominlet.
5. Seal the collection bag opening tightly with adhesive
tape or a cable tie (not included) when removing it from
themachine.
6. Dispose of collection bag in appropriate container according
to statutoryprovisions.

 Loading...