FEATURES / FUNCTIONS
3
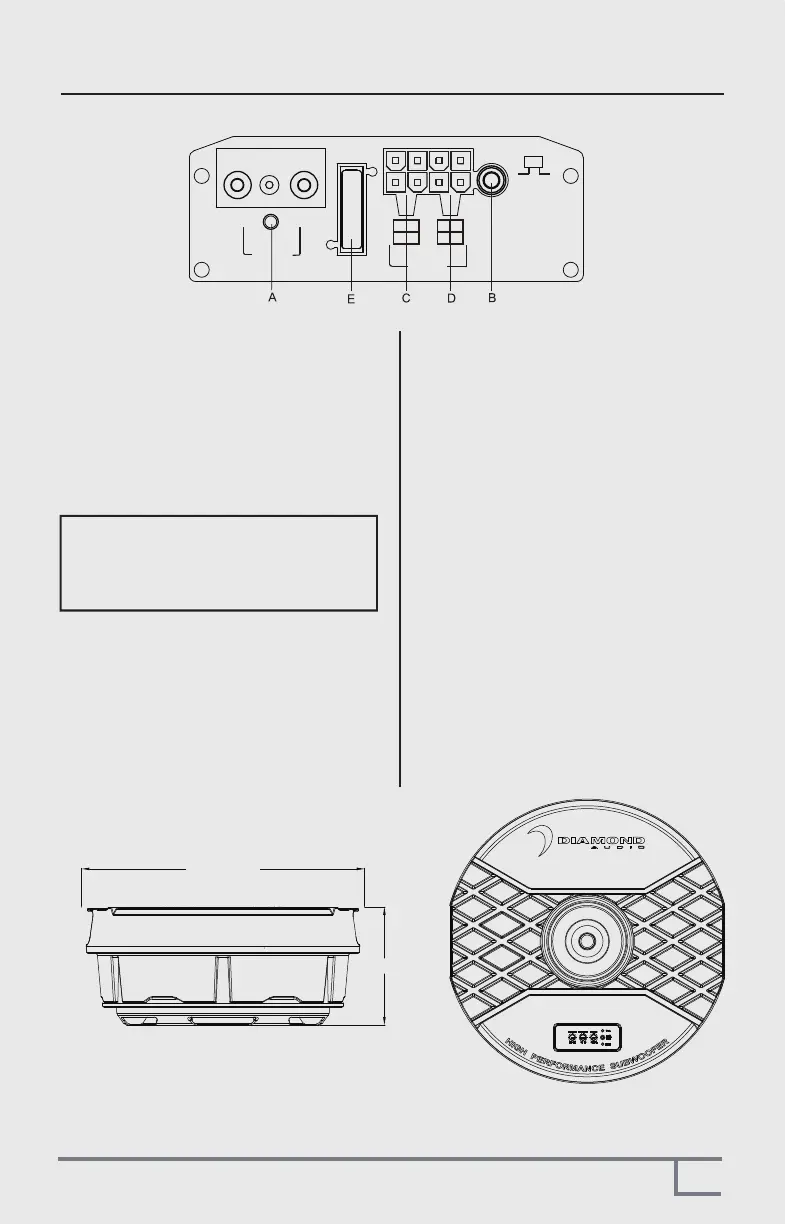
A.POWER STATUS LED
AUTO POWER CIRCUIT
The AUTO POWER circuit is for high level
(speaker-level) connections. When the speaker
level connections are used AND the remote
turn on wire is NOT used the subwoofer will
AUTO POWER ON when signal is detected.
If the amplifier detected no signal input, the
amplifier will auto turn off.
You MUST use the Remote Control as this is
used to set up level and See G on its functions
B.REMOTE LEVEL CONTROL PORT
.
C.HIGH LEVEL (speaker level) INPUTS
If your head unit does not have RCA outputs
you can use the speaker outputs for the audio
source for the subwoofer. Use the supplied
cable and wire harness and connect the
outputs properly as shown in the connection
diagram in this manual (FIG2, PG5)
There is a GREEN “power” LED that glows
green when power is on and no problems are
present. If the protection circuit (PRO) comes
on, it will illuminate the other LED RED
E.FUSE
Do not use a fuse with a different value
and NEVER replace the fuse with a wire
or coin. The fuse is there to protect the vehicle
NOT the amplifer/subwoofer.
Note: Please connect the remote terminal
to the remote output of head unit as in
Fig.4. When you hear the unit turn ON/OFF
there should be a very slight POP noise
from the subwoofer.
D.LOW LEVEL RCA INPUTS
Low level inputs are the recommended way
to introduce the audio signal to the subwoofer.
IF RCA outputs are present on your head unit
or other signal source (such as a sound
processor - see FIG 1, PG4).
NOTE: NEVER CONNECT BOTH RCA AND
SPEAKER INPUTS SIMUALTANEOUSLY!!
POWER
GND +12V
REM
REMOTE
R-
R+
L-L+
FUSE
R-
R+
L-
L+
LOW HI
OFFON
INPUTS
AUTO
POWER ON
5.9"/150mm
Ø14.2" /360mm
 Loading...