Page 9;&(%$*4.8"4,7%<'*#$"&8#=%/7*,#*%4,77%>?@@@?@AA?BCDC1Item 57087
EF;6GHIJ6KFGLIMNFLMG6MFMO6 E6GPJ
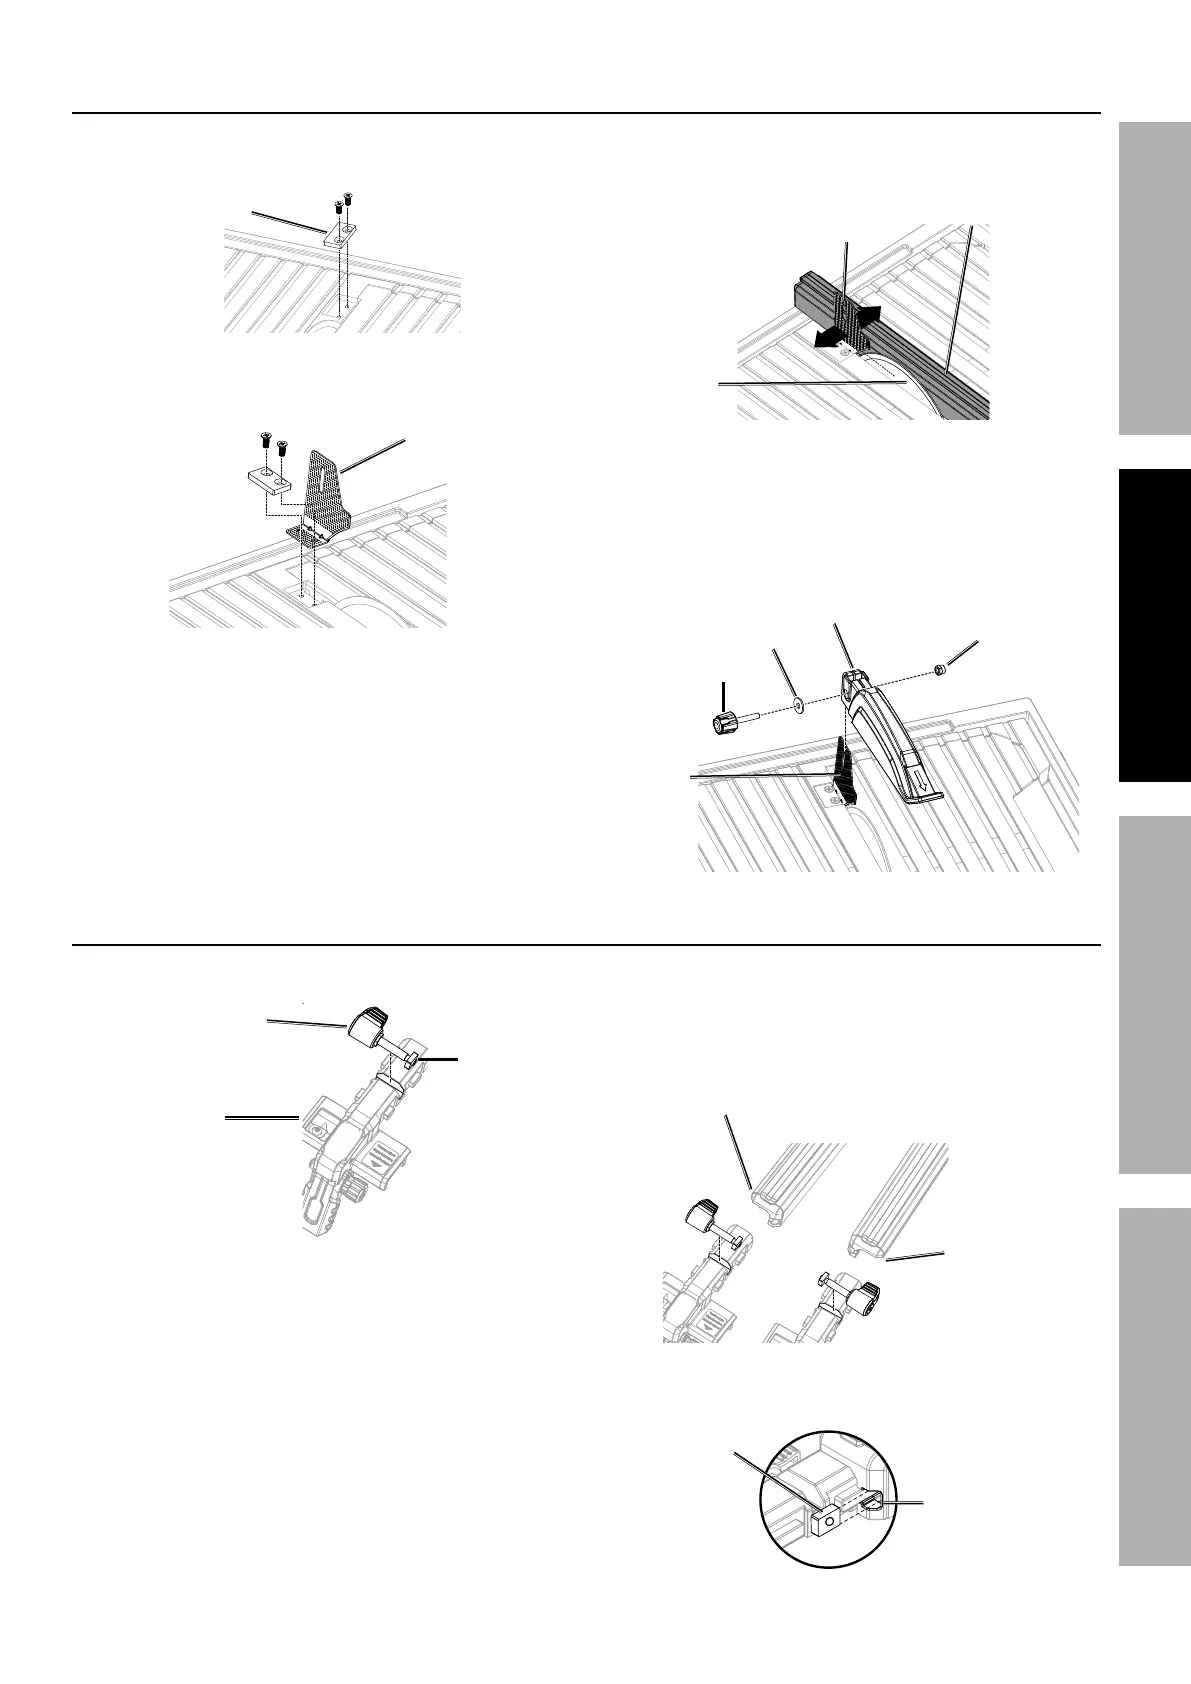
L8#$,77"83%$.*%S7,9*%R',(9
1. Use a screwdriver to remove screws from
Rivet Plate. Remove Rivet Plate from slot.
K"W*$%J7,$*
2. Position Riving Knife in empty slot and replace Rivet
Plate on top. Secure Plate and Knife with screws.
K"W"83%^8"2*
3. Align Riving Knife with Saw Blade. If necessary,
use Rip Fence as an alignment tool. (See
′Installing the Rip Fence′ section).
K"/%;*84*
E,)%
S7,9*
K"W"83%^8"2*
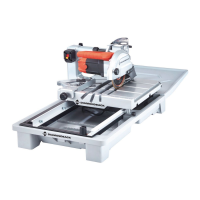
4. Slide Blade Guard over Riving Knife and align
holes in guard with slot in the knife. Place
Lock Nut into corresponding slot in the guard
and hold in place. Thread Lock Nut with Knob
through washer, blade guard and riving knife.
Use Knob to tighten to the desired height.
S7,9*%R',(9
T&4`%M'$
^8&+
Q,#.*(
K"W"83%
^8"2*
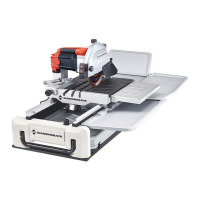
L8#$,77"83%$.*%K"/%;*84*
1. Place Lever Knob into open slot on Locking Lever.
T*W*(%
^8&+
T&4`"83%
T*W*(
^8&+%
M'$
2. Install Lever Knob on either side of the Locking
Lever depending on which side of the Saw the
Rip Fence will be placed. Lever Knob must be
installed opposite of the flat side of Rip Fence rail.
;*84*%(,"7%
("3.$%#"9*
;*84*%(,"7%
7*2$%#"9*
3. Align Knob Nut on Locking Lever with the
corresponding slot on the Rip Fence.
^8&+%M'$
K"/%;*84*