12
PM-000005 - Trencher Operators Manual - December 2012
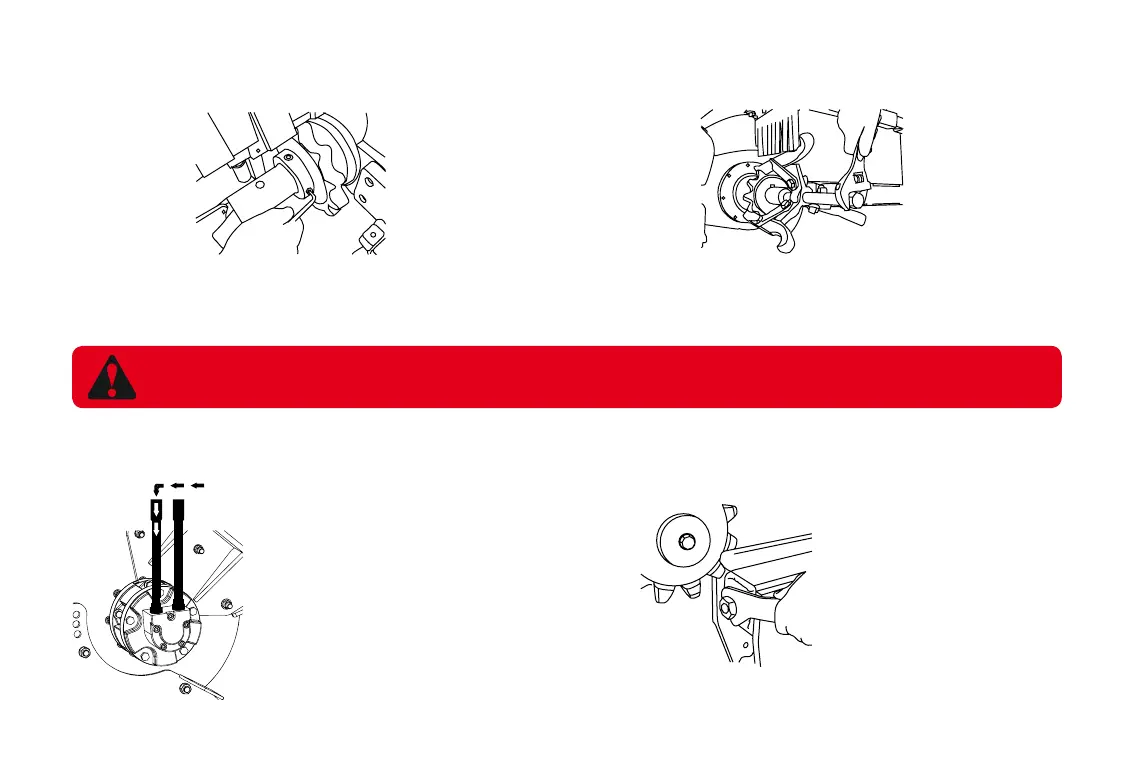
SPROCKET REPLACEMENT
Firstly remove ½” bolt holding the auger, then remove auger.
Using a 3/16” Allen key loosen the 2 grub screws in the
retaining collar and slide collar off the shaft. (shown in Fig 1).
Slide the sprocket off the shaft and replace with new sprocket. It is
recommended Anti-seize be applied to shaft before replacement of
sprocket (Shown in Fig 2)
Fig 1
Fig 2
5 mainTenance
BOOM ADJUSTMENT
iMPORTANT: ShuT dOwN TReNcheR & MAchiNe beFORe ANy AdjuSTMeNTS ARe MAde
1. Use spanner supplied to
wind adjuster nut clockwise
for loosening, anti-clockwise
for tightening
a
b
suPPly from machine
1. The Trencher chain must rotate
in an anti-clockwise direction (when
viewed from the Motor side of the
Trencher). The Supply Line from the
Parent machine must be connected
to the ‘A’ port on the Trencher Motor
HYDRAULIC HOSE CONNECTION
NOTE: IF THE SPROCKET CANNOT BE REMOVED BY TAPPING WITH A HAMMER THEN A PULLER MAY
HAVE TO BE USED.