© 2017 DIGIPAS TECHNOLOGIES INC. All Rights Reserved.
CHAPTER 2: SETTING UP
Operation Procedure
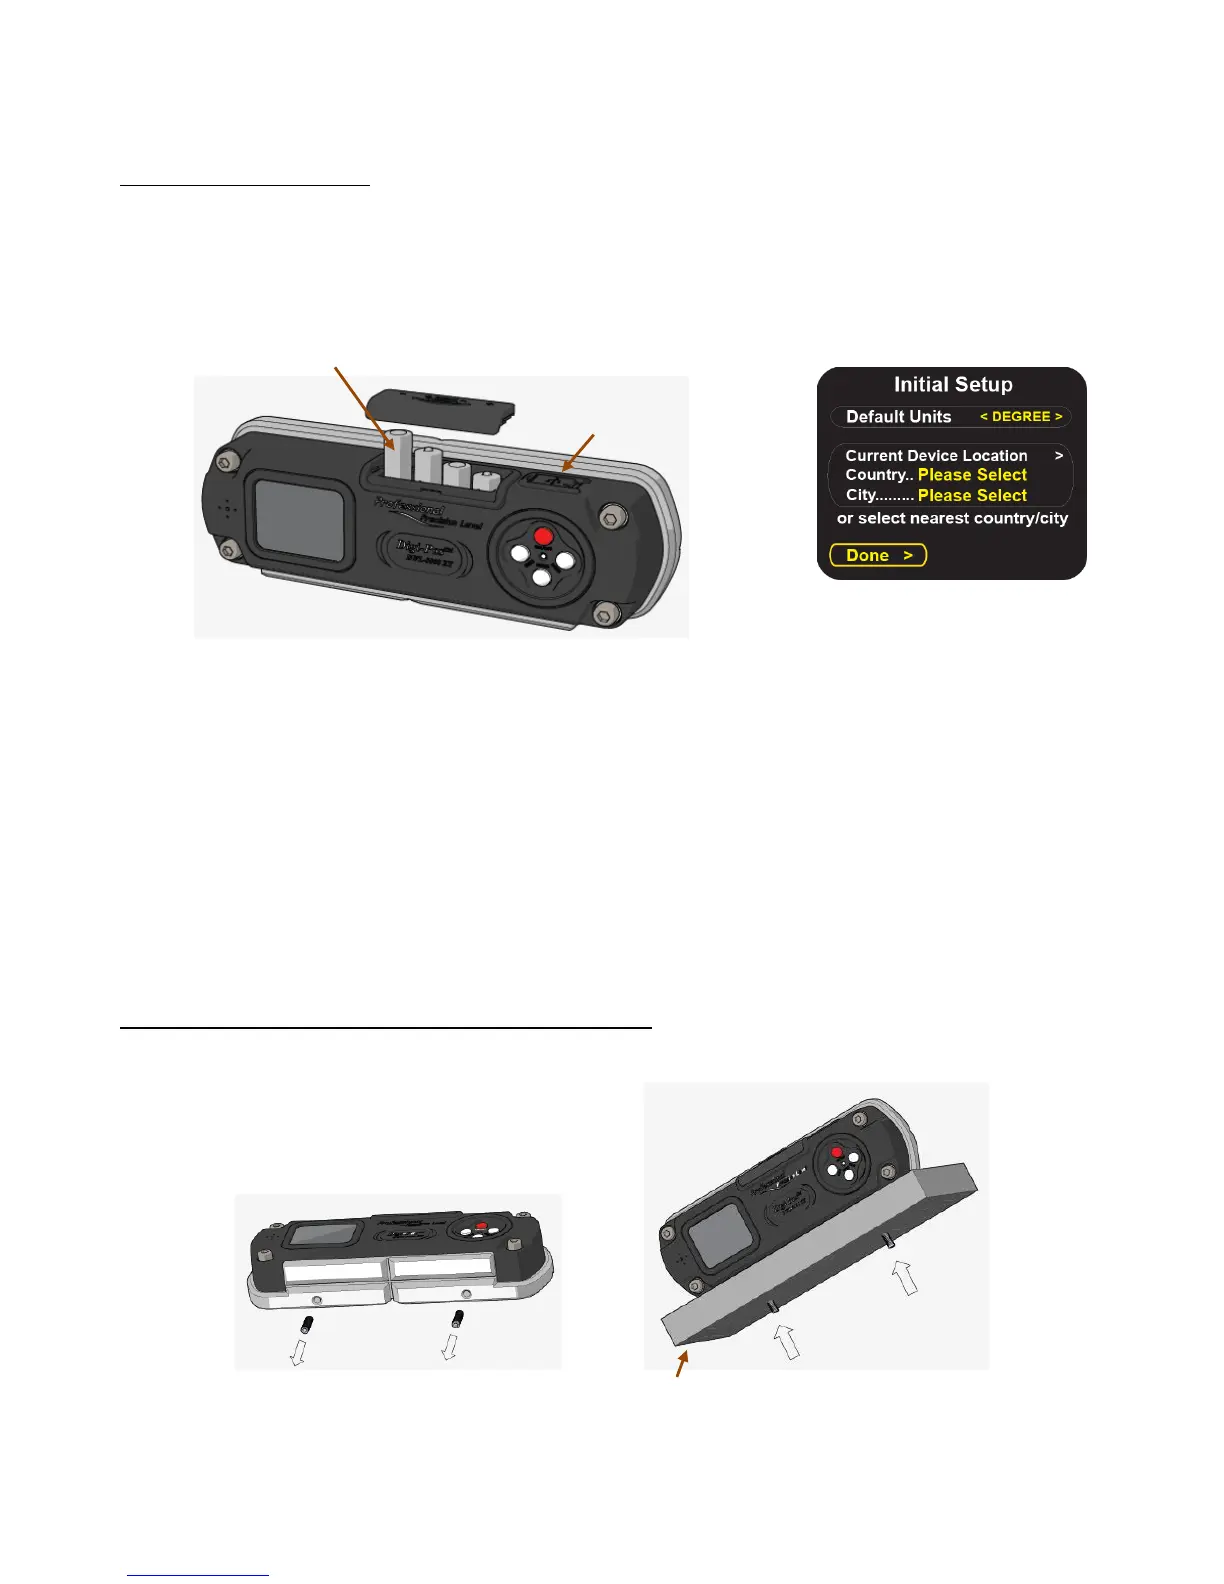
1. Insert 4 pieces of "AAA" batteries into the battery compartment and press ON/OFF button. Alternatively,
insert USB power source to the USB Port to power up the device. Take note that the device performance
might be affected when poorly regulated USB power source is used.
2. Initial Setup screen pops up. Press ON/OFF button to scroll up or MODE button to scroll down for
selecting ''Default Units'' or ''Current Device Location''. Press ''UNITS'' or ''HOLD'' button to input the
selected option. Select the nearest option when your location is not available in the default list. Scroll to
select ''Done'' to continue.
3. Allow sufficient time for device to warm up and stabilise after turning on the device. The device is ready
to use.
Note: For maximum accuracy, perform calibration (refer to APPENDIX: User Calibration) or Absolute
Level (refer to Chapter 4: Absolute Level for more details) before measurement.
Mounting Device On Fixture or Work Piece
The two threaded holes are provided for mounting the device onto user-defined fixtures/machinery.
To mount the device onto user’s defined fixture or work piece. Remove both the set screw (M5), then
replace with appropriate type of screws specified by user.
Battery: 4 x “AAA” size 1.5V batteries
(Take note on the battery’s polarity as indicated on top of the battery cover)
 Loading...