Quick Start Guide
Digi® Smart Gateway™
Transportation Package
1 Verify components
Included equipment:
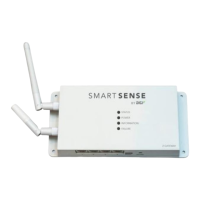
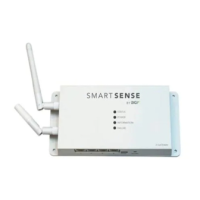
Smart Gateway
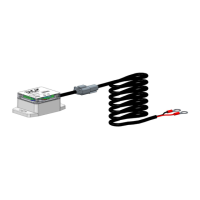
HCtemp Sensor(s)
Additional equipment (not included):
n Zip ties
n Mounting screws
n Silicone sealant
2 Follow installation guidelines
The following table describes where to install each Smart Gateway component, as it relates to a 3-zone installation.
Item Name Notes
1
Smart Gateway Installed in the refrigeration unit and powered by the battery.
2
HCtemp Sensor(s)
Installed in the zones of your trailer. The image on the right
shows an example of a 3-zone trailer.
Note Operate only indoor when used in band 5150-5250 MHz to reduce the potential for harmful
interference to co-channel mobile satellite systems.
Note High-power radars are allocated as primary users (that is, priority users) of bands 5250-5350 MHz and 5650-5850 MHz and that these
radars could cause interference and/or damage to LE-LAN devices.
3 Install the Smart Gateway
Install the Smart Gateway on the inside of the refrigeration cabinet or on the external wall of the trailer next to the refrigeration cabinet.
To install the Smart Gateway inside of the refrigeration cabinet:
Secure the Smart Gateway toward the top of the cabinet and make sure it is stable and cannot move or come loose.
a. Connect the 3/8 inch ring terminals to the 12 V battery terminals in the refrigeration unit.
Note: The red wire connects to the positive (+) terminal of the battery. The black wire connects to the battery ground (-).
b. Verify the Smart Gateway power LED:
n Solid blue LED on Legacy (non-cellular) gateways indicates power.
n Solid green LED on Late Model (cellular) gateways indicates power.
If NO POWER, make sure the cable ring terminals are securely connected to the battery.
c. Run the cable along the inside wall of the refrigeration unit and use zip ties to secure excess cable length.
d. Use screws to secure the Smart Gateway high up and on the inside of the refrigeration cabinet. Typically, you can secure it to a crossbar.
Verify that the Smart Gateway is tightly fastened so that it cannot move or come loose.
e. Make note of the Smart Gateway ID(such as A001234) and the trailer ID it is installed in. You will need this information for updating the
Digi Host with the Trailer Number/ID information.
To install the Smart Gateway on the exterior wall (outside of the reefer cabinet):
Secure the Smart Gateway to the exterior wall of the trailer using machine tap screws.
a. Mark the mounting hole locations.
b. Drill a pilot hole for the tap screws.
c. Apply silicone sealant to the pilot holes.
d. Mount the Smart Gateway to the trailer wall using the tap screws.
e. Run the cable along the wall of the refrigerator unit and use zip ties to secure excess cable length.
f. Connect the 3/8 inch ring terminals to the 12 V battery terminals in the refrigeration unit.
Note: The red wire connects to the positive (+) terminal of the battery. The black wire connects to the battery ground (-).
© 2017 Digi International Inc.
Digi, Digi International, and the Digi logo are trademarks or registered trademarks in the United States and other countries worldwide. All other trademarks mentioned in this
document are the property of their respective owners.