19
English
accidental events.
For the duration of warranty on
conformity defects please re-
fer to the specific provisions of
national laws applicable in the
country of purchase, where pro-
vided.
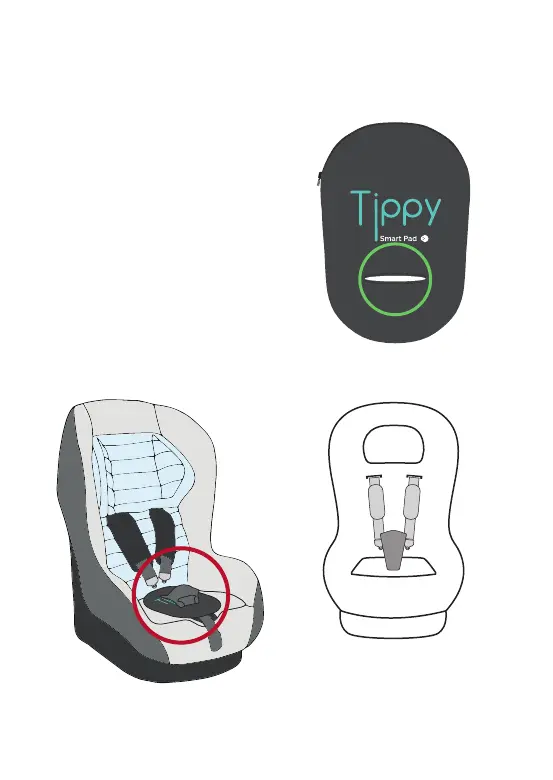
2. Installation of
Tippy on child seat
1. 1. Install Tippy on child seat
(as shown in
Picture 1
) and let
the anchoring of safety belt (red
circle) pass through the horizon-
tal split (green circle in
Picture 2
).
Picture 1. Correct installation of
Tippy on child seat.
Picture 2. Horizontal split of
Tippy.
Step 1.