4.Installing Tx1500
1 Prepare the Turnstile assembly
th
tep:S
The floor where the turnstile will be fixed must meet the following specifications:
a. 1,6mm x l 1,4mm xDimensions: Direction of flow columns width concrete
height
10 cm;
b. ;Necessary height: 2. meters5
c. ;Level the floor for better product performance
d. ;Floor specification (FCK15 M.P.A. concrete or equivalent)
e. 1,6m
x 1,4m x 2,6m.Floor specification (FCK15 M.P.A. concrete or equivalent)
Power point input and network cable can be on the floor, preferably at point 3 or
overhead pipes.
Obs.:The dimensions of the concrete block and power inputs are only a suggestion.
The client can choose smaller bases (footing) at the fixing points (determined by
template).
List of tools for assembling the Turnstile:
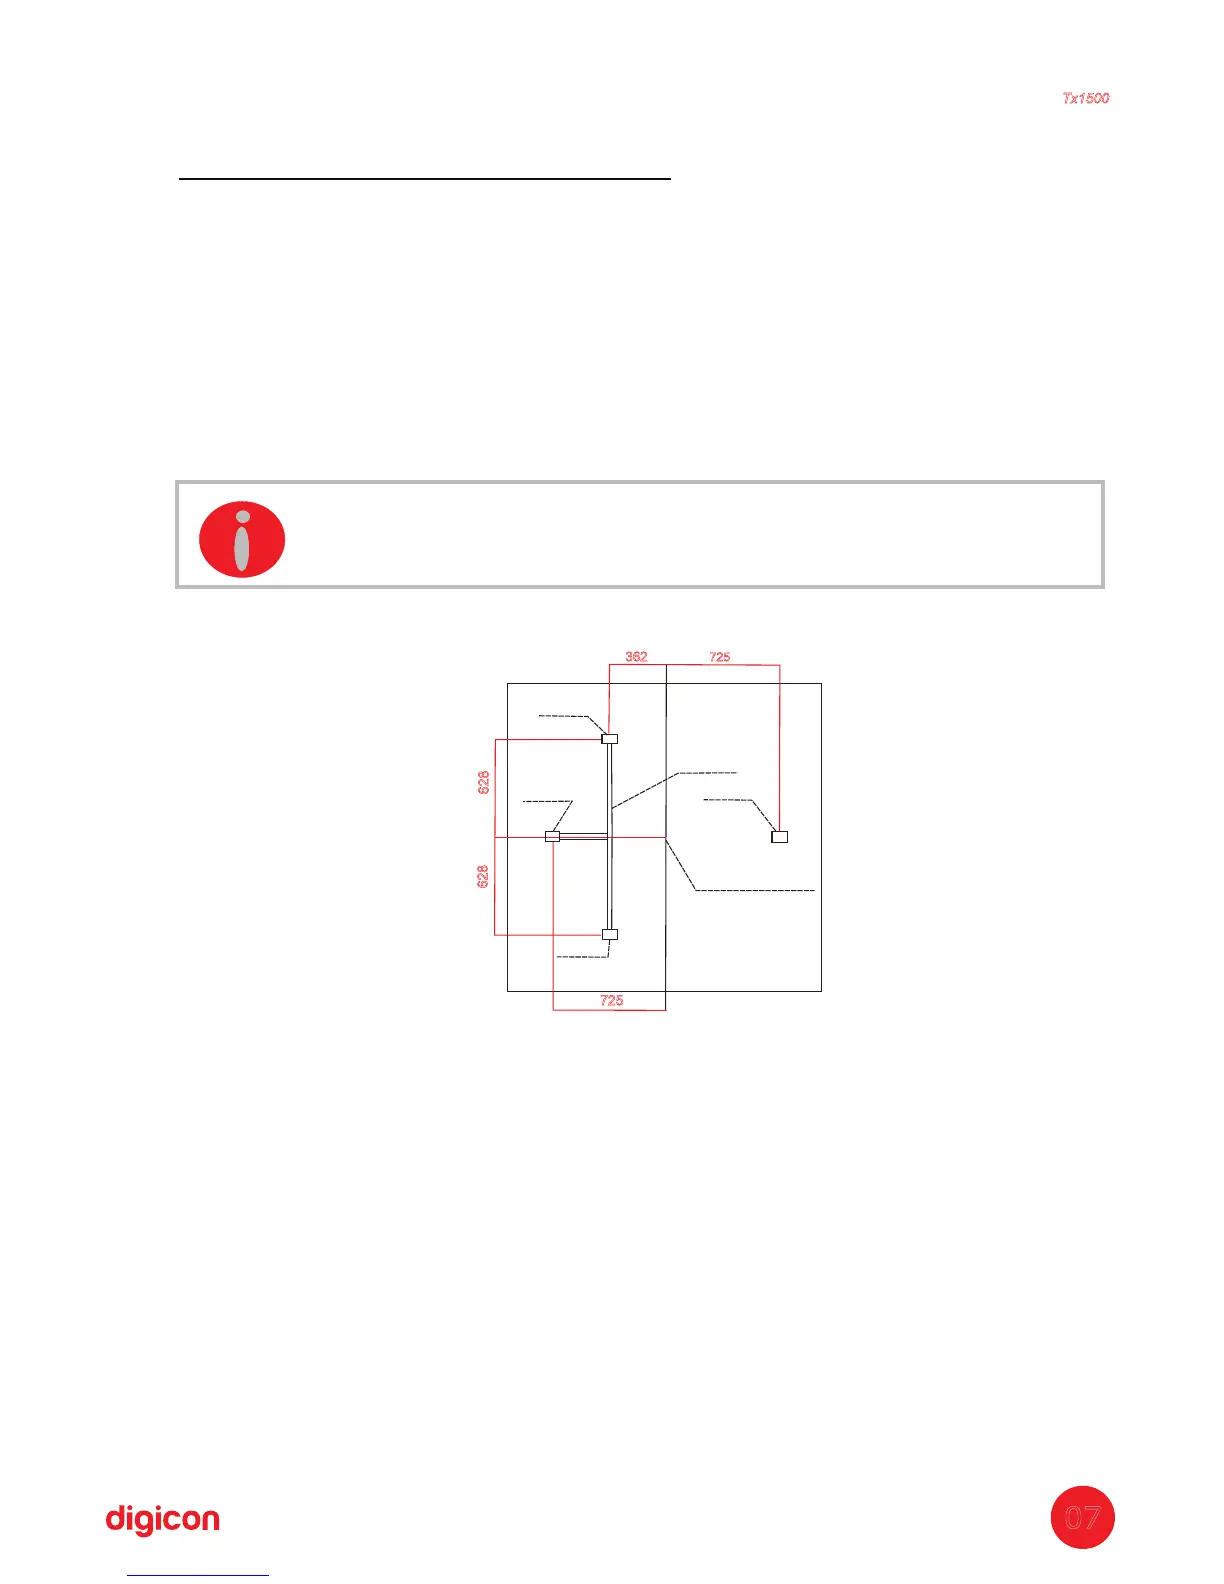
INFORMATION: Illustrative image (measures specified in “mm”).
Duct
Point 4
Reference point
Point 1
Point 3
Point 2
725
628
628
362
725
Torniquete
Tx1500
07
1 socket wrench with
socket of 14 and
17mm;
1 combination wrench
17;
1 socket wrench 10
with extension;
1 ;n.3 Allen wrench
1 n. 5 Allen wrench;
1
medium-sized
Philips screwdriver;
1 medium-sized
screwdriver;
1 hard plastic
hammer
1 plum-line or water
level;
1 silicone tube;
Molykote BR2 Plus
gr
aphite grease;
Step ladder with four
steps
;
Electric drill and drill
bits for concrete with
6 and 14 cm
;
Bolter – 10 parts for
every product.