2
th
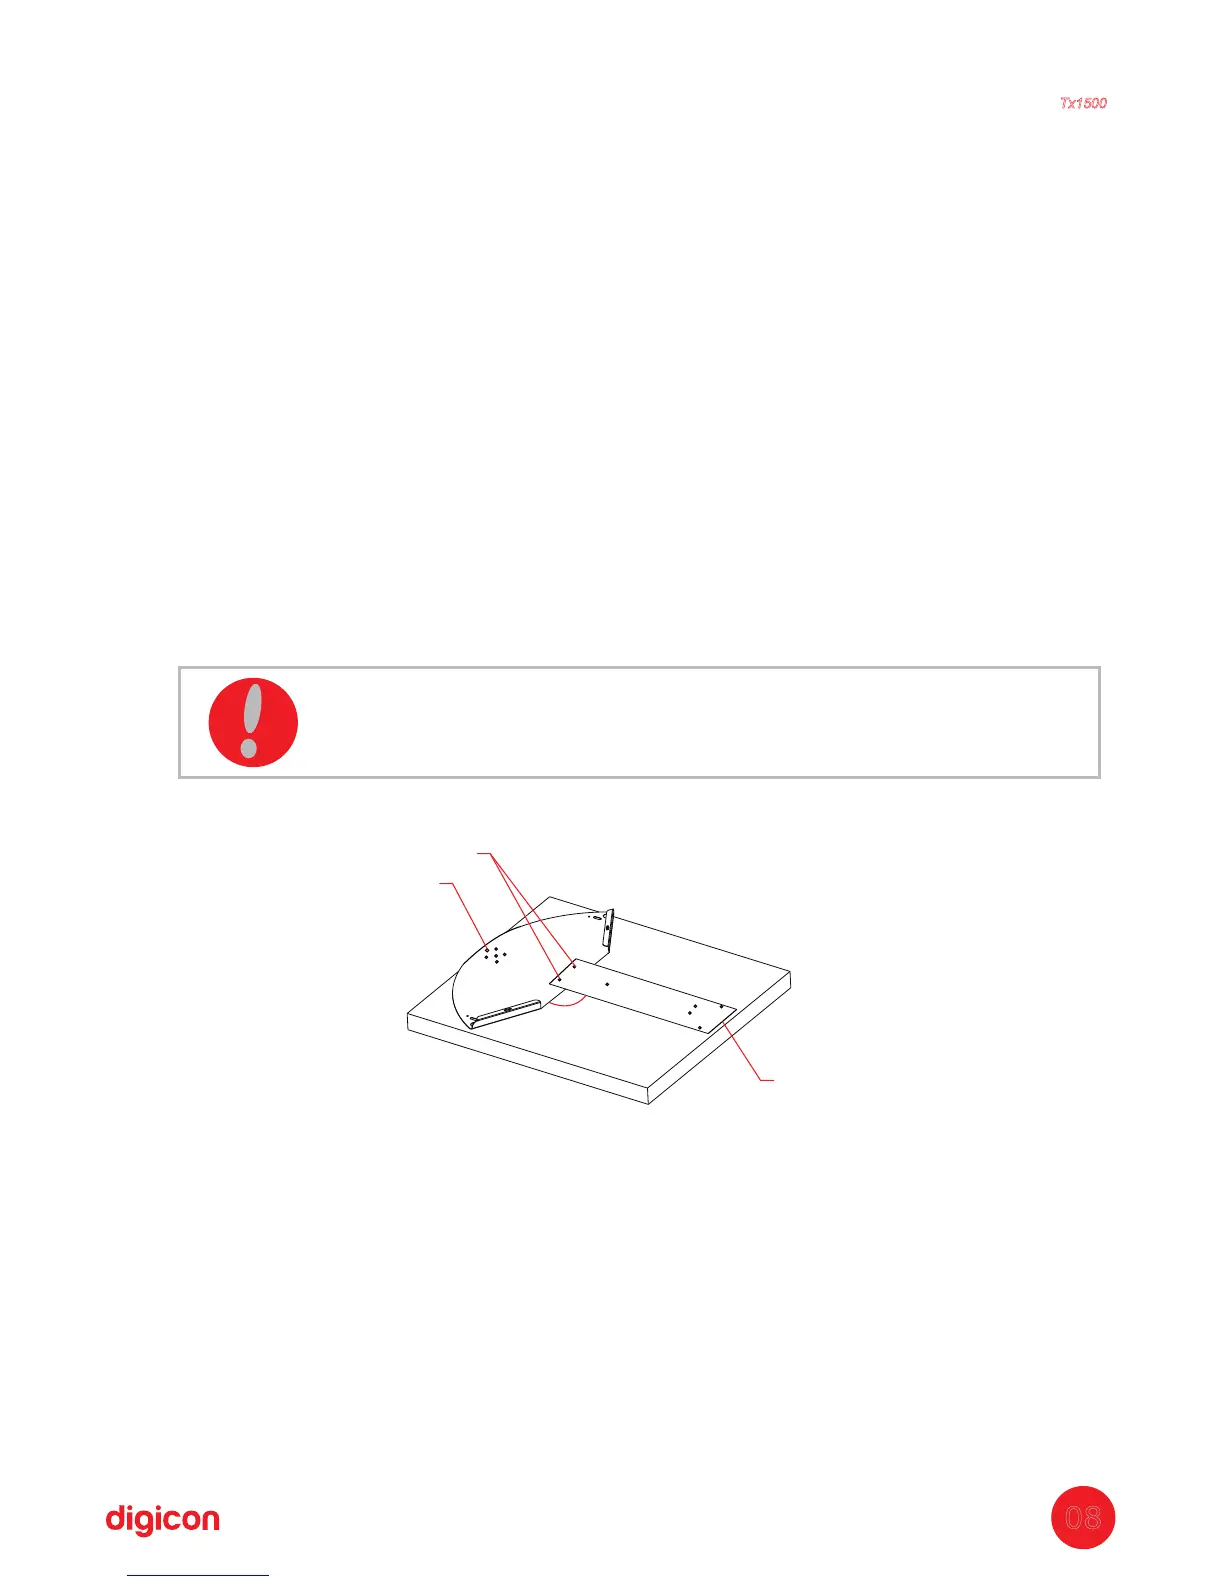
tep:S Drilling device
a. It will be necessary to add cardboard or bubble wrap under the device so not to
damage the roof painting when using the drilling demarcations;
b. Screw the device (P1) to the turnstile's roof (P1);
c. Position the assembled parts in the area chosen for installation, observing the flow
of entrance and exit;
d. Observe the desired side for the opening (lock side) of the central support for
maintenance;
e. P ;lace
the roof (P1) and fix tem with screw (P2) and nut (P3)
f. The pre-hole must be done with an Ø6mm drill, so there are no damages to the
device's holes;
g. Remove the device and drill again all the holes with an Ø14mm drill.
Quantity of parts used in this stage:
P1
= 1x Roof
P2 = 1x Drilling device
P3 = 2x M6x15Allen screw
P4 = 2x M6Nut
Obs.: After all demarcations, disassemble the device to use the part later (P1).
90°
P1
P3 - P4
P2
Torniquete
Tx1500
ATTENTION: The place of installation and the direction of entrance
.and exit must be defined alongside the responsible for the place
08