Creating an Audio CD from a Pro Tools Session
13
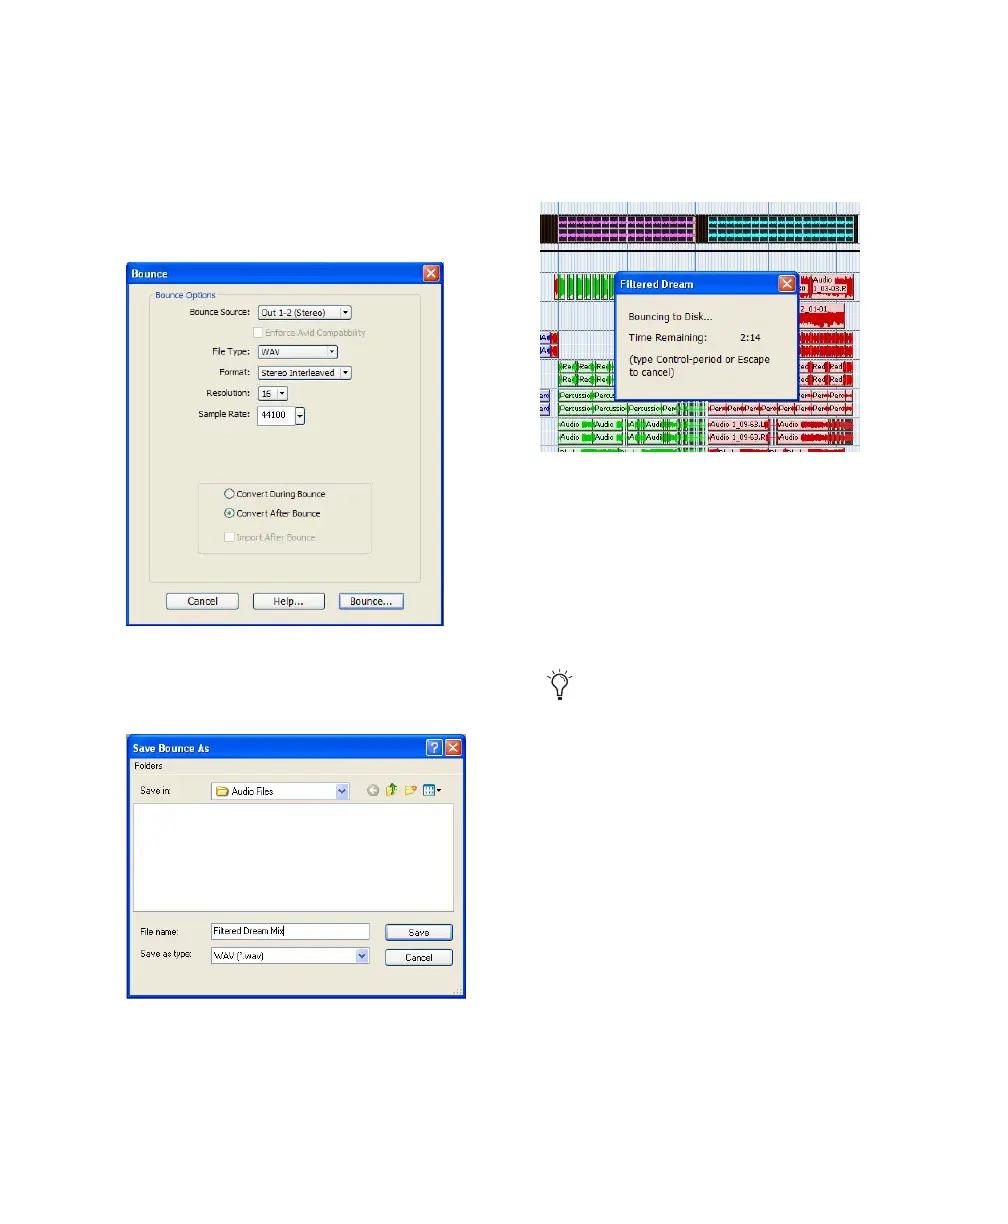
7 If you are changing the sample rate of the
bounced file, choose a Conversion Quality set-
ting. (For details, see the Mbox 2 Getting Started
Guide.)
8 Choose “Convert after Bounce,” and click
Bounce.
9 In the Bounce dialog, give the bounce tracks a
name and choose where they should be saved.
10 Click Save.
Pro Tools begins bouncing to disk. Pro Tools
bounces are done in real time, so you hear audio
playback of your mix during the bounce process
(though you cannot adjust it).
.
Burning a CD
After the bounce is completed, you will have an
audio file that is ready for burning onto a CD.
Quit Pro Tools and launch any common CD
burning application to burn your bounced mix
to CD.
Bounce options for creating CD burnable tracks
Entering a name for the bounced file
Bouncing to Disk dialog
Make certain that you configure your CD
burning application to create an audio CD
rather than a data CD.
 Loading...