6
Setting Push-button Mode and the
Push-button Interrupt Time
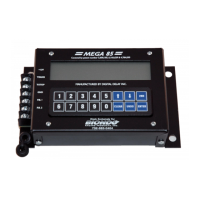
To set the Push-button Mode, press the 4 key, the Push-button Mode is shown on the left screen. The left most digit
shows “1”, “ 2” or “3” to indicate which Push-button Mode the unit is in, when in Push-button Mode 3, the P.B. 1 on terminal
strip starts both the primary and secondary delays, this is done by pressing and then releasing the pushbutton on the first
desired yellow light to start delay one. Then repressing the same pushbutton and releasing on the second desired yellow light is
done to start delay 2. Care should be taken not to flinch in pushbutton mode 3 because the box will think you released, and the
car will roll out of the beams causing a red light even if you are pressing the pushbutton. When in Push-button Mode 2, one
or
both
push buttons can be used in any sequence, the First P.B. starts the primary and Second P.B. starts the secondary delay.
When in Push-button mode 1 the pushbutton wired to pushbutton 1 on the terminal strip will only be used to hit the tree once.
The two right digits show the programmable amount of time (00 to 99 seconds) that after the Transbrake releases, Button 1 and
Button 2 push-button inputs are disabled. To change pushbutton mode or the Interrupt Time first arrows to that screen side,
followed by pressing the arrow keys will change the pushbutton mode. To change the Push-button interrupt time press the
CLEAR key, then enter the desired number value. For example “1 10” would indicate 1 Push-button Mode with a 10 second
Interrupt Time. If no Push-button Interrupt Time is wanted enter “00”.
PUSHBUTTON MODE 1: Means one button for one hit at tree.
PUSHBUTTON MODE 2: Means two push buttons for two hits at tree.
PUSHBUTTON MODE 3: Means one pushbutton for two hits at tree.
Note: Only in pushbutton mode 1 or 3 can the push button 2 terminal be used as the tap button input.
Understanding and Connecting
a By-pass push-button
A by-pass push-button is used to engage the Transbrake solenoid without starting a timing cycle. This can be helpful
if the vehicle needs the Transbrake engaged to back up. If a by-pass push-button is desired, connect one side of a push-button
to the Transbrake terminal and the other side of the push-button to +12 Volts.
Applying 12 Volts to any of the outputs will not damage the unit.
Connecting or shorting any output terminal directly to ground will cause damage to the unit. This damage will
not be covered by the warranty. It is strongly recommended that a 15 Amp fuse be put in each of the wires coming
from the output terminals.

 Loading...