1
1. HARDWARE OVERVIEW
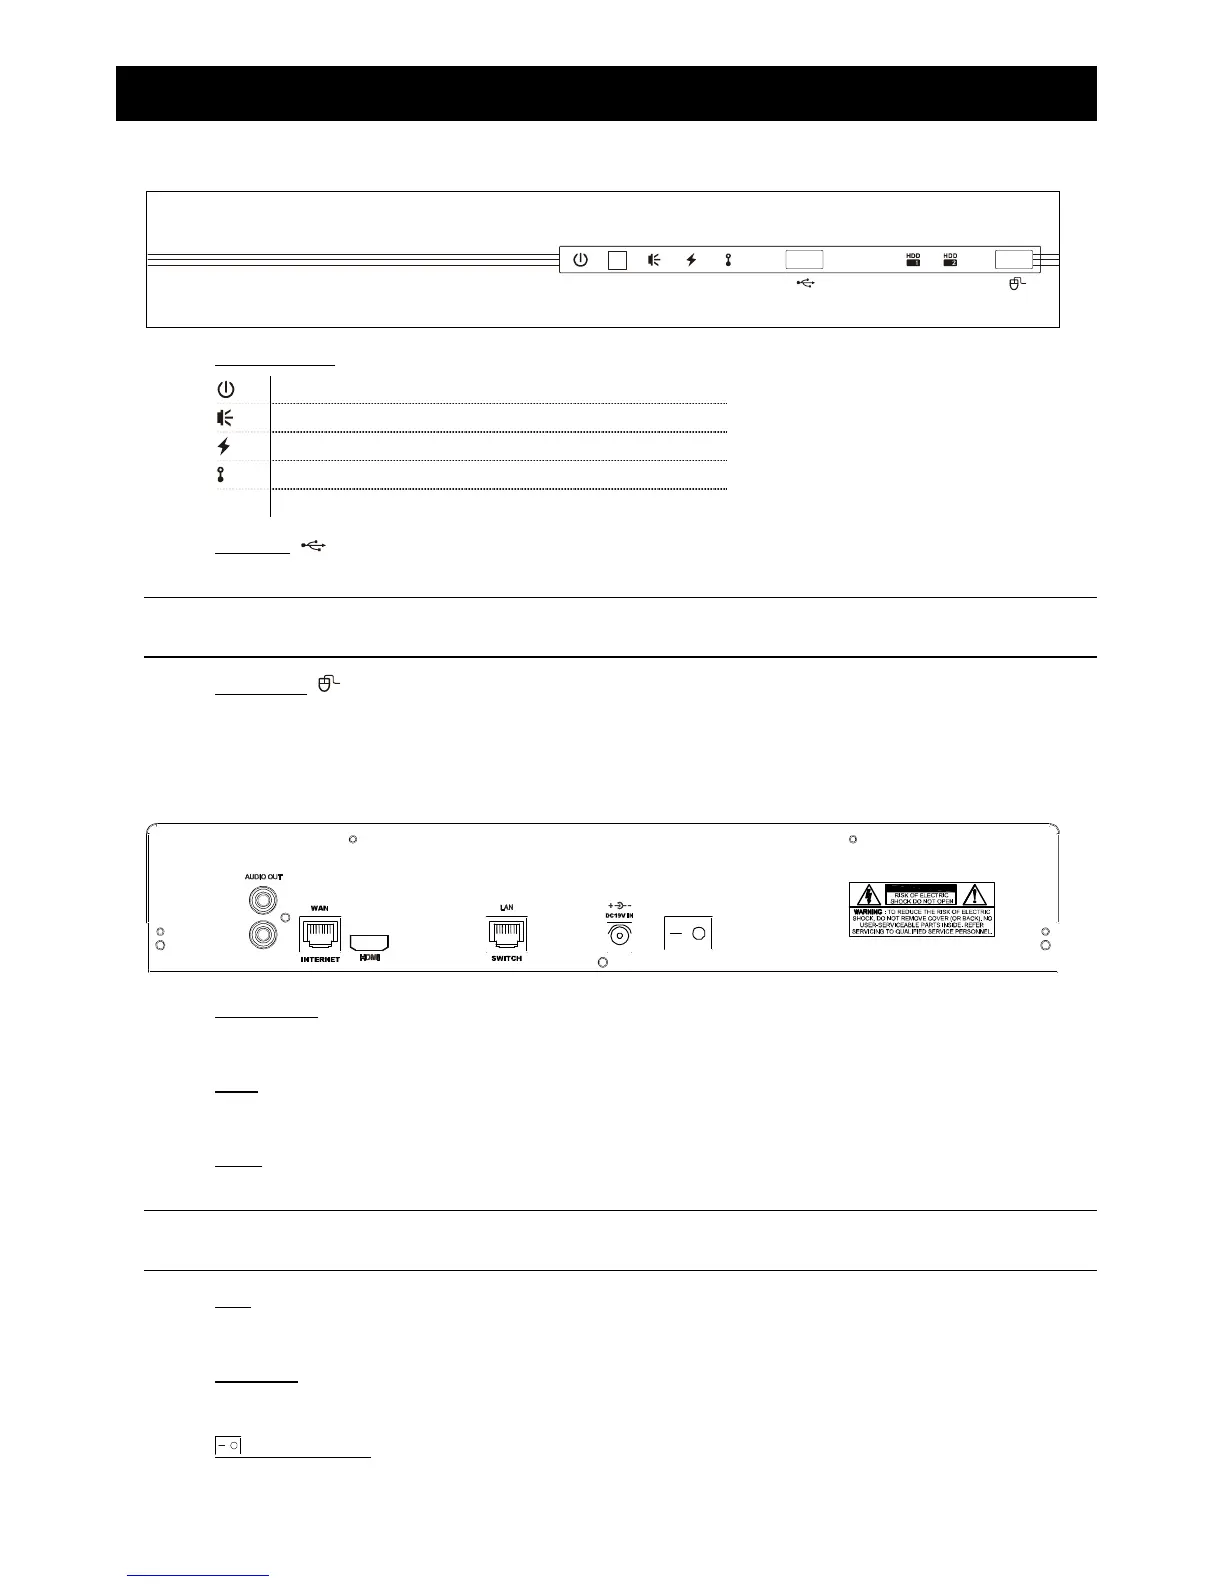
1.1 Front Panel
LANWANALARM
POWER
1) LED indicators
The NVR is power-supplied.
An alarm event occurs.
The NVR is connected to Internet.
The NVR is connected to LAN.
HDD Up to two hard disks are installed in the NVR and connected well.
2) USB port ( )
Insert a compatible USB flash drive for video backup.
Note: For the compatible list of USB flash drives, please refer to “APPENDIX 2 COMPATIBLE USB FLASH DRIVE
LIST” at page 13.
3) Mouse port ( )
Insert a mouse for function operation.
1.2 Rear Panel
1) AUDIO OUT
Connect to a speaker.
2) WAN
This port is used to connect your NVR to Internet via a RJ45 network cable.
3) HDMI
This port is used to connect the monitor which supports HDMI interface for high definition video output.
Note: Direct connection to the monitor which supports VGA or composite interface is not supported. Please
prepare a converter in advance.
4) LAN
This port is used to connect your NVR to IP cameras locally.
5) DC19V IN
Connect the NVR to power with the regulated adapter.
6) (Power switch)
Switch to “–” to turn on the power, and “” to turn off the power.