Do you have a question about the Dimplex Monterey and is the answer not in the manual?
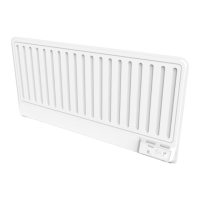
Details on how to safely and correctly install the heater on a wall.
Explanation of the heater's control panel, buttons, and display.
Details on activating and configuring the temporary heat boost feature.
How to temporarily alter the heating schedule, starting or ending periods early.
A passcode-protected lock for restricting access to heater functions.
Configuration options for PIN lock and UI lock settings.
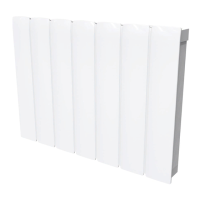
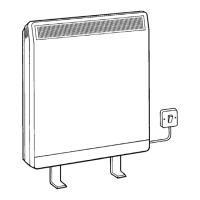
The Dimplex Monterey (MFPE) is an electric fixed local space heater designed for normal domestic household use, offering a range of features for efficient and flexible heating control. It is intended for wall mounting and should be installed in an upright position, adhering to specified minimum clearances. The heater is splash-proof to IP24, making it suitable for various indoor environments.
The primary function of the Dimplex Monterey is to provide space heating with precise temperature control. It operates using a digitally controlled electronic thermostat, accurate to ±0.2°C, ensuring consistent room temperatures. The heater offers several operating modes, including various timer modes and continuous heat modes, to suit different user needs and schedules.
The Dimplex Monterey boasts advanced controls with capacitive sense technology, providing total flexibility in heating management. The user interface, located on top of the heater, consists of a display screen and six touch-sensitive buttons: Display Screen, 'Menu' Button, 'Back' Button, 'Up and Down' Arrows, 'Enter' Button, and 'Advance' Button.
First Time Power-On: Upon initial power-on, a setup wizard guides the user through setting the time, date, daylight savings time, and sound preferences. The heater then defaults to the 'Out All Day' Timer Mode on the Home Screen.
Home Screen: The Home Screen displays the current target temperature (setpoint) and the active mode of operation. It also indicates when the 'Advance' function is in use and shows 'Heating On' when the heater is actively trying to reach or maintain the room temperature, or 'Heating Off' otherwise. The display will 'sleep' after a period of inactivity but the heater remains active in its set mode.
Temperature Control: The heater's adjustable thermostat allows room temperature to be controlled within a range of 7°C to 30°C, with 21°C being a common comfortable setting. The screen color changes from deep blue to bright red based on the selected temperature, providing a visual cue.
Timer Modes: These modes are designed for efficient operation with predictable heat demand.
Continuous Heat Modes: These modes provide a constant 'Heating On' period until manually changed.
Product Locks: These features restrict access to the heater's controller functions.
Advanced Settings: These settings offer significant changes to the heater's operation and are recommended for modification only by trained professionals due to the risk of user error.
Cleaning: Before cleaning, the heater must be disconnected from the electrical supply and allowed to cool. The exterior can be cleaned with a soft, dry cloth; abrasive cleaning powders or furniture polish should be avoided to prevent surface damage. For thorough cleaning or redecoration, the heater can be unhinged from its wall bracket by depressing the latch on both brackets and hinging it forward.
Battery Replacement: The product is fitted with a replaceable coin cell battery for the real-time clock, with a life expectancy of over 5 years. To replace the battery, the heater must be isolated from the electricity supply. The battery module is accessed by unhinging the heater from the wall, sliding a catch, and pulling the module from the controls. After replacing the battery, the module slides back into place, ensuring the clip is engaged. The old battery should be disposed of appropriately.
RF Module Installation: The heater is capable of connecting to Dimplex Control, which requires additional hardware, specifically an RF module. To install the RF module, the heater is unhinged from the wall, the battery module is located and removed, and the RF module replaces the battery tray. After installation, the product is powered on, and RF communications are enabled via the 'Comms' settings menu.
Overheating Protection: For safety, the heater is equipped with a thermal cut-out. In the event of overheating, this cut-out automatically cuts power to the heater. Once cooled, it resets automatically. The display screen may flash red to indicate overheating. To reset the display, the obstruction causing overheating must be removed, and the 'Enter' button held for 10 seconds.
Troubleshooting (Error Codes): The heater provides error codes to assist in diagnosing issues. These codes cover various categories such as Thermistor Failures (e.g., Room thermistor error), Excessive Temperatures (e.g., Overheat), Internal Failures (e.g., Element failure), User-Related Errors (e.g., Open window detection failure, Timeloss failure), and IoT Related Errors (e.g., error between heater and RF module).
| Thermostat | Yes |
|---|---|
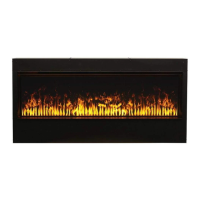
| Flame Effect | Yes |
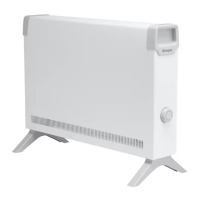
| Style | Freestanding |
| Heat Settings | 2 |
| Remote Control | Yes |
| Safety Features | Overheat protection |