8
To mount the heater to the wall:
1. Remove wall mounting bracket from the back of the heater by depressing the spring latch at the side of each
bracket - see Fig.2.
2. Fix the wall bracket securely to the wall through the four screw holes. Ensure only screw ttings provided are
used for the particular wall type.
3. Present the heater to the wall bracket and engage bottom slots in the back with bracket hooks.
4. Press heater into locked position and ensure the clips on the top are engaged.
5. Remove protective lm from the user interface
WARNING:
This product is heavy and care
should be taken in installation
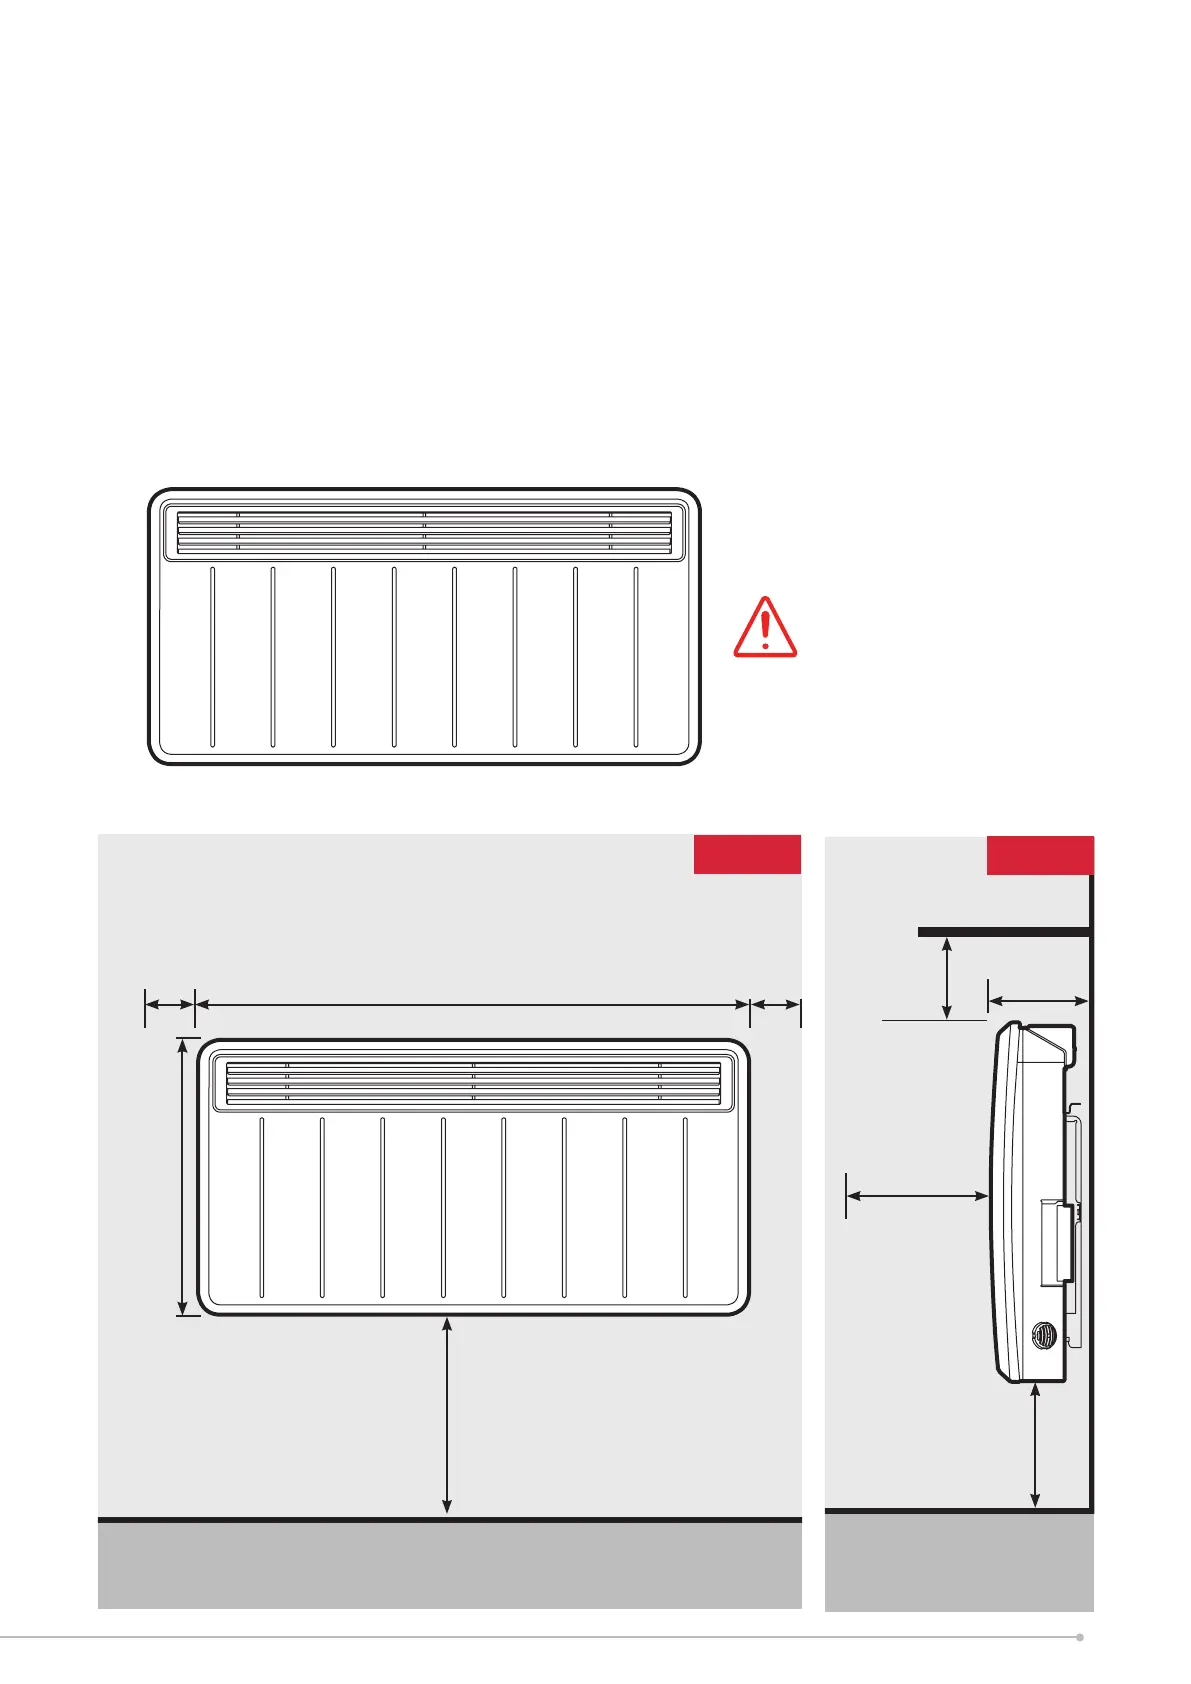
‘C’
150mm
(min)
150mm
(min)
‘D’
150mm
(min)
Fig. 3
300mm
150mm
(min)
‘E’
Shelf / Obstruction
Minimum front
clearance
*Please note correct product
orientation is with controller
facing top right side only
150mm
(min)
Fig. 4