2 3
setup Menu
All of the conguration and customization options are contained within the Setup Menu. Any
changes you make in this menu are saved in the memory of the micro.clock for future use.
Throughout this manual we’ll indicate Setup Menu options as MENU = OPTION, meaning we’d
like you to navigate to that item in the Setup Menu and set its value to match.
TURN TO
MOVE
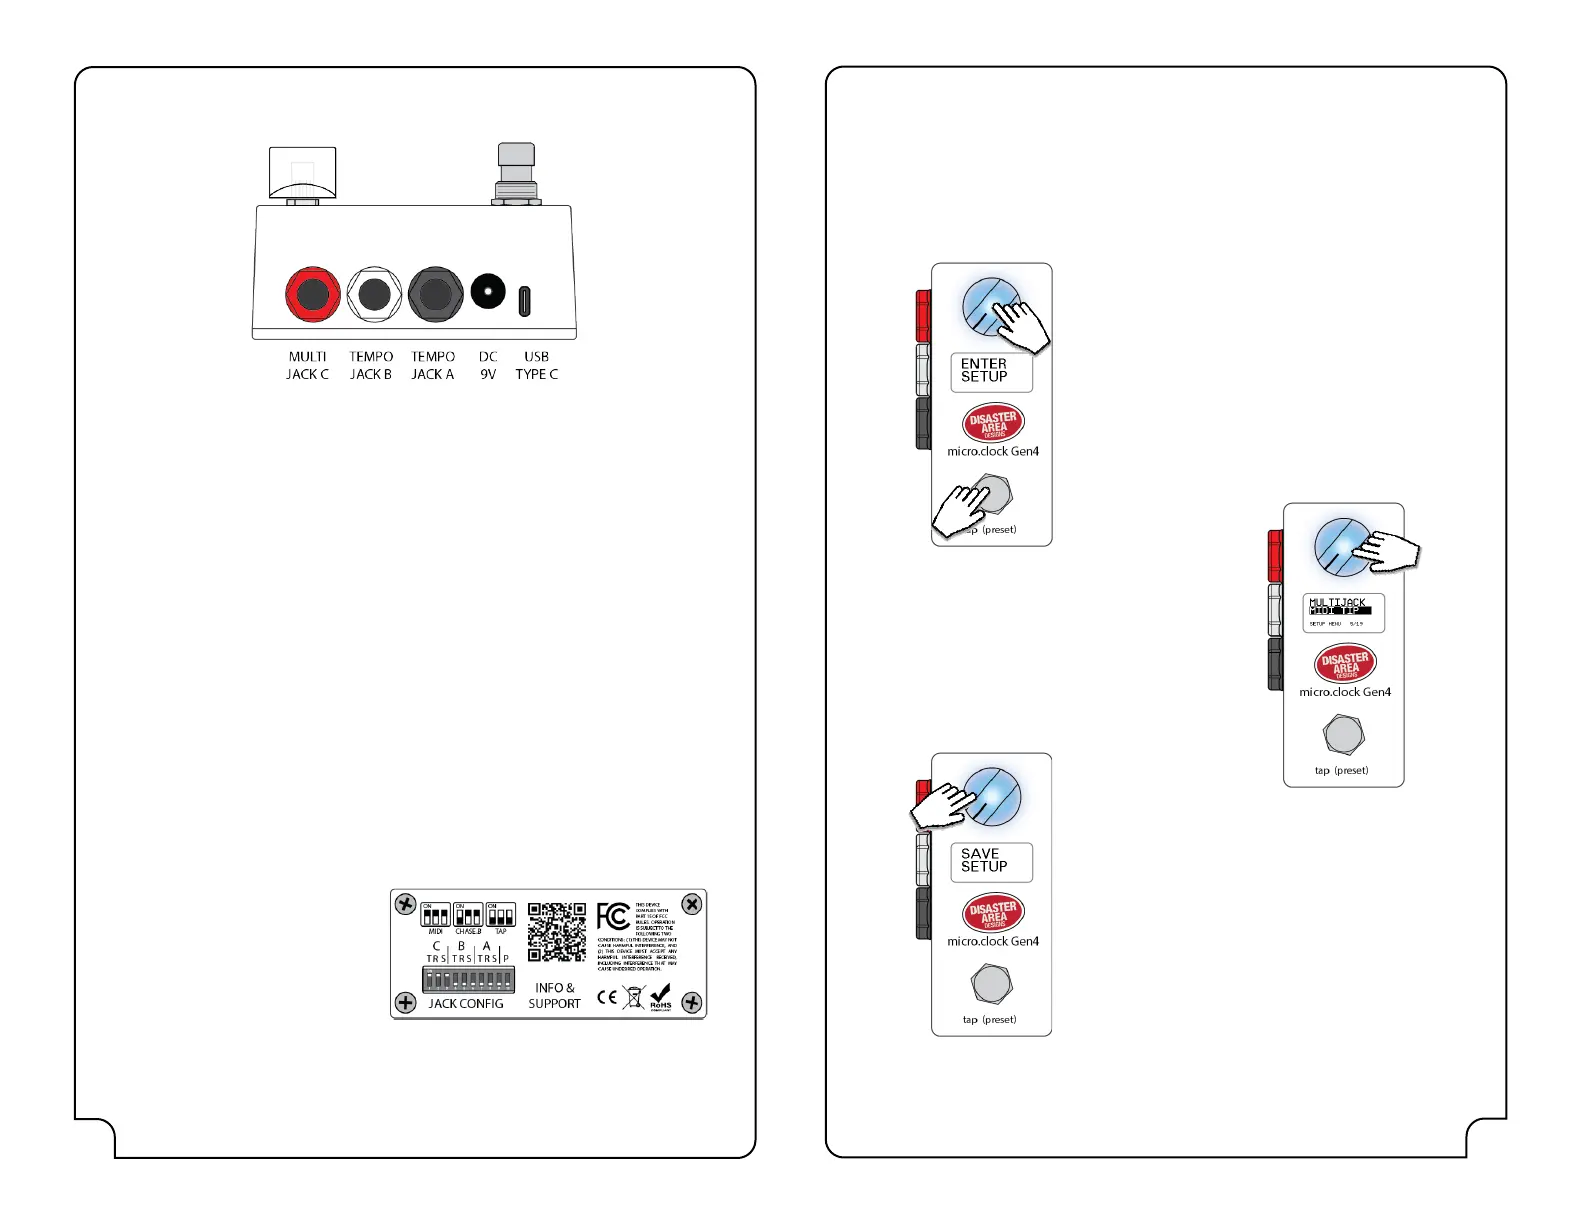
NAVIGATING THE SETUP MENU:
Turn the knob choose an option to edit.
Tap the knob to select the option, then turn the knob
to change its value.
Tap the knob again to de-select the option and
return to the list of setup items.
ENTERING THE SETUP MENU:
Press and hold the knob and footswitch after the
micro.clock boots. It may help to press the knob
slightly before pressing the footswitch.
Release the buttons when you see ENTER SETUP on
the display.
HOLD TO
ENTER
EXITING THE SETUP MENU:
Hold the knob to save the settings and exit.
The micro.clock will restart to apply your changes.
TAP TO
EDIT
HOLD TO
SAVE
IMPORTANT NOTE: You must SAVE your changes from the Setup Menu before they
will take eect!
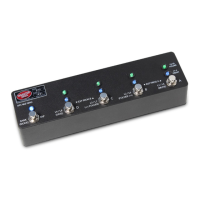
The micro.clock is compact but loaded with features and connectivity.
MultiJack C: This jack can send tempo to most devices, as well as acting as MIDI output, MIDI
input, remote footswitch input, and more.
Tempo Jack B: Sends tempo to your device, or it may be congured as a MIDI output.
Tempo Jack A: Just like Jack B, this jack can send tempo or MIDI output.
DC 9V: The micro.clock requires 9V DC only, center negative, 2.1mm pin. Just about
anything that will power a Boss pedal will work on your micro.clock. You’ll need to provide at
least 100mA of isolated power, but more is okay.
USB Type-C: This port connects to a USB host like a computer or tablet to serve as a USB MIDI
device. It is also used to update the rmware in your micro.clock and may be used to power
the controller.
Ins and outs
HOLD
BOTH TO
ENTER
dIp swItChes
There are ten DIP Switches on the rear of the micro.clock, accessible through an opening in
the enclosure. Each switch isolates the Tip, Ring, and Sleeve of one of the outputs to prevent
ground loops or other undesirable behavior.
Set the DIP Switches for each port to match the conguration of that port in the Setup
Menu.
Set the DIP switches to OFF-OFF-OFF to
use the output for isolated tap tempo.
Set the switches to ON-ON-ON to use
as MIDI output, footswitch input, and
most other functions.
Set the switches to OFF-ON-ON for use
with Chase Bliss devices (ring active.)
The switch labeled “P” is a pull-up function that ties Jack A Tip to Ring. This is used with
rare devices that provide power for their tap tempo input from the ring. Leave it OFF
unless otherwise directed.