DiversiTech International Ltd.
Glaisdale Drive East, NG8 4LY
Nottingham United Kingdom
Email sales@pumph.co.uk
Phone +44(0)115 900 5858
24
FOR FURTHER INSTALLATION ADVICE PLEASE CALL THE TECHNICAL SUPPORT HELPLINE ON 0115 900 5858.
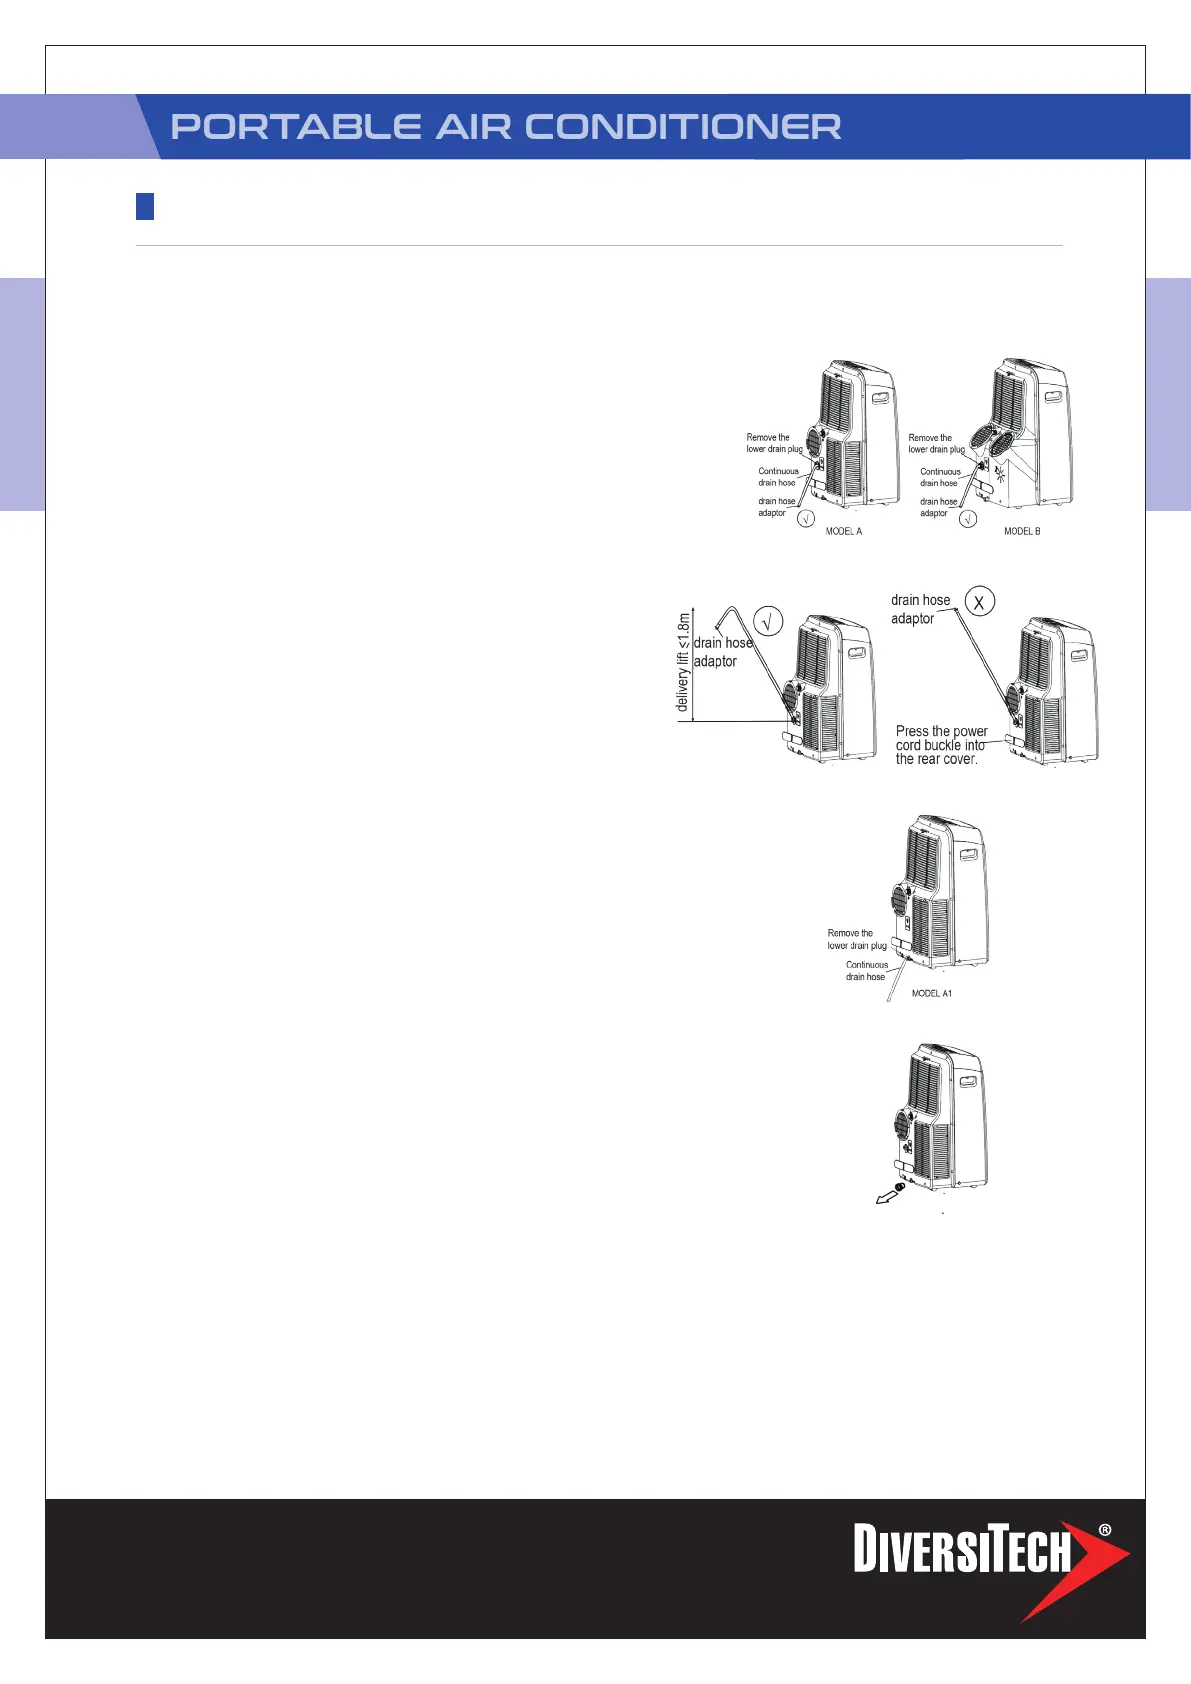
NOTE: Make sure the hose is secure
so there are no leaks. Direct the hose
toward the drain, making sure that
there are no kinks that will stop the
warter owing. Place the end of the
hose into the drain and make sure the
end of the hose is down to let the water
ow smoothly. When the continuous
drain hose is not used, ensure that the
corresponding drain plug and knob are
installed rmly to prevent leakage.
(For model A1)During heating pump
mode, remove the lower drain plug
from the back of the unit, install
the drain connector(5/8” universal
female mender) with 3/4” hose(locally
purchased). Carefully move the unit to
a drain location, and let the water drain
away.
Note: Make sure the drain hose is lower
than the bottom tray drain outlet.
When the water level of the bottom
tray reaches a predetermined level, the
unit beeps 8 times, the digital display
area shows “P1” . At this time the air
conditioning /dehumidication process
will immediately stop. However, the fan
motor will continue to operate (this
is normal). Carefully move the unit to
a drain location, remove the bottom
drain plug and let the water drain
away. Reinstall the bottom drain plug
and restart the machine until the “P1”
symbol disappears. If the error repeats,
call for service. NOTE: Be sure to
reinstall the bottom drain plug rmly to
prevent leakage before using the unit.
OPERATING INSTRUCTIONS
WATER DRAINAGE
NOTE: The following control panels are for explanation purpose only. The control panel of
the unit you purchased may be slightly different according to the models. Your machine may
not contain some indicators or buttons. The actual shape shall prevail.
OTHER FEATURES
PAC-H-12
 Loading...