EN
6
©
2020 DJI OSMO All Rights Reserved.
DJI RSC 2
Quick Start Guide
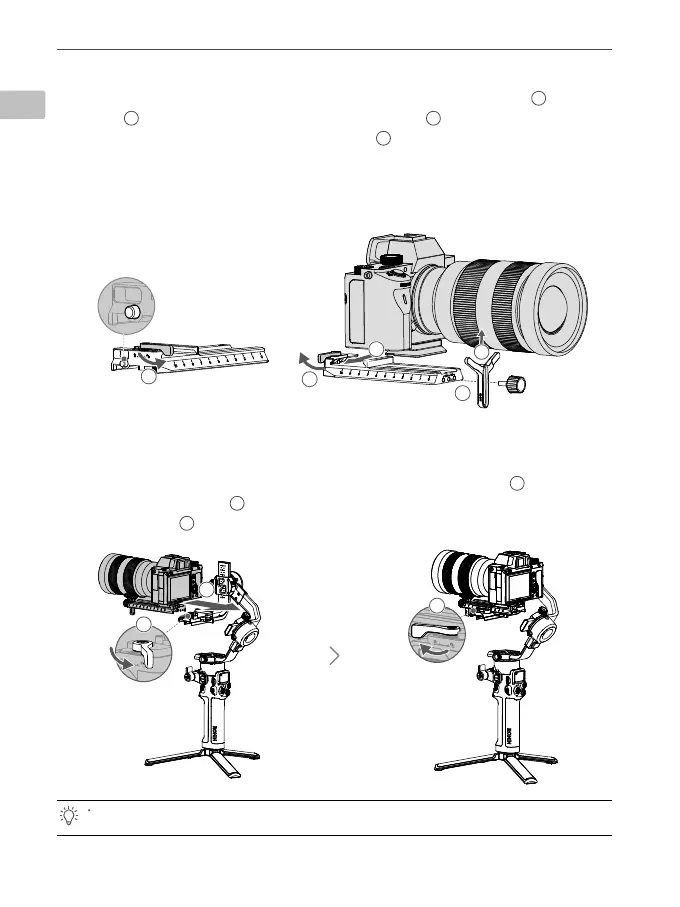
2. Attach the Lower Quick-Release Plate and Lens Support
Toggle the lever on the lower quick-release plate to the unlocked position
1
, insert the
camera
2
, and toggle the lever to the locked position
3
after it is engaged. Attach
the lens support to the lower quick-release plate
4
. It is recommended to use the lens
support* when using a long or heavy lens.
To remove the camera from the lower quick-release plate, toggle the lever to the unlocked
position and remove the camera while pressing the safety lock beside the lever.
3. Attach the Camera to the Gimbal
Toggle the lever on the camera mounting plate to the unlocked position
1
and insert the
lower quick-release plate
2
. Toggle the lever to the locked position once the camera is
roughly balanced
3
.
1
2
3
4
5
1
2
3
* The Lens-Fastening Strap (not included) is required to use SuperSmooth mode.
The position of the camera mounting plate can be adjusted by toggling the lever on the bottom as
desired.
Safety Lock