1101 Series Installation Guide | Digital Monitoring Products 3
4
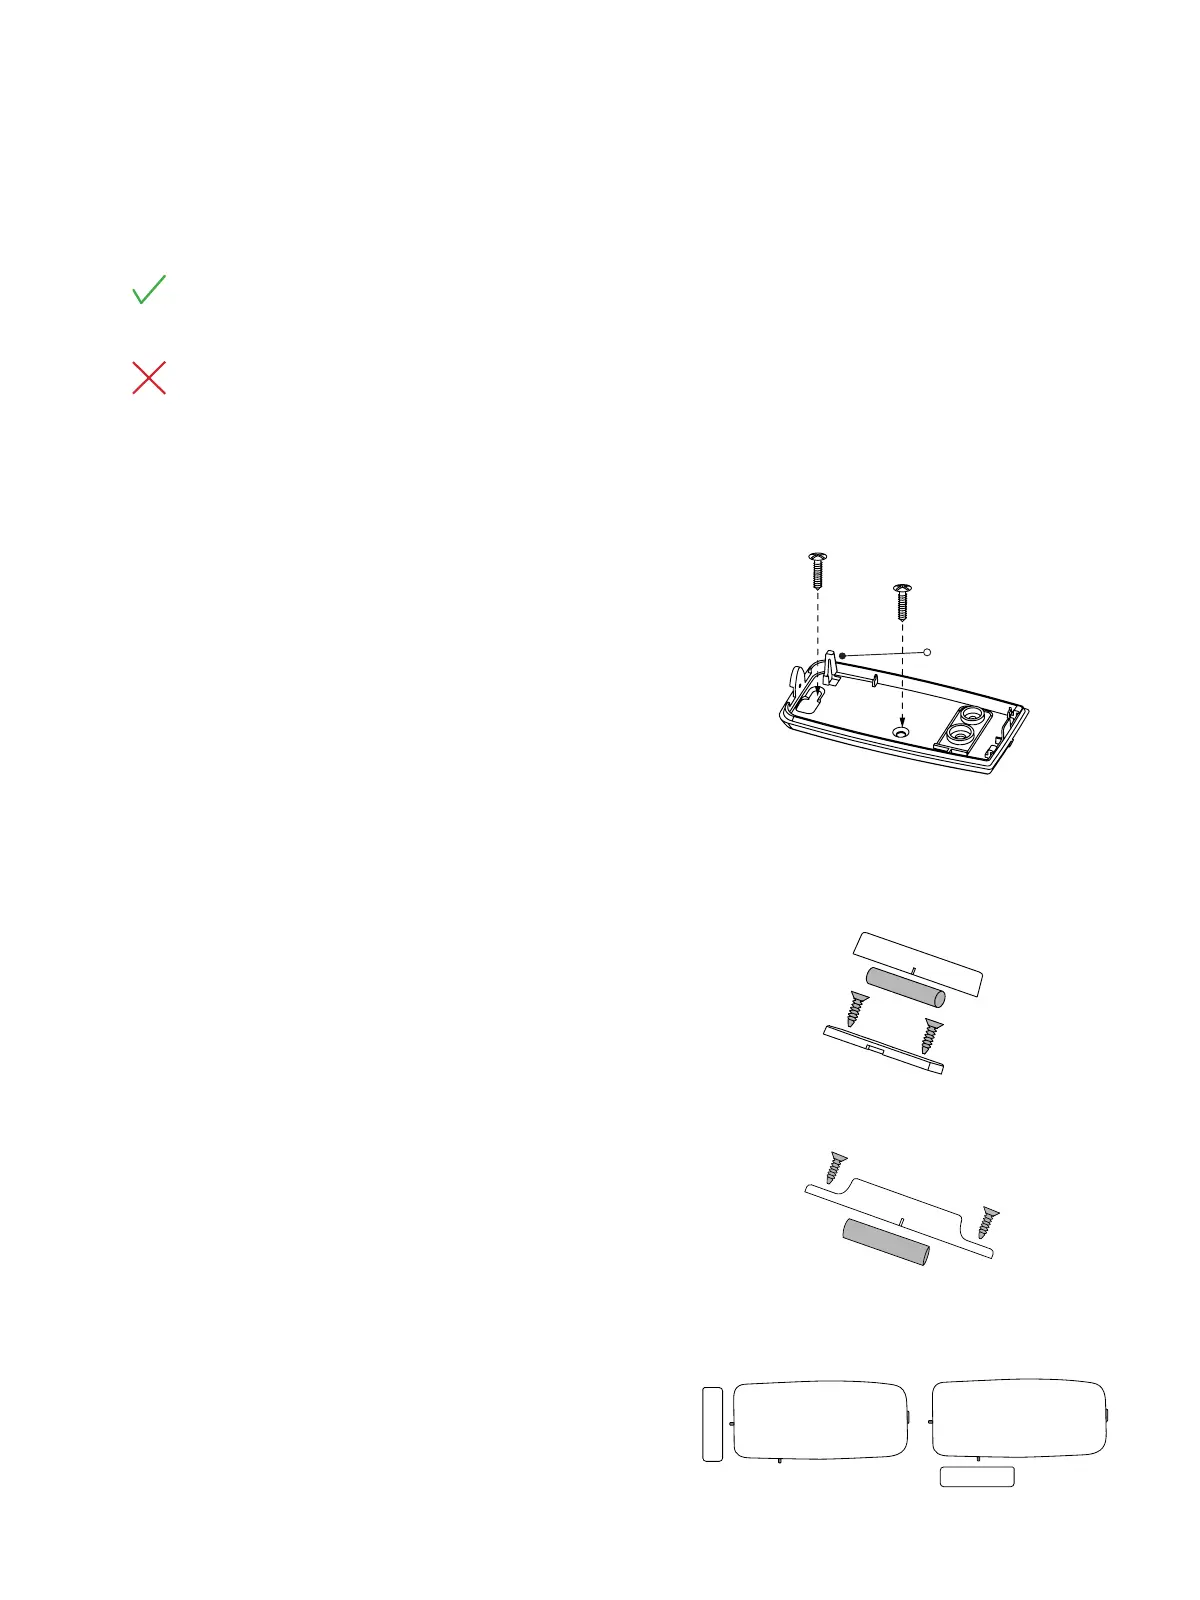
Mount the Transmitter
Mount the Housing
When mounting the transmitter, refer to Figure 1 and Figure 2for
battery and mounting hole locations.
1. Remove the battery and the PCB.
2. Place the supplied #4screw into the mounting hole and
secure the transmitter housing to the surface.
3. Reinsert the PCB and the battery.
4. Snap the transmitter cover back onto the base.
Mount the Magnet
For magnet placement options, see Figure 5.
Standard Installation
1. Push the supplied magnet into the magnet cover.
2. Hold the magnet base on the door closest to the magnetic
reed switch, no more than 1/2” (1.3cm) from the transmitter.
3. Use the provided #4 screws to mount the base. See Figure 2.
4. Snap the cover onto the base.
Commercial Installation
1. Push the supplied magnet into the magnet cover.
2. Place and hold the magnet cover directly on the door closest
to the magnetic reed switch, no more than 1/2” (1.3cm) apart
from the transmitter.
3. Use the provided #4screws to mount the cover. See Figure 4.
Use the LED Survey to Select a Location
The transmitter provides a Survey LED capability to allow one person to confirm communication with the wireless
receiver or panel while the cover is removed.
1. With the cover removed, hold the transmitter in the exact desired location.
2. Press the tamper switch to send data to the panel and determine if communication is confirmed or faulty.
Confirmed: If communication is confirmed, for each press or release of the tamper switch the LED blinks
immediately on and immediately o. Repeat this test to confirm five separate consecutive LED blinks. Any
indication otherwise means proper communication has not been established.
Faulty: If communication is faulty, the LED remains on for about 8 seconds or flashes multiple times in
quick succession. Relocate the transmitter or receiver until the LED confirms clear communication.
3
Figure 2: Mounting the Transmitter
Figure 3: Standard Installation
Figure 4: Commercial Installation
Figure 5: Placement Options