1101 Series Installation Guide | Digital Monitoring Products 4
5
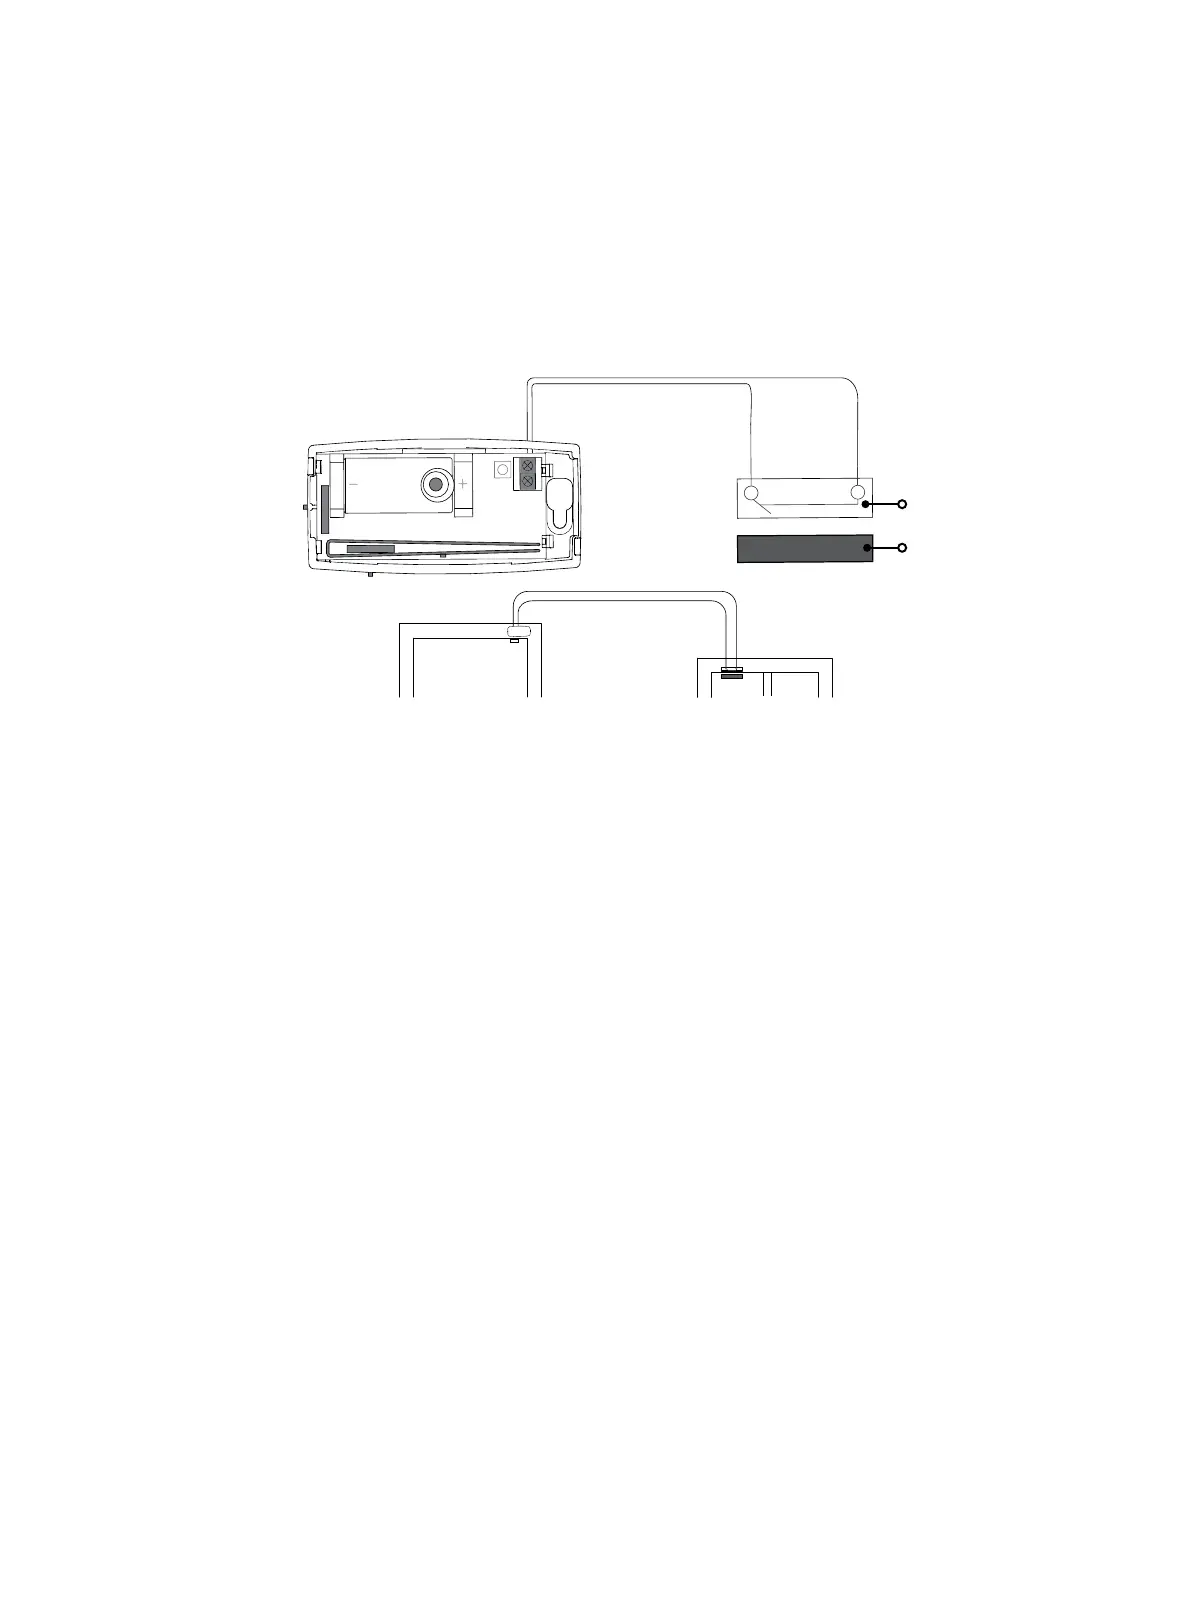
Wire External Contacts (Optional)
Refer to Zone Information in the appropriate panel programming guide for more information. DMP recommends
using 18or 22AWG unshielded wire for contact connections. Do not use twisted pair or shielded wire. Refer to
Figure 6 when wiring external contacts.
1. Use a flathead screwdriver to loosen the two external contact terminal screws.
2. Insert external contact wiring into the 1101terminal block and tighten the screws.
3. Connect the other ends of the wires to the external contact as either normally open (N/O) or normally
closed (N/C) without an end‑of‑line resistor.
4. Snap the transmitter cover back onto the base.
6
Test the Transmitter
After the transmitterhas been installed, test to confirm that it is communicating reliably with the panel. Use
the Tech APP™ to perform a Wireless Check‑in Test on the system or complete the following steps to perform a
Check‑in Test from a keypad that is connected to the panel. At the keypad, enter 8144 (WALK) and select WLS.
Figure 6: Connect External Contact
External Contact
Terminal Block
1101
Door
Window
External
Contact
Magnet
Program an internal
contact as the next
consecutive zone.
Program an
external contact as
the first zone.
ADDITIONAL INFORMATION
Supervision Time
When a receiver is installed, powered up, or the panel is reset, the supervision time for transmitters is reset. If the
receiver has been powered down for more than one hour, wireless transmitters may take up to an additional hour
to send a supervision message unless tripped, tampered, or powered up. This operation extends battery life for
transmitters. A missing message may display on the keypad until the transmitter sends a supervision message.
Replace the Battery
1. Push the button on the end of the transmitterand separate the two halves.
2. Remove the old battery, observe polarity, and place the new battery in the holder.
3. Snap the cover back on the transmitter.
Sensor Reset to Clear LOBAT
Once the battery is replaced, a sensor reset is required at the keypad to clear the LOBAT message. On an LCD keypad,
press and hold 2for two seconds. On a graphic touchscreen keypad, press RESET. Enter your user code, if required.
The keypad displays SENSORS OFF followed by SENSORS ON.