Do you have a question about the DMX 512S and is the answer not in the manual?
Overview of front panel controls including USB, LCD display, MENU, UP, DOWN, ENTER, CHASE, SPEED, PLAY, STOP, RECORD, BLACK OUT, and Power switch.
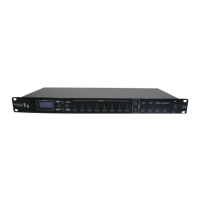
Details of back panel ports such as Input Voltage, DMX OUT, RS232, PANEL/CENTRAL, AUDIO, AUDIO & MIC, MIC, and IN RECORD.
Procedure to set the Unit ID for central control, ranging from 001 to 008.
Guide to selecting playback modes: single, cycle, multi, and mic modes for chase playback.
Instructions for checking and adjusting the timing for chases 1 through 8.
How to check and adjust the running speed for speeds 1 through 8.
Steps to save chases 1-8 or a full backup to a USB drive.
Instructions for loading chases 1-8 or a full backup from a USB drive.
Procedure to perform a factory data reset, requiring confirmation.
How to check the current version of the unit.
This document describes the DMX 512S Recorder, a device designed to record and play back DMX chases for lighting control. It is particularly suitable for small discos, clubs, private parties, and similar venues. The recorder's primary function is to store pre-programmed DMX chases, making them easy to recall and play back. It cannot create programs independently; all programs must be generated by other DMX 512 consoles and then recorded onto the device.
The DMX 512S Recorder offers a range of usage features to enhance its versatility. It includes a single DMX512 signal input and play interface, capable of controlling up to 512 channels. Users can adjust the play mode, with options for Multi, Cycle, and Single modes. Chases can be triggered in either AUTO or MUSIC modes, though not in MIDI mode. For automatic playback, the speed of each program can be freely adjusted. The device comes with a built-in 512MB storage capacity, allowing for the storage of up to 8 programs. Each program can record for more than 5 minutes, with the exact duration depending on the number of console channels and the content size.
The recorder offers two distinct interface manipulation modes: a "system" mode that provides access to all functions, and a "user" mode that is limited to playback functions only. It supports microphone pickup and AV audio input, with adjustable sensitivity for both. For central control or touch panel integration, the device can connect via RJ45 or RS232. It also supports XLR pin 3 and RJ45 network ports. For data management, a USB disk can be used for both backup and download of programs.
To operate the device, users first need to program DMX chases using a DMX console. Once programmed, the DMX console's output is connected to the recorder's input, and the recorder's output is connected to intelligent lights. After powering on the recorder, the RECORD button is pressed for 2 seconds until the RECORD light illuminates and the LCD displays "Select an index." The DMX console is then switched to auto-run mode, and the desired chase is selected, with its running speed and fade time adjusted. A CHASE 1-8 button on the recorder is then pressed to select the chase for recording. Once the DMX console's chase completes its last step, the selected CHASE 1-8 button is pressed again to stop recording, and the CHASE light turns off. To record additional chases, the process is repeated. The STOP button is used to exit the recording mode. After recording, the DMX console can be powered off and disconnected.
For automatic playback, the recorder's output is connected to intelligent lights. After powering on both the recorder and the lights, the MENU button is pressed to select "2. play mode," followed by ENTER. The UP/DOWN buttons are used to select an auto mode (Multi, Cycle, or Single), and ENTER is pressed again. The UP/DOWN buttons are then used to select AUTO to trigger the chase. Pressing the PLAY button and then a CHASE 1-8 button selects the desired chase for playback. The +SPEED- button allows for adjustment of the scene's running speed during playback. The BLACK OUT button can activate or stop the blackout status.
For MIC PLAY, the setup is similar to auto play, but after selecting "2. play mode" and an auto mode, MUSIC is selected via the UP/DOWN buttons to trigger the chase. The PLAY button and a CHASE 1-8 button select the chase. The polarity switch on the back panel is used to select AUDIO/MIC for microphone pickup (an AV audio cable should be inserted for AUDIO input). The sensitivity of both pickup sources can be adjusted as needed.
The device also features a "user mode" for simplified operation. To enter user mode, the MENU and ENTER buttons are pressed simultaneously while re-turning on the power switch. The LCD will display "user mode" and then "Play**xxxxx." In this mode, only play, stop, and chase change operations are possible. Menu item functions can only be set in "system mode." To return to system mode, the same procedure is followed.
Maintenance features emphasize safety and proper handling. The unit should be kept dry and not exposed to water or high humidity. Users are advised not to dismantle or modify the product without authorization. It should be kept away from magnetic fields during operation, and no inflammable liquids or metal objects should enter the unit. The device requires careful handling, as strong shocks or vibrations can lead to malfunction. Operation is restricted to adults, and children should not tamper with it. In case of liquid spills, the power supply must be disconnected immediately. The manual also provides instructions for saving and loading data to/from a USB drive, as well as a factory data reset option.
| DMX Input | Yes |
|---|---|
| DMX Output | Yes |
| Display | LCD |
| Power Source | Battery |
| Power Supply | 9V DC |
| Operating Temperature | 0°C |