DS-Series™ Printer Quick Reference
DNP Imagingcomm America Corporation 1 Release: v01.2017
© 2017. All rights reserved. PN: 35-260-2-SA
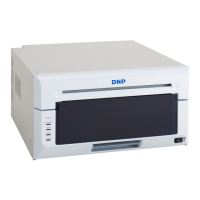
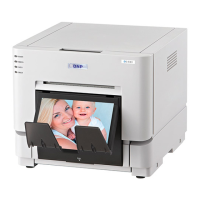
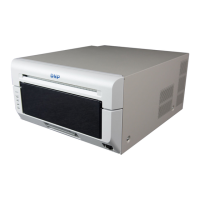
DS40 & DS80 Printers
The DS40 and DS80 are quite similar. The
instructions for one will work for the other.
The main difference is in the media width size:
• DS40 printers use 5” or 6” wide media sets.
• DS80 printers use 10” wide media sets.
The easiest way to determine what kind of printer
you have is to look at the label on the front.
ATTENTION:
Always replace paper and ribbon at the same
time.
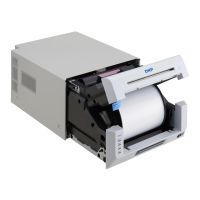
Installing a Paper Roll
1. Pull out the media
compartment drawer by
lifting the blue handle
under the scrap box and
pulling gently.
2. Release the paper
compartment release lever.
3. Remove the scrap box. Set
it aside.
4. Remove the paper roll from
the printer.
5. Remove the spools ends from the paper roll
by pulling gently on the spools.
6. Set the spools into a new roll of paper.
ATTENTION:
Be sure there is no gap between the paper and
the spools. Failure to set correctly can result
in paper jams. Set the paper into the paper
compartment. Make sure the paper roll is seated
so that the leading edge of the paper roll is
coming over the top of the paper roll and feeding
into the paper compartment from the bottom.
7. Remove the seal on the paper.
8. Advance the paper
so that the paper is
feeding into the printer
from the bottom of the
paper compartment.
The printer beeps when
the paper is in the correct position.
9. Replace the scrap box, and close the top of
the paper compartment.
10. Close the paper compartment.
ATTENTION:
The printer will not operate without the scrap bin
in place.
Installing a New Ribbon
1. Remove the old ribbon and
discard it.
2. Set a new ribbon into the
ribbon cassette. Advance the
ribbon, leaving no slack.
3. Place the cassette in the printer
with the supply side in the front.
4. Close the media compartment
drawer.
5. The printer will cycle through the lights as
it adjusts the media. When the media is
aligned, four blank test images are printed.
Repairing a Ribbon Tear
1. Open the media compartment.
2. Remove the ribbon cassette.
3. Cut the ribbon. Carefully remove any
remaining ribbon from
inside the mechanism.
4. Reattach the ribbon using
cellophane tape, as shown.
5. Advance the ribbon several
times until the tape is no
longer showing.
6. Make sure there is no slack in the ribbon.
Replace the cassette in the printer.
ATTENTION:
Make sure the ribbon is placed in correctly.
7. Close the media compartment drawer. The
printer will re-initialize.
Removing a Paper Jam
1. Pull out the media compartment.
2. Release the paper compartment release
lever.
3. Remove the scrap box. Set it aside.
4. Remove the paper roll from the printer. Pull
any paper remaining from the printer.
5. Cut off any partially
printed, wrinkled or
otherwise inferior paper
evenly with scissors.
6. Replace the paper and feed the paper into
the printer.
7. Replace the scrap box,
and close the media
compartment drawer.
8. The printer will cycle
through the lights as it
adjusts the media. When
the media is aligned, four blank test images
are printed.