14
EN
Installation Rooop Air Conditioner (Air Distribution Box, Electronic Controls)
8.1.4 Connecting the lighting cable to
the electronic control box (optional)
If the ADB is equipped with LED lighting, connect the
2-conductor lighting cable supplied with the ADB to
the “INTERNAL LIGHT” matching connector on the
electronic control box.
8.2 Installing the foam dividers
Roof thicknesses vary among RVs and the ADB
installation may require additional foam to fill any gaps in
thicker roofs.
This section describes how to determine if additional
foam dividers are required, the number required, and
the installation method.
ww
q
ee
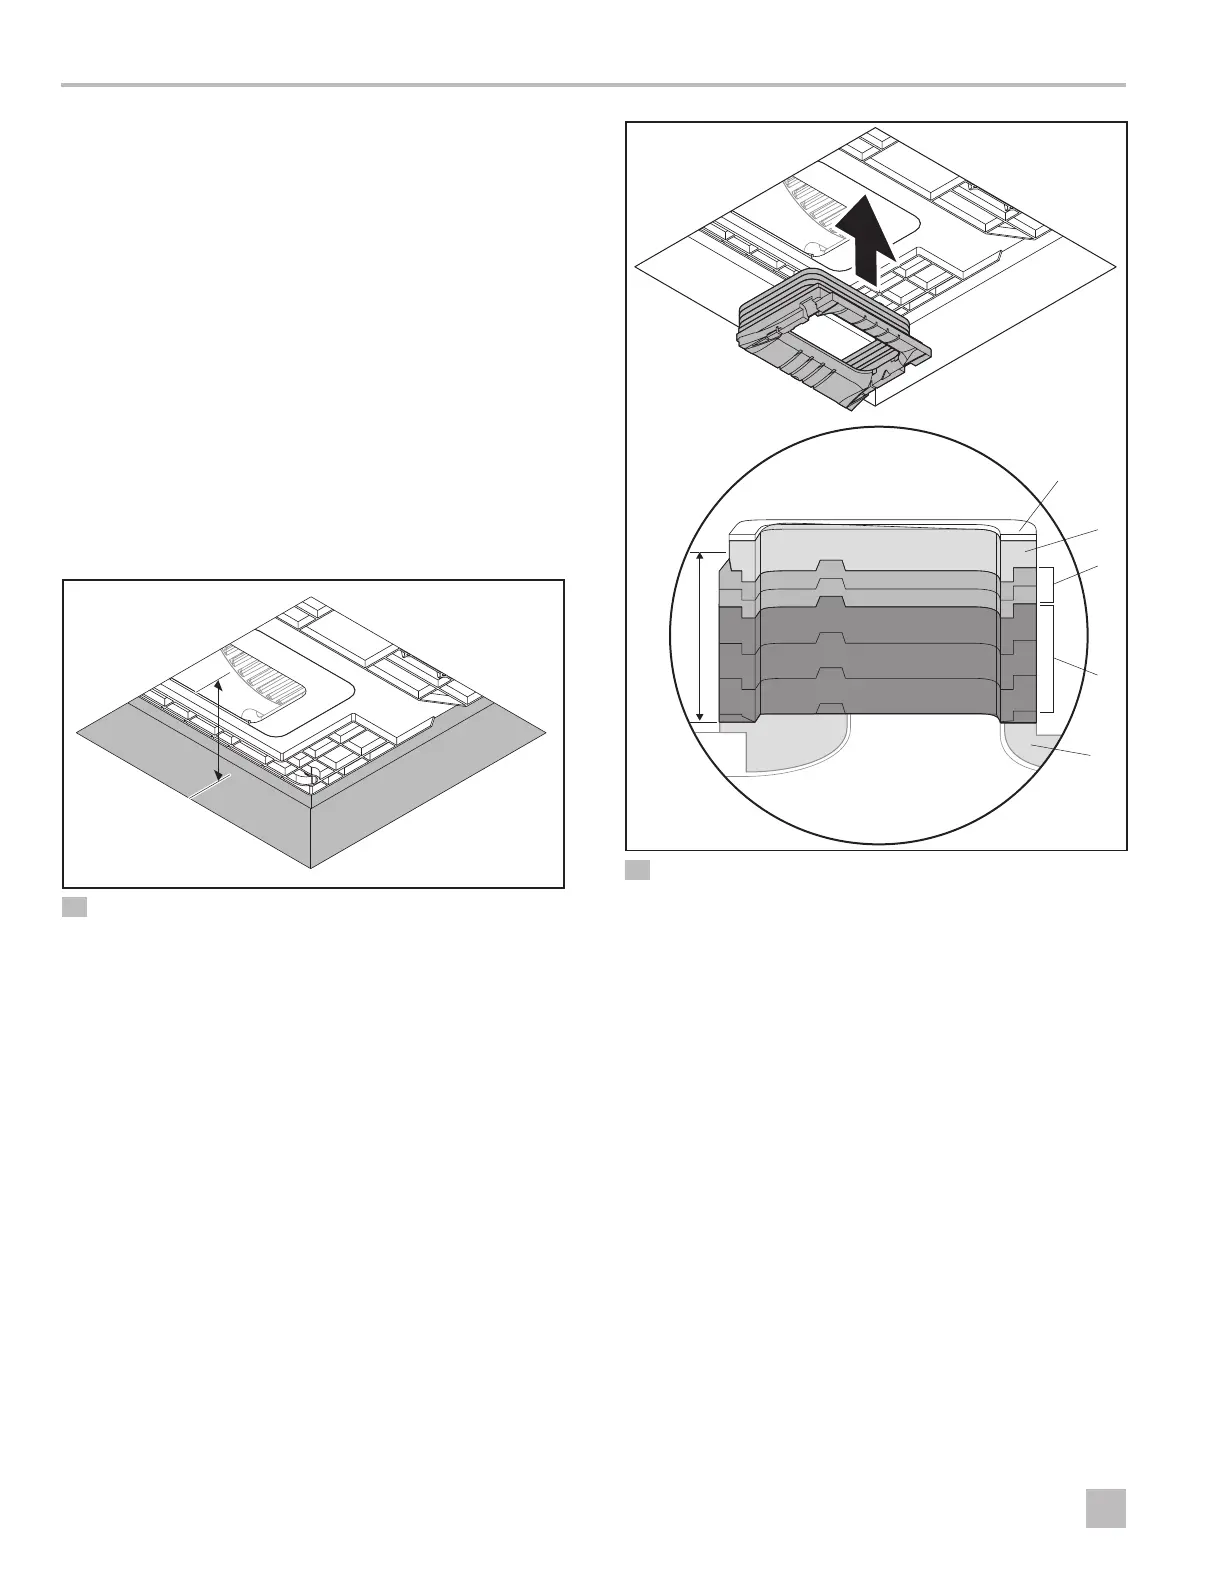
11 Measuring the roof thickness for foam divider installation
q
Ceiling opening
e
Roof thickness
w
Rooop component basepan
1. Inspect the ADB and the mounting hardware placed
inside the RV in “Positioning the rooop component”
on page12. See “ADB components” on
page6 for the parts configuration.
2. Measure the roof thickness, from a flat surface of the
installed rooop component’s basepan to the ceiling
opening inside the RV.
q
w
e
u
y
t
r
12 Stacking the foam dividers and placement location
q
Stacked foam dividers
t
Foam divider -
0.4in. (10mm) (2)
w
Roof thickness
e
Top foam -
0.4in. (10mm) (1)
y
Foam divider -
1.2in. (30mm) (3)
u
ADB adapter (1)
r
Top foam ring - 0.4in.
(10mm) (1)
3. Identify the different types and sizes of foam dividers.
4. Using the tables in “Roof thickness 1.25to 5.5
in. (32to140 mm)” on page16 and in “Roof
thickness 6.0 to 7.5 in. (152to191mm)” on
page17, determine the number and combination
of foam dividers required based on the roof
thickness.
 Loading...