7
Installation / Operation
4. Install oor mounting nuts and washers onto T-bolts. Carefully torque nuts to 30-40 inch-
pounds. DO NOT OVERTIGHTEN. Alternate between sides when tightening to prevent
distortion of base. When tight, base should be securely attached and at against oor.
Attach bolt covers onto nuts. (g.
5
B, p. 2)
6. Connect water supply line and torque connection to 30-40 inch-pounds.
DO NOT OVERTIGHTEN. (g.
5
C, p. 2)
7. Connect electrical power to toilet according to wiring diagram on
toilet’s parts list (printed separately). Turn on electrical power to
toilet.
8. Turn on water supply to toilet. Flush toilet several times and
check for leaks.
9. Attach pump/base cover (g.
5
E, p. 2) to base with screws on
sides of toilet base (g.
6
) and with locking tabs on sides and
back.
6.3 Remote installation
1. To install toilet separate from holding tank
(not on typical floor flange), position toilet
in location with same clearances as ange-
mounted toilet (g.
3
, p. 2). See Rough-in
dimensions.
2. Mark fastener hole locations through two
holes in base. Drill pilot holes for hex screws
in Remote Mounting Hardware Kit.
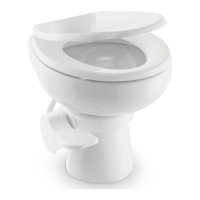
3. Remove black rubber elbow from check valve
(g.
5
D, p. 2) in back of toilet (g.
7
).
4. Route either 1.5 in. ID exible sanitation hose or 1.5 in. ID PVC or ABS pipe from waste tank to
check valve. Plumbing can be routed either above- or below-oor as required. Access holes
may need to be drilled through oor or wall depending on installation layout (g.
8
).
(Flexible sanitation hose can be connected directly to check valve with hose clamps.)
5. Route and connect appropriate wiring and water line according to instructions in section 6.2.
6. Fasten toilet to oor with hex-head screws on each side of base. Cover fasteners with plastic
caps. Then, follow steps 8 and 9 from section 6.2 to complete the toilet installation.
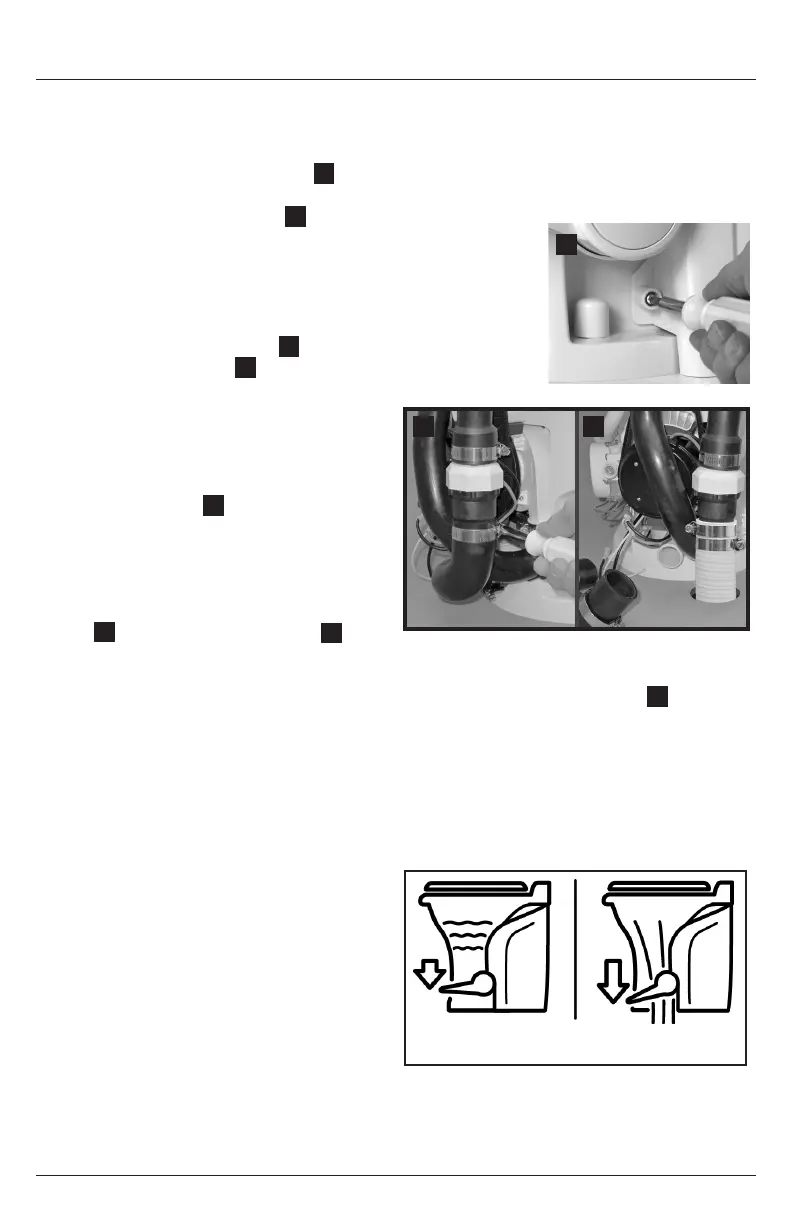
7 Operation
7.1 Add water to bowl
Flush – press pedal
completely down
Add water to bowl –
partially press pedal
To add water to the toilet, press the ush pedal
part way down. (To avoid possible overow,
water ow will stop automatically if pedal is
pressed too long.) More water is usually added
only when ushing solids.
7.2 Flush toilet
To ush, press pedal down completely, then
release it. This activates a powerful macerator
pump that siphons water and waste from the
toilet bowl, macerates and propels the efuent to the holding tank.
(“Operation” continued on next page)
6
7 8

 Loading...