N
Nicole LarsonSep 18, 2025
Why is my Dometic RM3962 Refrigerator making a gurgling noise?
- MMiguel BeckSep 18, 2025
If you hear a loud gurgling noise coming from the cooling unit of your Dometic Refrigerator, the cooling unit is likely defective.
Why is my Dometic RM3962 Refrigerator making a gurgling noise?
If you hear a loud gurgling noise coming from the cooling unit of your Dometic Refrigerator, the cooling unit is likely defective.
Why is my Dometic RM3962 light on but not cooling?
If your Dometic Refrigerator isn't operating but the interior light is on, the issue might stem from a few potential causes. Check if the mode or a switch is set incorrectly. It's also possible that the DC voltage is too low or absent. The thermistor might not be operating within the proper temperature range. Another potential cause is that the communication wire harness has lost continuity or is shorted to ground. Lastly, there might be a short or a failed circuit in the lower control module.
Why Dometic RM3962 Refrigerator works on electric but not gas?
If your Dometic Refrigerator operates in electric mode but not in gas mode, several issues could be the cause. First, check if the mode or a switch is set incorrectly. The gas pressure might be too low or absent. Ensure the knob on the gas valve hasn't been turned to the off or closed position. Altitude might be affecting the refrigerator's operation in gas mode. The re-igniter might not be creating a spark, or the resistance on the gas valve solenoid might be out of specification. The orifice could be blocked or incorrectly sized. For older Americana models, the thermocouple might be defective. The burner could be blocked, the wiring might be faulty, shorted, or miswired, or there could be a short or a failed circuit in the lower control module.
Why is my Dometic Refrigerator freezing food?
If the fresh food compartment in your Dometic Refrigerator is freezing, it could be because the thermistor is not operating within the proper temperature range, or there is a short or a failed circuit in the lower control module.
What to do if Dometic Refrigerator does not work in gas operation mode?
If your Dometic Refrigerator isn't working in gas operation mode, first check if the LP gas bottle is empty and change it if necessary. If the bottle isn't empty, there might be air in the gas line; try removing the air by repeating the ignition sequence. If the problem persists, turn the refrigerator off and contact a Dometic dealer or Service Center for repair.
What to do if Dometic RM3962 emits an odor from fumes?
If your Dometic Refrigerator emits an odor from fumes, it may be caused by a dislocated or damaged burner or a dirty fuel tube. Turn the refrigerator off and contact a Dometic dealer or Service Center for repair.
What does E3 error mean on a Dometic RM3962?
If 'E3' is displayed and two thermostat range setting lights are flashing on your New Generation Dometic Refrigerator (First generation DMR702 and DMR702-D models only), the thermal fuse might be tripped, or the thermofuse could be defective. Improper installation might have caused an imbalance in the airflow around the refrigerator.
Why are the lights off on my Dometic RM3962 panel?
If the panel lights on your Dometic Refrigerator do not turn on, the DC voltage might be too low or absent. The upper control module could be defective, or the communication wire harness might have lost continuity or is shorted to ground.
Why is the light in my Dometic Refrigerator not working?
If the interior light in your Dometic Refrigerator is not functioning properly, the interior light is likely defective or broken.
What does the check light mean on a Dometic Americana Refrigerator?
If the check indicator lamp is on in your Americana Dometic Refrigerator, the DC voltage is too low, or there is a loose or weak ground.
Procedures to follow if you smell gas, including ventilation and contacting the supplier.
Do not store or use flammable vapors/liquids near the appliance.
Improper installation, adjustment, or service can cause injury or property damage.
Turn off refrigerator and contact Service Center if ammonia smell is detected.
Indicates a hazardous situation which, if not avoided, could result in death or serious injury.
Indicates a hazardous situation which, if not avoided, could result in minor or moderate injury.
Used to address practices not related to personal injury.
Description of the ON/OFF, AUTO/GAS, and TEMP. SET buttons on the control panel.
Explains the LED display's function for temperature, modes, and status messages.
Table detailing what different LED indications mean for refrigerator status and operation modes.
Adjusting thermostat for cooling cycle and effect of temperature on operation.
Importance of proper vehicle leveling for absorption refrigerator operation.
Effects of high altitude on refrigerator performance and recommended operation.
How the system automatically selects energy sources (AC or LP gas).
Procedure for removing air from LP gas lines after long periods of non-use.
Detailed explanation of AUTO mode and GAS mode operation.
Step-by-step guide for safely starting the refrigerator, including safety warnings.
How to set the desired temperature using the TEMP. SET button.
Requirements for the ice maker to operate, including power and water supply.
Steps to adjust the size of ice cubes produced by the ice maker.
Minimum water pressure and line requirements for the ice maker.
Explanation of the Low Ambient Control (LAC) for cold weather.
How extremely cold temperatures can affect refrigerator performance.
Procedure for turning off the refrigerator and preparing it for storage or winterization.
Table showing the refrigerated volume for RM3762 and RM3962 models.
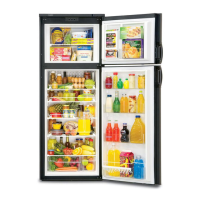
Tips for cooling food, covering odorous foods, and placement within the compartment.
Guidelines for storing food in the frozen compartment, including packaging and placement.
How to make ice cubes and optimal settings for freezing.
Step-by-step instructions for removing and reinstalling refrigerator shelves.
Using the card to keep doors ajar for storage and as a partition.
Procedure for defrosting the refrigerator, including safety warnings.
Steps for preparing the refrigerator for storage or winter, especially for ice maker models.
Guidelines for cleaning interior, evaporator, and external vents, including safety warnings.
Procedure for identifying and replacing the refrigerator's fuses.
Recommended annual checks by a qualified technician for gas connections and system.
How to check the control system's functionality.
Procedure for cleaning the burner and checking its flame and electrode for proper operation.
Information that removal and disposal should be performed by a qualified service technician.
Table listing symptoms like 'stops cooling' or 'ammonia smell' and their remedial actions.
Explanation of error codes displayed by the refrigerator and actions to take.
Information about using the Dometic website for product care, warranties, and literature.
How to contact Dometic for service and to obtain spare parts.
Instructions for registering the product online via the Dometic website.
Benefits of registering, including warranty verification, factory communication, and owner confirmation.
Information on the optional 2 Plus 3 Full Service Contract for extended warranty coverage.
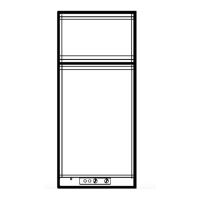
This document provides operating instructions and maintenance guidelines for the Dometic RM3762 and RM3962 recreational vehicle refrigerators. These appliances are designed for storing fresh and frozen foods and for making ice.
The Dometic RM3762 and RM3962 are absorption refrigerators, meaning they cool by using a heat source (either 120 VAC electricity or LP gas) to circulate a refrigerant solution. This process allows them to maintain low temperatures in the fresh food and freezer compartments. The refrigerators are equipped with an automatic energy selector control system, which allows the user to choose between fully automatic operation (AUTO mode, attempting electric mode first) or LP gas-only operation.
A control panel with an LED display provides a visual indicator of the refrigerator's status, including the temperature in the fresh food compartment, current operating mode, and any alarm conditions. The thermostat has five settings, from "1" (warmest) to "5" (coldest), allowing users to adjust the desired temperature.
For models equipped with an ice maker, the refrigerator can produce ice cubes when connected to 120 VAC power and a water supply. The ice maker features an ice level bail arm that stops production when the storage container is full. The size of the ice cubes can be adjusted by turning a screw located under a protective cover in the ice maker mechanism.
The refrigerator also includes a Low Ambient Control (LAC) function, which enables trouble-free operation in low ambient temperatures (below 50°F).
Starting the Refrigerator: To start the refrigerator, ensure all manual gas valves are in the ON position and a continuous 12 VDC supply is available. Then, press the ON/OFF button. Users can select the operation mode using the AUTO/GAS mode selector button:
Adjusting the Thermostat: After initial start-up, the thermostat can be adjusted by repeatedly pressing the TEMP. SET button until the desired setting (1-5) is displayed. The chosen setting will control both gas and electric operation.
Operating the Ice Maker (Ice Maker Models Only): Before operating the ice maker, ensure the refrigerator is connected to 120 VAC, the water valve is turned on, and the ice level bail arm is in the fully down position. To prevent water from splashing during travel, raise the bail arm to the UP/OFF position about 1.5 hours before departing to allow the water in the mold to freeze.
Adjusting Ice Cube Size: To adjust ice cube size, remove the protective cover from the ice maker mechanism, locate the adjusting screw, and turn it counterclockwise to increase cube size or clockwise to decrease it. Allow the ice maker to cycle several times before making further adjustments.
Temporary Gas Lockout: In AUTO mode, the temporary gas lockout feature will automatically lock out LP gas operation for 15 minutes when the engine is switched off, preventing gas operation during refueling. This feature does not work when AUTO mode is off.
Operating at High Altitude: At altitudes higher than 5500 feet, reduced cooling performance and burner outage may occur when operating on LP gas. It is recommended to operate the refrigerator on electric power at these altitudes.
Purging Air from LP Gas Lines: If the refrigerator has not been used for a long time or LP tanks have been refilled, air may be trapped in the supply lines. To purge the air, turn the refrigerator off and on by pressing the ON/OFF button. This procedure can be repeated 3 to 4 times if necessary.
Storage Compartments: The refrigerator includes wire shelves and plastic shelves. The coldest areas are under the cooling fins and at the bottom, while warmer areas are on the upper door shelves. Food should be covered to retain crispness and prevent odor absorption. Overpacking should be avoided to allow for free air circulation and efficient cooling.
Airing Position Card: An airing position card can be used to keep the doors ajar when the refrigerator is put into storage or not in use for an extended period, preventing odors and mildew. The card can also serve as an adjustable partition in the door bin compartments.
Turning Off the Refrigerator for Extended Periods: To turn off the refrigerator, press the main power ON/OFF button. For winter storage or extended non-use, the refrigerator should be emptied, defrosted, cleaned, and the doors placed in the airing position. If ice cube trays are in use, they should be dried and kept outside the cabinet. It is recommended to either put RV batteries on a charger or turn off the vehicle's main 12 VDC switch to prevent battery discharge, as the control system consumes a few milliamps even when off.
Defrosting: To defrost, turn off the refrigerator, empty it, and leave the cabinet and freezer doors open with the drip tray in place. Defrosting time can be reduced by placing ice trays filled with hot water in the freezer compartment. Avoid using sharp tools or hot air blowers to remove frost, as this can damage the cooling system or plastic parts.
Cleaning: The refrigerator should be kept clean, especially after defrosting or before storage. Use a lukewarm weak soda solution to clean the interior liner, finned evaporator, gasket, and shelves. Avoid strong chemicals or abrasives. Ensure the thermistor bulb and bracket are properly positioned after cleaning.
Periodic Inspection and Cleaning: Annual inspection and cleaning of several components are recommended for efficient operation. This includes checking the lower and upper vents for obstructions (like bird/insect nests), ensuring the refrigerator area is free from combustible materials, and cleaning the coils on the back of the refrigerator with a soft brush if accessible.
Replacing Fuses: The refrigerator is equipped with three fuses: a 5 A fuse for 12 VDC, a 5 A fuse for the AC heating element, and a 3 A in-line fuse for the fan and heat tape on ice maker models. To replace a fuse, turn off the refrigerator, unplug the power cord, remove 12 VDC power, open the power module cover, snap out the old fuse, fit the new fuse, and close the cover.
Checking LP Gas Connections: Periodically check all LP gas connections at the back of the refrigerator for leaks using an approved leak detection solution. Bubbles indicate a leak that must be repaired immediately. Never use an open flame to check for gas leaks.
Cleaning the Burner: To clean the burner, turn off the refrigerator, unplug the 120 VAC power, disconnect 12 VDC wires or shut off power, turn off the manual gas shutoff valve, remove the burner housing cover, clean the burner tube with a brush, and blow out the burner with compressed air. Verify that the burner jet slots are centered under the flue tube and that the flame is clear blue. Check the electrode for proper location and gap. After cleaning, turn on the manual gas shutoff valve, examine fittings for leaks, reconnect power, and check LP gas safety shutoff. Do not use wires or pins to clear obstructions from the burner jet.
Preventative Maintenance (Required for Warranty): The warranty requires yearly preventative maintenance performed by a Dometic Authorized Service Center/Dealer. This includes inspection, cleaning, and full diagnostics of the electronic system, burner assembly, wiring, and cooling unit. The original purchaser must keep records of this maintenance.
Troubleshooting: The manual provides a troubleshooting table for common issues such as the refrigerator not cooling, emitting an ammonia smell, not being cold enough, or not working on electric or gas. It also lists error codes (E0, E1, E2, E3, E4) that may be displayed on the LED panel, indicating specific problems like communication errors, LP gas system faults, temperature sensor failures, cooling unit malfunctions, or out-of-range DC voltage. For persistent problems or error codes, users are advised to contact a Dometic dealer or Service Center.
| Type | Absorption Refrigerator |
|---|---|
| Freezer Capacity | 2.3 cu. ft. |
| Color | White |
| Power Source | LP gas |
| Climate Class | T (Tropical) |