4
EN
How The System Works How The System Works
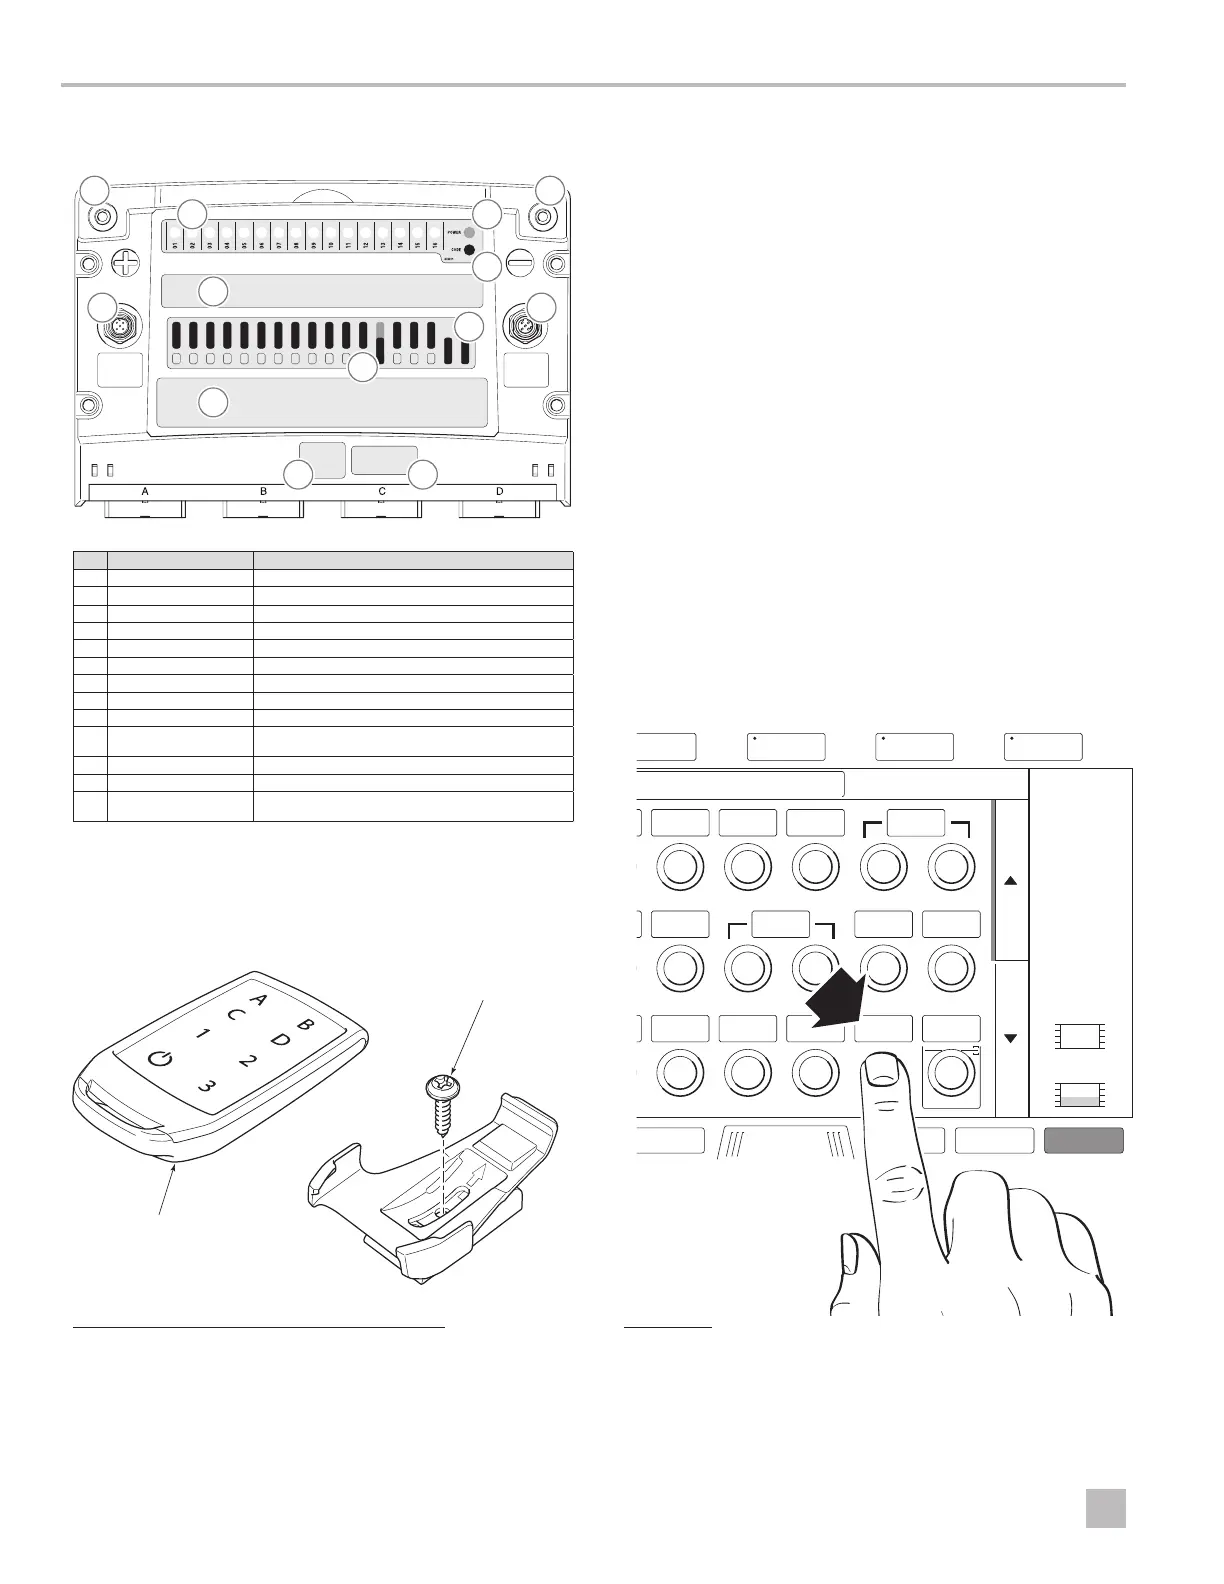
3.3 Layout
43
1 2
8
9
12 13
10
11
5 6
7
Item Name Description
1 Positive Terminal Connection to the house battery power.
2 Negative Terminal Connection to the house battery ground.
3 NMEA 2000 Connector Connection to NMEA 2000 network.
4 Ethernet Connector Optional.
5 Channel Activity LED LED ON shows when load is active.
6 Power LED LED ON shows when DCM is powered.
7 Error Code LED Error code list can be found in Section 3.1.
8 Always ON Channel Fuses Fused output channels powered when DCM is powered.
9 Fuse Bypass Use fuse bypass to turn the channel on in case of failure.
10
Input Channel Label Channel inputs going to the DCM.
This could be physical switches
or analog sensor feedback.
11 Output Channel Label Channel outputs and fuse values to loads controlled by DCM.
12 Serial Number Label DCM serial number.
13 DCM Label DCM info on: Boat model and model year / DCM part number and
revision / Config part number and revision.
3.4 Key Fob Mounting Kit
INSERT INTO
HOLDER
SCREW INTO
DECK
3.5 Key Fob Pairing Procedure
In case your key fob lost pairing or you received a new key fob
follow this procedure to pair the key fob to the DCM:
1. On the MFD Switching page find Remote Learn button.
2. Press and release the Remote Learn button on the MFD (the
button is located on the MFD Switching page).
3. Press and release any button on the Key fob.
4. Wait 20 seconds for the DCM to exit programming mode.
5. The transmitter and DCM are now paired.
6. Repeat the pairing process for additional transmitters.
7. Up to 40 transmitter addresses can be stored in the DCM.
If a transmitter is lost or stolen, the user may want to clear it
from the DCM’s memory so that it can no longer control the
DCM.
To erase all transmitter addresses, press and hold the Remote
Learn button on the MFD for 15 seconds.
Note that all transmitters must then be re-paired with the
DCM.
SWITCHING
Home
First Fish
Port
Port Recirc
Pump
Port Pump
Out
Stbd Pump
Out
Stbd Recirc
Pump
Stbd Fill
Pump
O L M HO L M H
O L M HO L M H
Nav/Anchor
Lights
Courtesy
Light
Bilge
Jackplate
Vent
Down
Up
Shallow
Water
Down
GPS Speed
Powerpoles
Up
Up
0.00
m
h
f
t
Eng. Voltage (1)
Depth
Trim
1
1
Jackplate
12.1
0%
––––
V
RPM (1)
0
R
P
M
Info Menu Mark SOS
Trim
Set Sweet
Spot
Set Shallow
Water
Set Hole
Shot
Remote
Learn
Hole Shot Sweet Spot Night Running
46%
Figure 2-4. Key Fob Dash Mounting kit. NOTE: May already be
installed on your boat.
Figure 2-5.