Sunchaser, 8500 & 9000 Awnings User’s Guide
3
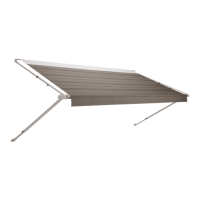
Important: Never leave the roller tube level with the
awning rail, adjust both arms of the Universal Hard-
ware 7 to 8 adjustable arm holes below awning rail
(fabric slope approximately 10 degrees). Sunchaser
hardware should be in the water shed position. See
FIG. 9.
6. Slide pull strap to the right hand end of the roller
tube and wrap around arm. See FIG. 6.
7. While holding arm, pull up on the lift handle to re-
lease and lift awning to desired height. Release
handle and allow the lock button to engage into a
hole in the adjustable arm. See FIG. 7.
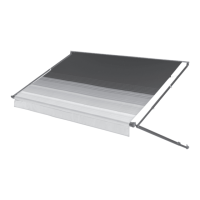
8. To place the awning in the carport position, press
the release lever on the bottom mounting bracket
and pull the arm away. Move to a vertical position,
and secure in place with stakes. Raise to desired
height. Repeat on opposite end. See FIG. 8.
Lifting Hazard: Use extreme caution when lift-
ing arm off bottom mounting bracket. If not
controlled Fabric Roller Tube Assembly could
cause back injury and or damage to RV and
Awning.
FIG. 8
Water Pooling Hazard:
Whenever heavy rain is expected the awning
must be placed in the storage position. Pool-
ing of water on top of the awning fabric, will
make the awning unstable causing the arms
and roller tube to bend or collapse. Never re-
lease lift handle locks with water pooled on
canopy. This will result in personal injury,
death and damages to the awning and/or rec-
reational vehicle.
Wrap Pull Strap
Around Right Arm
Assembly
FIG. 6
Pull Up On Handle
To Release Lock
Button, Lower
Handle to Engage
Button
FIG. 7
5. While stretching fabric taut, tighten knob. Repeat
on opposite side. The rafter in the arm with the
water shed feature is positioned higher, this could
make tightening of the knob more difficult. The
knob is designed with a groove. Insert the end of
the 23" wire handle (supplied) in the groove and
tighten the knob by turning the handle. See FIG. 5
& 5A.
Loosen Knob Swing,
Rafter Towards End
Cap And Hook, Stretch
Fabric Taut, Tighten
Knob
FIG. 5
Place
Rod In
Groove
To And
Turn
FIG. 5A
FIG. 4
Hook Rafter Claw
Onto Torsion Rod
Torsion
Rod
FIG.
4a
Middle Channel
Innermost
Channel / Claw
Spring Button