EPT076596 Issue 1 – March 2022
33
Maintenance
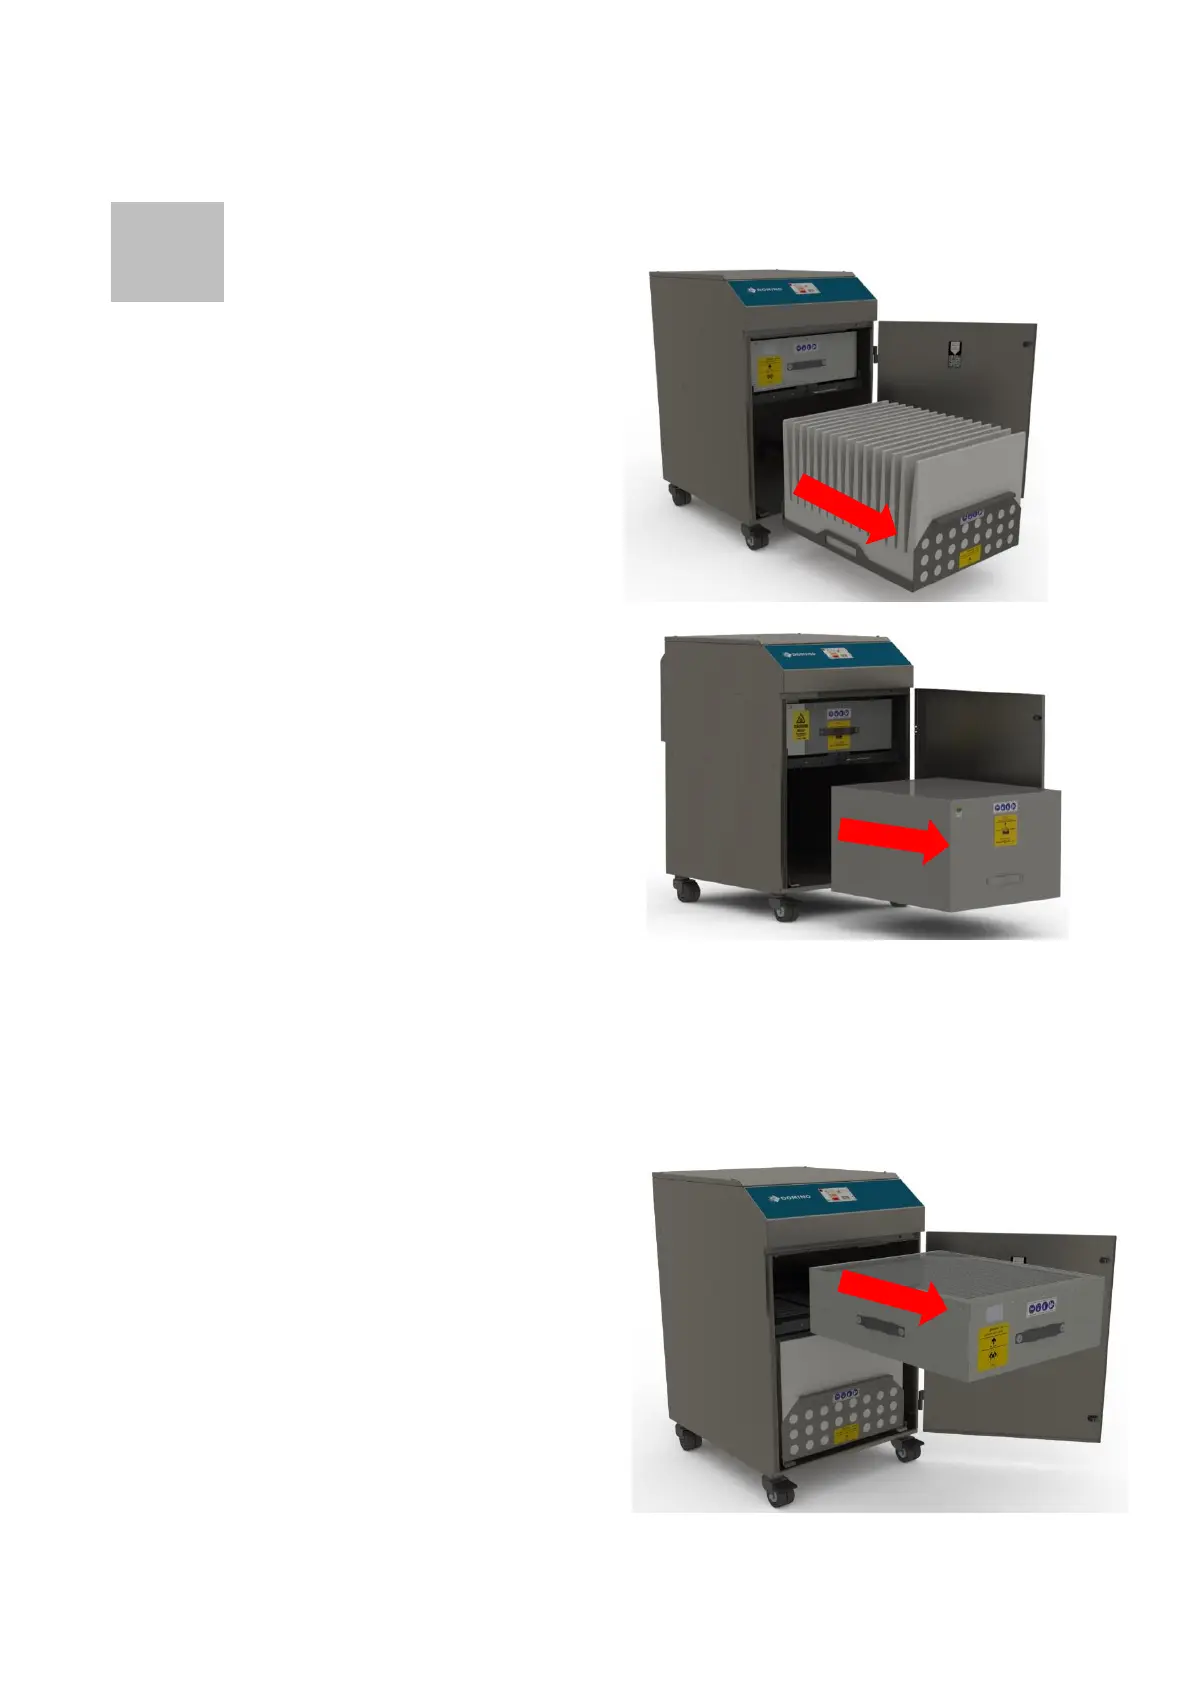
Pre-Filter Replacement
Refer to section 2 02 for PPE requirements.
To remove and replace the Pre-filter follow the procedure
detailed below. (Follow the replacement guide that is with
each consumable).
1. Isolate the electrical supply to the extractor
2. Undo the latches on the front of the unit and open
the door.
3. The Pre-filter is the lower of the 2 filters (refer to
section 1 for filter location) using the handle on the
front of the filter cage, pull it out of the unit,
towards the user.
4. Once removed it is recommended that the used
filters are bagged and sealed.
5. Slide the new filter into position making sure it is
pushed all the way in and is located correctly on the
spigot in the back of the unit.
6. Close the door and fasten the 2 latches.
7. Reconnect the power supply
Main Filter Replacement
To remove and replace the Main filter follow the procedure
detailed below.
1. Isolate the electrical supply to the extractor
2. Undo the latches on the front of the unit and open
the door.
3. The main filter is the higher of the 2 filters (refer to
section 1 for filter location) rotate the lever below
the filter through 180
o
anticlockwise to lower the
main filter.
4. Using the handle on the front of the filter, pull it out
of the unit being careful to support it as it comes
free as it is heavy (Max weight 34Kg, 2-person lift
required using side handles).
5. Once removed it is recommended that the used
filters are disposed in the box of the new
replacement.
6. Slide the new filter into position making sure it is
pushed in all the way.
7. Rotate the lever back through 180
0
clockwise to
raise the filter into position.
8. Close the door and fasten the 2 latches
9. Reconnect the power supply
Both filters MUST be fitted when the extractor is in use, if
the main filter is not installed correctly the DPX3500
system will not allow the motor to operate.
 Loading...