EasyManua.ls Logo

Donco kids 750 User Manual

Donco kids 750
7 pages
To Next Page IconTo Next Page
Page #1 background imageLoading...
Page #1 background image
750 TENT BED
ASSEMBLYINSTRUCTIONS
Thank you for purchasing this quality product. Be sure to check all packing
material carefully for small parts which may have come loose inside the
carton during shipment. Separate, identify and count all parts and hardware.
Compare with the parts list to be sure all parts are present.
“DO NOTTIGHTEN SCREWS UNTILCOMPLETELYASSEMBLED”
IMPORTANT:
Use of power tool to assemble this
product will invalidate any claim and
damage this product making unsafe !!!
Please assemble on a clean soft
surface to avoid damage.
!
Tools Required
(Not included)
+
2:00 h
1
2
3
4
5
6
7
8
9
10
12
(Not included)
Instructions
Question and Answer IconNeed help?

Do you have a question about the Donco kids 750 and is the answer not in the manual?

Donco kids 750 Specifications

General IconGeneral
BrandDonco kids
Model750
CategoryIndoor Furnishing
LanguageEnglish

Summary

Part List and Hardware Identification

Identifying the Hardware

Guides users to identify and count all hardware components by illustrations and labels.

Step 01: Initial Frame Assembly

Connecting Side Rails and Supports

Attaches side rails (5, 6, 7) and supports (8, 9, 10, 11) using dowels (E) and screws (D, H).

Step 03: Ladder and Frame Assembly

Ladder Construction

Assembles the ladder structure using parts (14, 15) and hardware (F, H).

Frame Reinforcement

Secures frame components (8, 9, 10) with hardware (A, B, C, H) for stability.

Step 05: Attaching Tent Panels

Tent Panel Installation

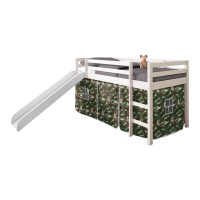
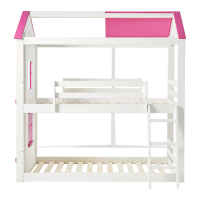
Attaches tent panels (1) to the frame using Velcro and securing mechanisms.

Step 06: Securing Tent Panels

Final Tent Panel Fastening

Completes tent panel attachment using screws (C, F, G) and hex screwdriver (H).

Step 07: Tent Reinforcement

Adding Tent Support Screws

Reinforces tent panels with screws (F, H) for added stability.

Step 08: Slat Installation

Securing Bed Slats

Installs bed slats (G) with spacer tape, ensuring proper placement.

Step 09: Slide Assembly

Attaching Slide Components

Connects slide parts (17, 18, 19, 20, 21) using screws (F, H).

Step 10: Final Slide Attachment

Mounting the Slide

Secures the assembled slide to the bed frame with screws (F, H) and provides safety warning.

Related product manuals