Do you have a question about the Donco kids 760 and is the answer not in the manual?
Lists tools needed for assembly, noting they are not included.
Warnings on screw tightening, power tool usage, and assembly surface preparation.
Lists all parts required for assembly with their corresponding labels.
Illustrates and quantifies all hardware pieces for assembly.
Connects side panels (1, 2) using dowels (C, J) and screws (B).
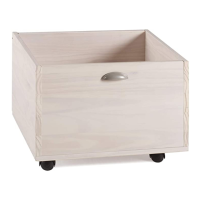
Attaches drawer sides (1, 2) to drawer base (3) using screws (B).
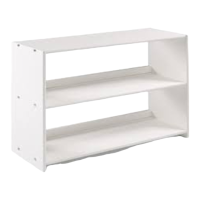
Installs shelves (3) into the drawer structure using screws (B).
Attaches drawer front to the assembled drawer box using screws (E).
Attaches drawer glides (G, H) and stops (F) to the drawer and desk frame.
Secures the desk surface (6) to the main frame using screws (E).
Assembles the bed frame using screws (A, D) and dowels (I).
Connects the desk unit to the bed frame using dowels (J).
This document outlines the assembly instructions for the "DONCO kids Fort Worth, Texas 76140 760 DESK," a piece of furniture designed for children's rooms or study areas. The primary function of this device is to provide a sturdy and functional desk surface, likely integrated with storage or a bed frame, suitable for a child's use. The "kids" designation in the brand name suggests that the product is specifically tailored for younger users, implying considerations for safety, durability, and appropriate sizing.
The manual emphasizes the importance of careful assembly to ensure the product's integrity and safety. It begins with a crucial warning: "PLEASE READ INSTRUCTION BEFORE STARTING THE ASSEMBLY," highlighting the necessity of understanding the process to avoid errors. Another key instruction, "DO NOT TIGHTEN SCREWS UNTIL COMPLETELY ASSEMBLED," is provided to prevent misalignment and stress on the components during the initial stages of construction, allowing for adjustments before final securing. This is a common practice in furniture assembly to ensure all parts fit together correctly before being permanently fixed.
The assembly process is broken down into several steps, each clearly illustrated with diagrams and corresponding part lists. This visual guidance is essential for users to identify components and follow the sequence of construction accurately. The "Part List - 760 DESK" section details all the individual pieces required, including wooden panels, various types of screws, wood dowels, and a hex screwdriver. Each part is assigned a unique identifier (e.g., A, B, C) and an image, along with its quantity and specific dimensions or type (e.g., "7.0 x 80 Screw," "8 x 30 Wood Dowel"). This meticulous listing helps users verify that all necessary components are present before starting, preventing frustration and delays.
The "Identifying the Hardware" section further aids in this verification process by providing detailed illustrations of each hardware item. This visual aid is particularly useful for distinguishing between similar-looking screws or dowels, ensuring the correct hardware is used at each step. The manual also includes a "Tools Required" section, indicating that a hammer and a hex screwdriver are needed for assembly. It explicitly states "(Not Includ)" next to these tools, informing the user that they must provide these items themselves. This upfront information helps users prepare all necessary equipment before beginning the assembly.
A time estimate of "0:45 h" (45 minutes) is provided for the assembly, giving users an idea of the expected duration. This can help in planning and managing expectations for the assembly process.
The manual includes important usage and maintenance features, although implicitly. The warning "Use of power tool to assemble this product will invalidate any claim and damage this product making unsafe !!!" is a critical safety and warranty instruction. It advises against using power tools, likely because they can overtighten screws, strip threads, or damage the wood, compromising the structural integrity and safety of the desk. This suggests that the product is designed for manual assembly, which allows for a more controlled and gentle fastening of components.
Another maintenance-related instruction is "Please assemble on a clean soft surface to avoid damage." This advice is crucial for protecting the furniture components from scratches, dents, or other cosmetic damage during assembly. A soft surface, such as a carpet or a blanket, provides a buffer against hard floors and prevents marring the finish of the wood. This also implies a focus on the aesthetic longevity of the product.
The assembly steps are presented sequentially, starting with "01" and progressing through "08." Each step focuses on a specific part of the desk's construction. For instance, step "01" involves attaching back and side panels using wood dowels and screws, with clear indications of "LEFT" and "RIGHT" components to ensure correct orientation. The diagrams show arrows indicating where screws and dowels should be inserted, and the quantities of each hardware item needed for that specific step are listed.
Step "02" involves assembling the main desk structure, showing how shelves and side panels are connected using "B" screws (7.0 x 50 Screw). The diagrams clearly label "TOP" and "BOTTOM" sections and indicate "BACK" panels, reinforcing the correct orientation of parts. The inclusion of a hex screwdriver in the "Tools Required" section is relevant here, as the "I" (Hex Screwdriver) is shown in the hardware list for this step, indicating its use for tightening the "B" screws.
Subsequent steps, such as "03" and "04," continue the assembly of the desk's framework and the attachment of additional components using different types of screws (e.g., "E" screws, 4.0 x 30 Screw). These steps build upon the previous ones, gradually forming the complete structure. The consistent use of part identifiers and quantities in each step ensures clarity and reduces the likelihood of errors.
Step "05" focuses on attaching specific hardware components, possibly for drawers or other functional elements, using "F" screws (3.5 x 16 Screw). The diagram includes a "1" SPACE" label, which might indicate a specific gap or alignment requirement for these parts. This level of detail is important for ensuring the proper functionality of any moving or adjustable parts of the desk. The "LEFT" and "RIGHT" labels for "G" and "H" parts further emphasize the need for correct orientation.
Step "06" illustrates the attachment of the main desk surface or a large panel to the assembled frame using "E" screws. The label "BOTTON SIDE" (likely a typo for "BOTTOM SIDE") indicates the correct orientation for this panel. This step is crucial for creating the primary work surface of the desk.
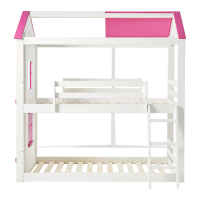
Steps "07" and "08" appear to integrate the desk with a larger structure, possibly a bed frame, given the presence of bed slats and a ladder-like structure in the diagrams. This suggests that the "760 DESK" might be part of a bunk bed or loft bed system, providing a desk area underneath. Step "07" shows the attachment of bed slats using "A" screws (7.0 x 80 Screw) and "D" screws (4.0 x 40 Screw), with a close-up view of how these connections are made. The "STOPS" label in step "08" indicates a mechanism to secure the desk in place within the larger structure, using "J" wood dowels (10 x 40 Wood Dowel). This integration feature is a key aspect of the product's design, maximizing space efficiency in a child's room.
Overall, the manual provides comprehensive, step-by-step instructions with clear illustrations and detailed part lists, making the assembly process manageable for the user. The emphasis on careful assembly, avoiding power tools, and protecting components during construction highlights the manufacturer's commitment to product safety, durability, and user satisfaction. The design of the desk, particularly its integration with a larger bed structure, points to a focus on space-saving and multi-functional furniture for children's environments. The inclusion of estimated assembly time and required tools further enhances the user experience by providing necessary preparatory information.
| Material | Wood |
|---|---|
| Assembly Required | Yes |
| Color | White |
| Style | Traditional |
| Convertible | No |
| Side Rails | Yes |
| Product Type | Bed |
| Size | Twin |