Do you have a question about the DoorBird D20x Series and is the answer not in the manual?
Lists all items included in the DoorBird Video Door Station package, including the device, mounting housing, and accessories.
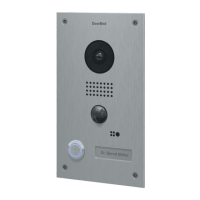
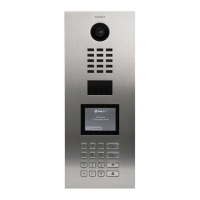
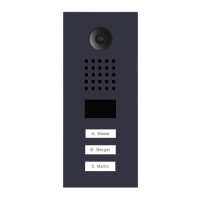
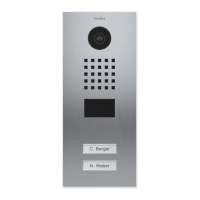
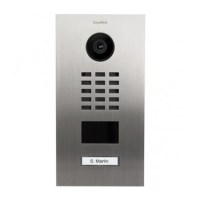
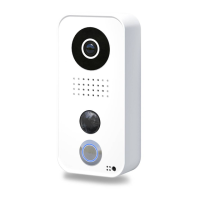
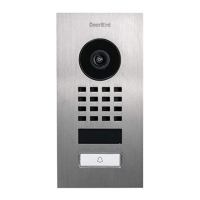
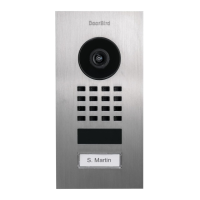
Details the features and functions of the Video Door Station's front panel, such as night vision, video, and speaker.
Describes the connection ports on the back of the Video Door Station, including antenna threads and cable harness.
Covers network speed requirements and initial setup considerations before installing the Video Door Station.
Instructions for safely disconnecting power to the existing doorbell system before installation.
Guidance on removing a previous doorbell system from the exterior wall.
Advice on choosing the optimal mounting position for the Video Door Station based on lens requirements.
Explains how to power the Video Door Station using a mains adaptor or Power over Ethernet (PoE).
Details optional wiring for connecting to a network, electric door openers, and door chimes.
Instructions for mounting the device's stand to the exterior wall or fence.
Steps for stripping and preparing wires for connection to the Video Door Station terminals.
Detailed guide on how to connect the prepared wires to the correct terminals on the device.
Instructions for attaching the external WiFi and RFID antennas to the Video Door Station.
Procedures for completing the physical installation by mounting the front panel or the unit itself.
Guide to powering on the device and verifying its initial operation via diagnostic indicators.
Instructions for downloading and configuring the DoorBird mobile application for device control.
Explains the meaning of the diagnostic LED light and diagnostic sounds for status indication.
Guidance on how to change the label on the name plate of the Video Door Station.
Information regarding trademarks, copyright protection, and general usage terms for the manual and product.
Defines the intended use of the product, safety guidelines for handling voltage, and liability limitations.
Details the device's security measures, data center location, and privacy-related features like visitor history.
| Video Resolution | 1280 x 720 (720p) |
|---|---|
| Connectivity | Wi-Fi, Ethernet |
| Night Vision | Yes, IR LEDs |
| Housing material | Metal |
| RFID | Yes |
| Compatibility | iOS, Android |