English
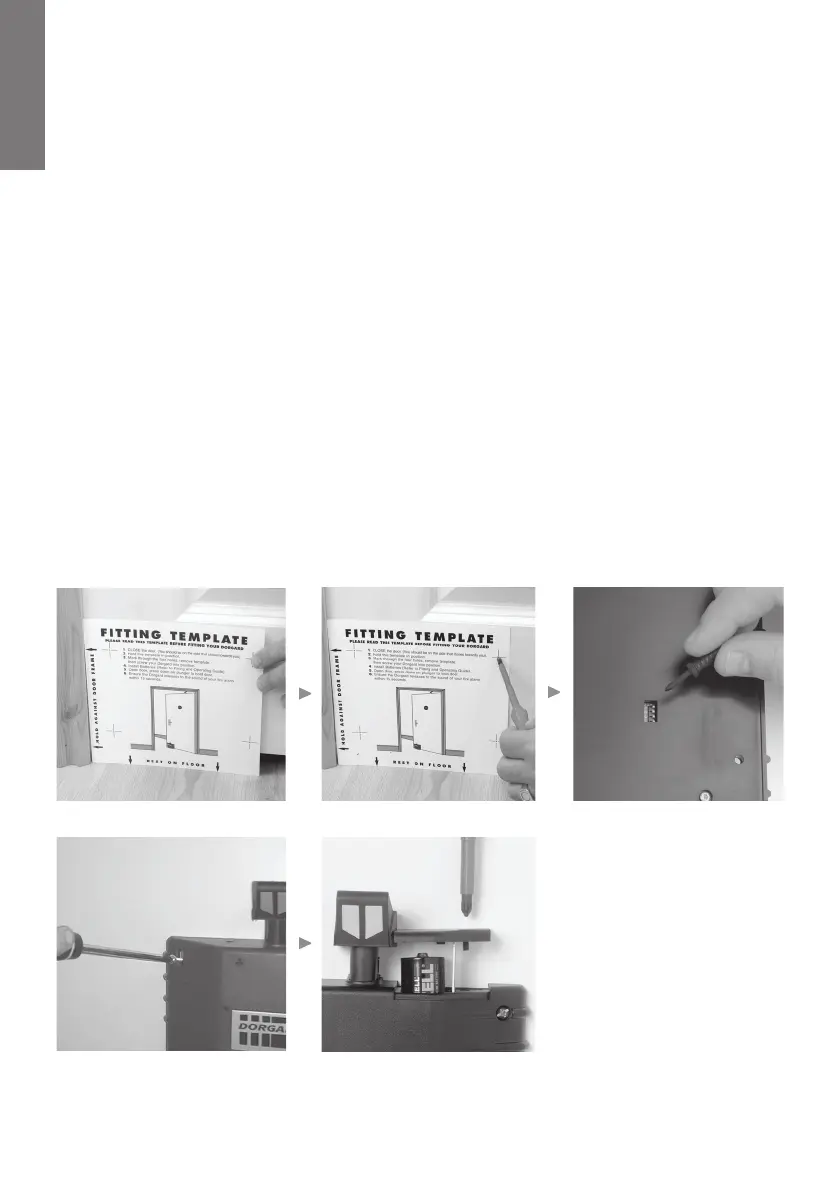
Follow Illustrations Fig 2.1 - 2.5 below.
1) Close the fire door. Place the template provided against the door on the side that shuts
against the door frame. Ensure the template matches your view of the door. (Fig 2.1)
2) Please make allowance for differing floor surfaces. (See note: Page 5)
3) Make pilot holes or mark the position for the holes through the template. (Fig 2.2)
4) If you want to use the Night time release function, select the relevant dip switch/s to the
On position. (Fig 2.3)
5) Using 2 of the 4 screws supplied fix Dorgard to your fire door, at points A and B on the fitting
template.This will allow Dorgard to be moved up and down slightly for correct positioning.
When Dorgard is in the correct position fasten down all 4 screws. (Fig 2.4)
6) Open battery compartment using a Phillips / Pozidrive No.2 Screwdriver. Insert the batteries
supplied (+) positive side up. Close the battery compartment by tightening the screw down
firmly (Do not over tighten as this will damage the battery lid). (Fig 2.5)
7) The Dorgard will beep and the LED will flash several times.
Installation of Dorgard DG1328-A01
Figure 2.5Figure 2.4
Figure 2.1 Figure 2.2
Figure 2.3
4
Fit&OpGuideINTERNATIONAL 23/7/04 2:20 pm Page 6